


New ArrivalsBack in stock
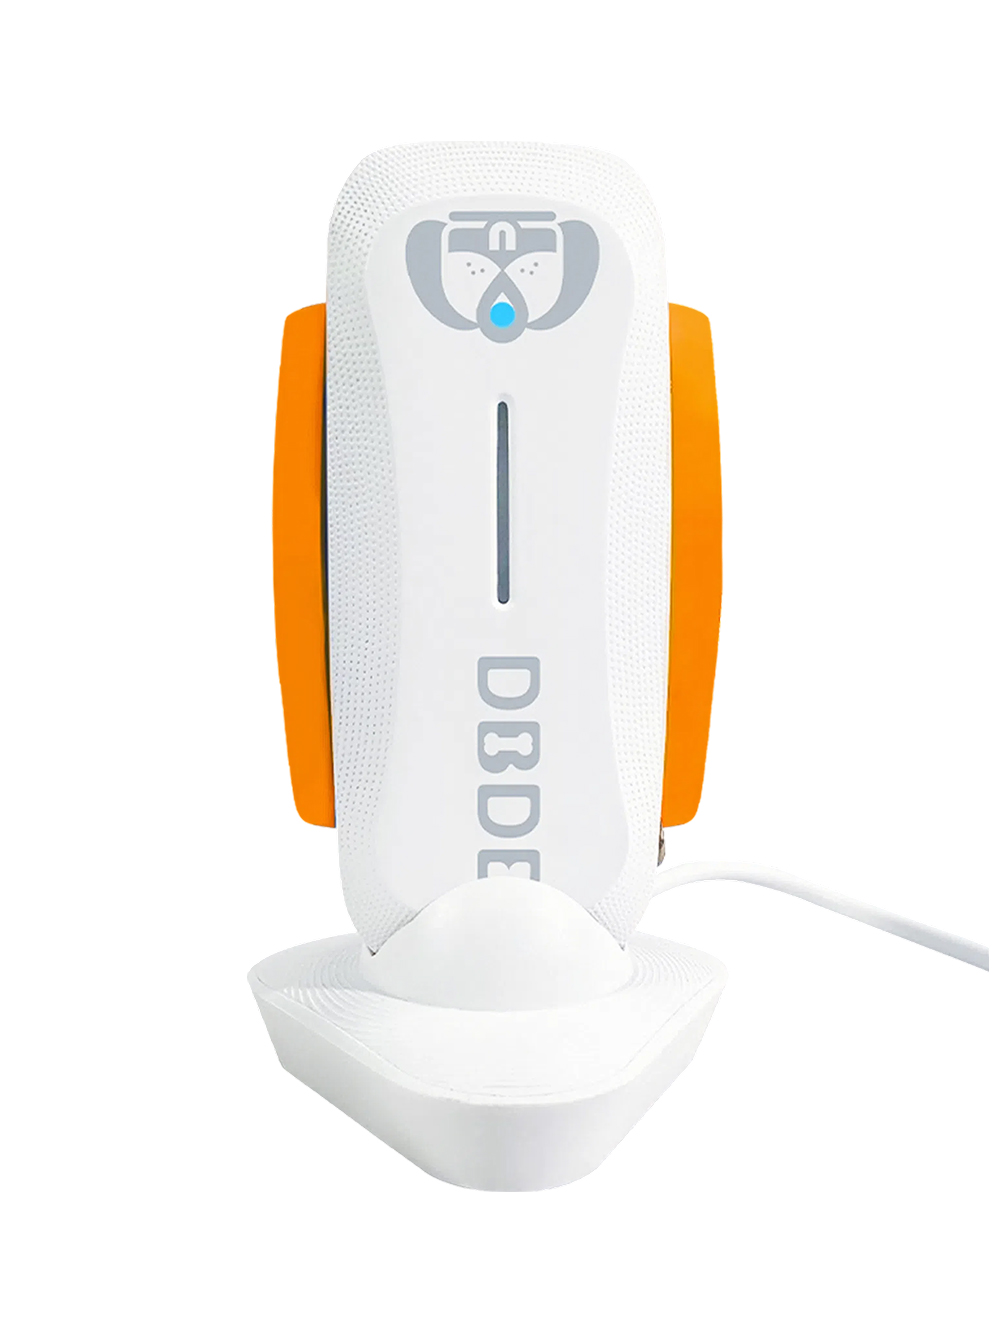

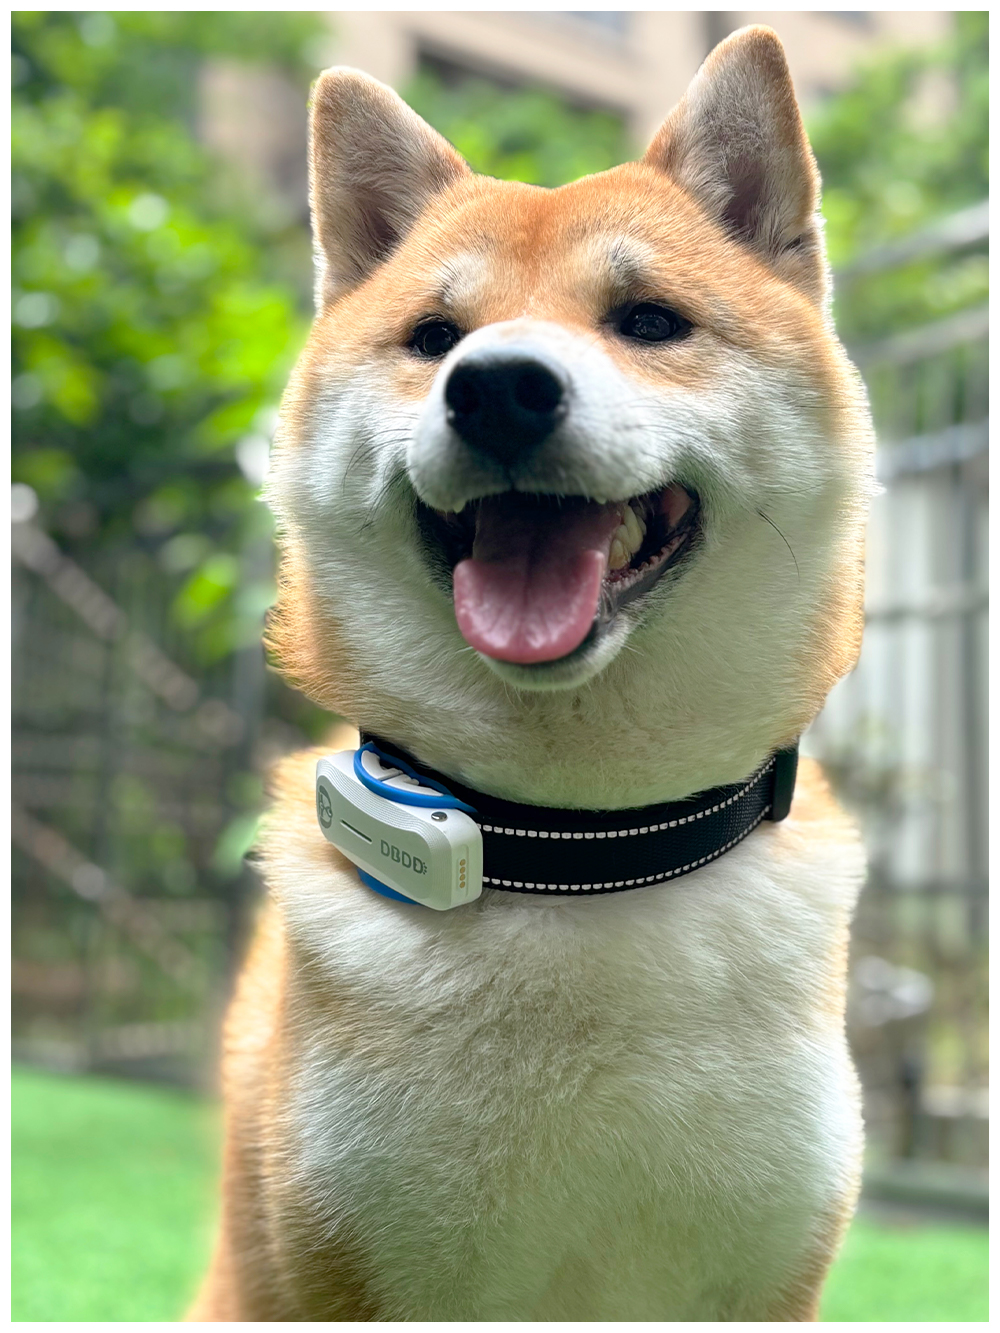
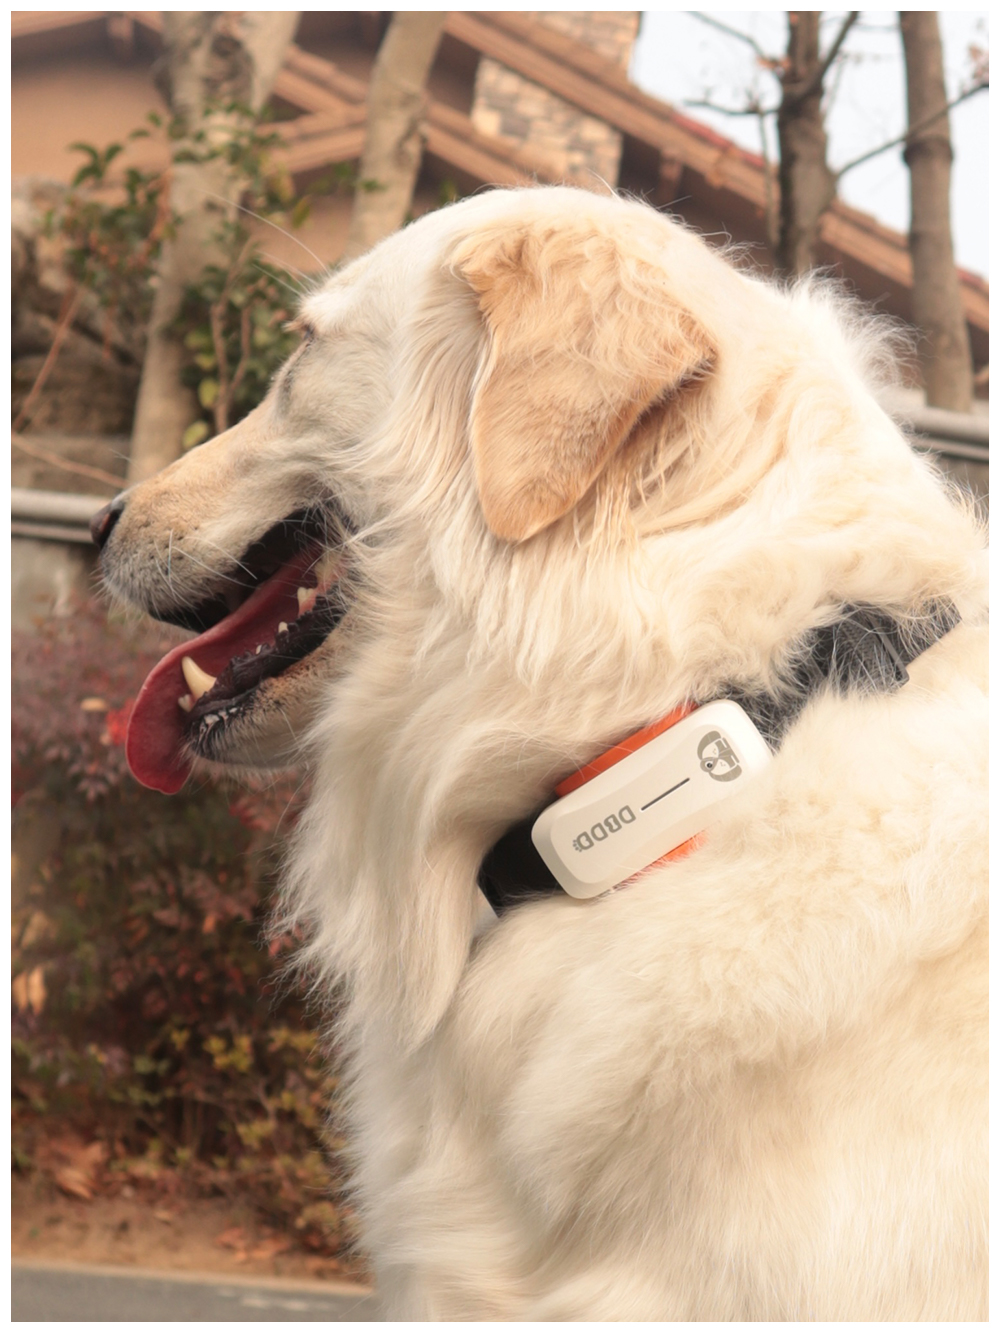

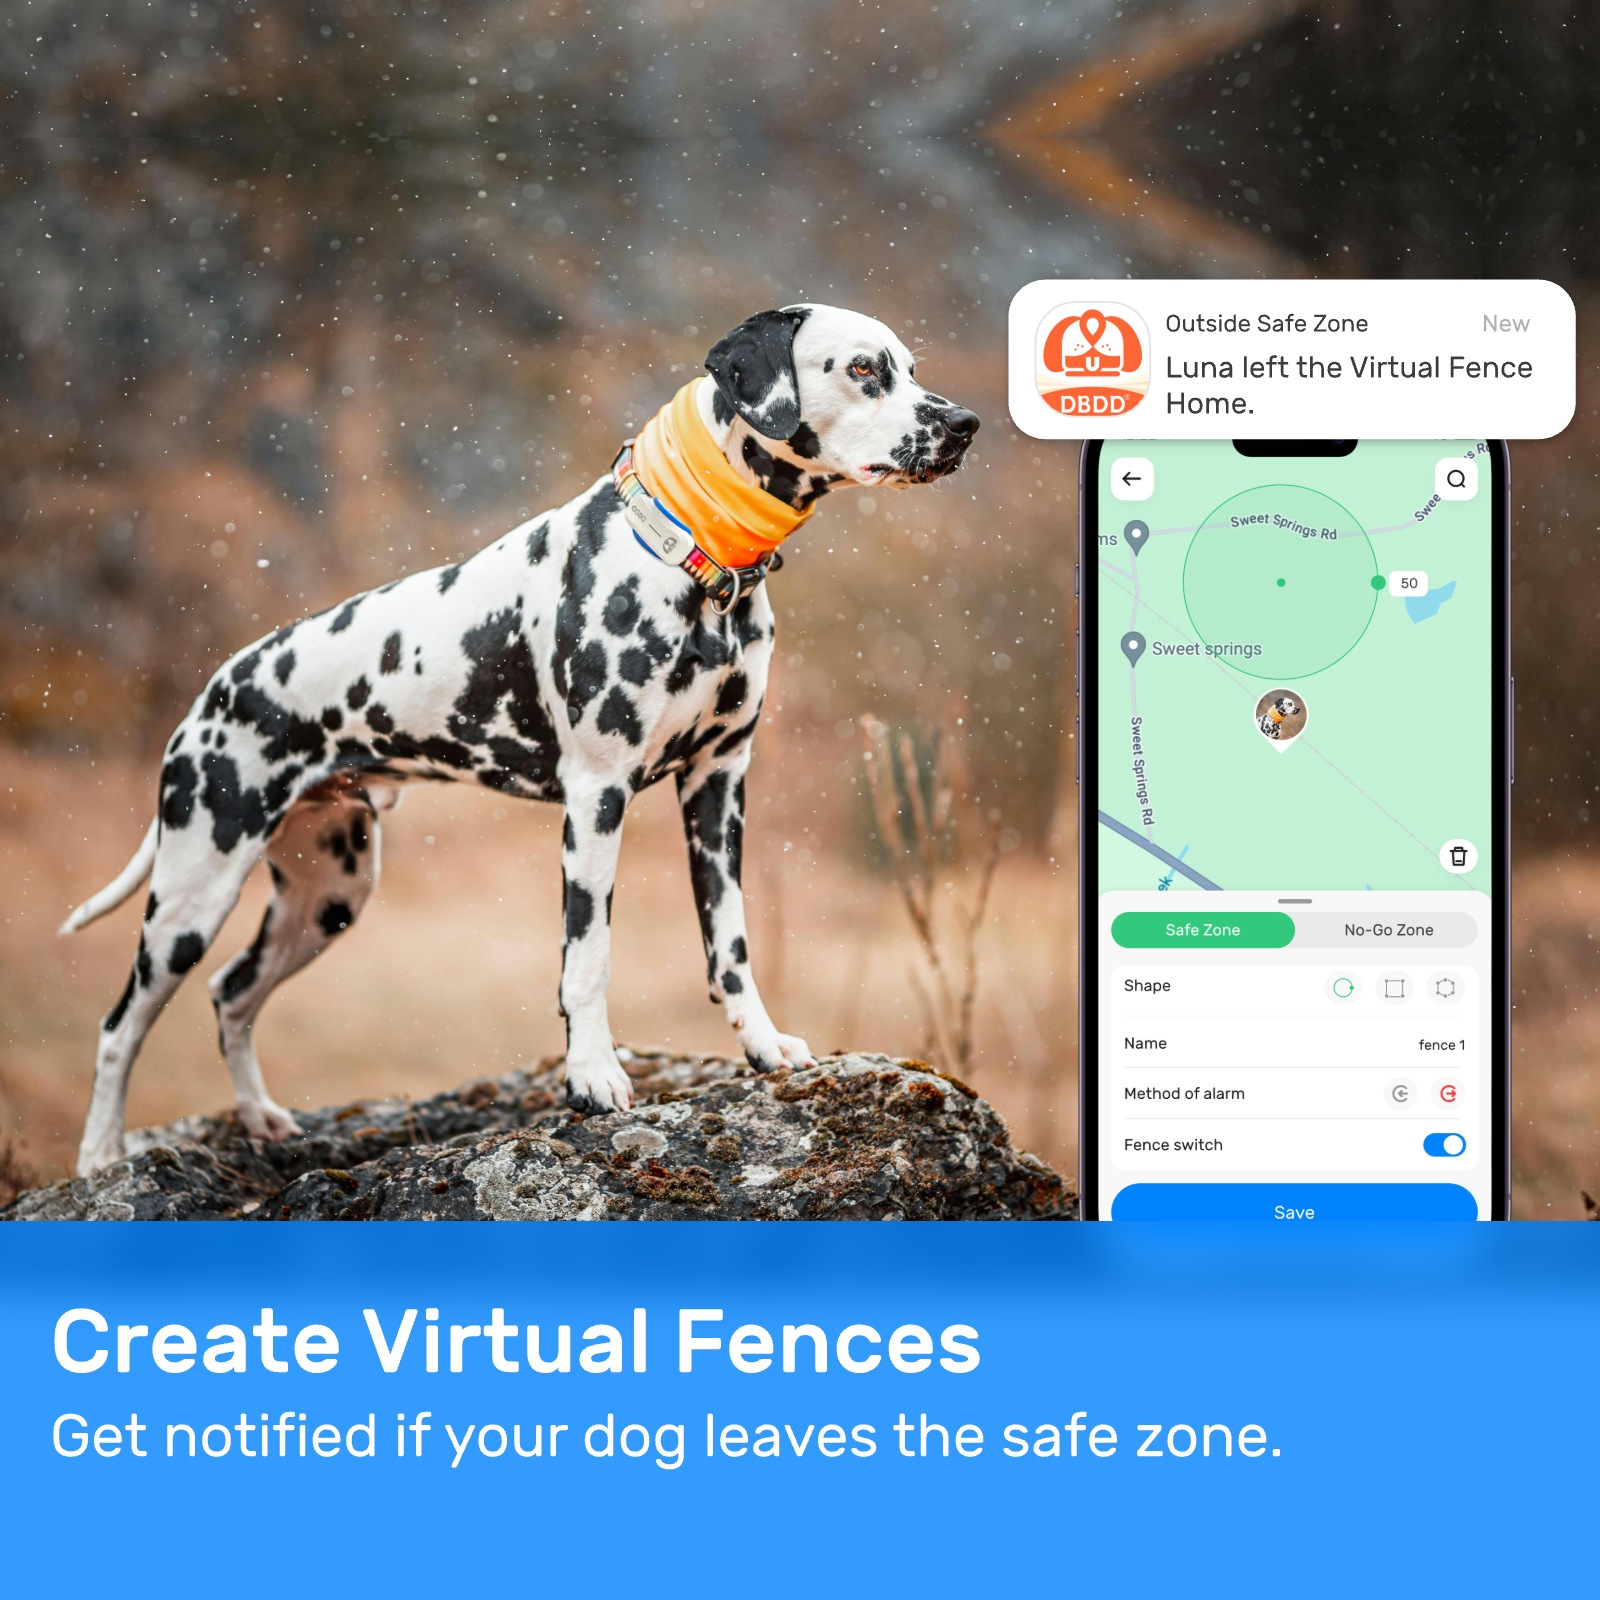

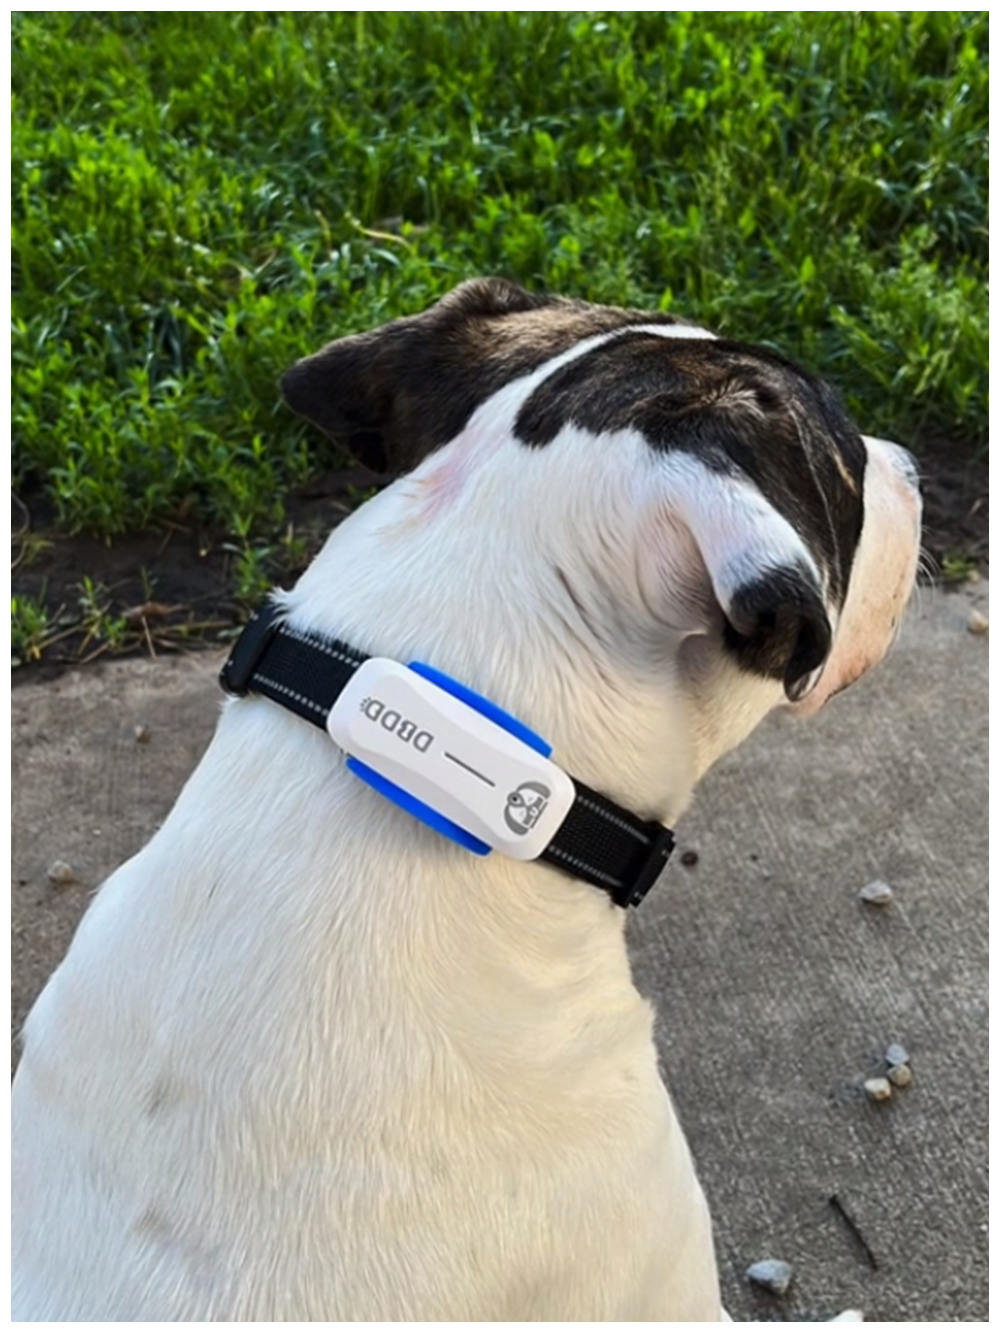
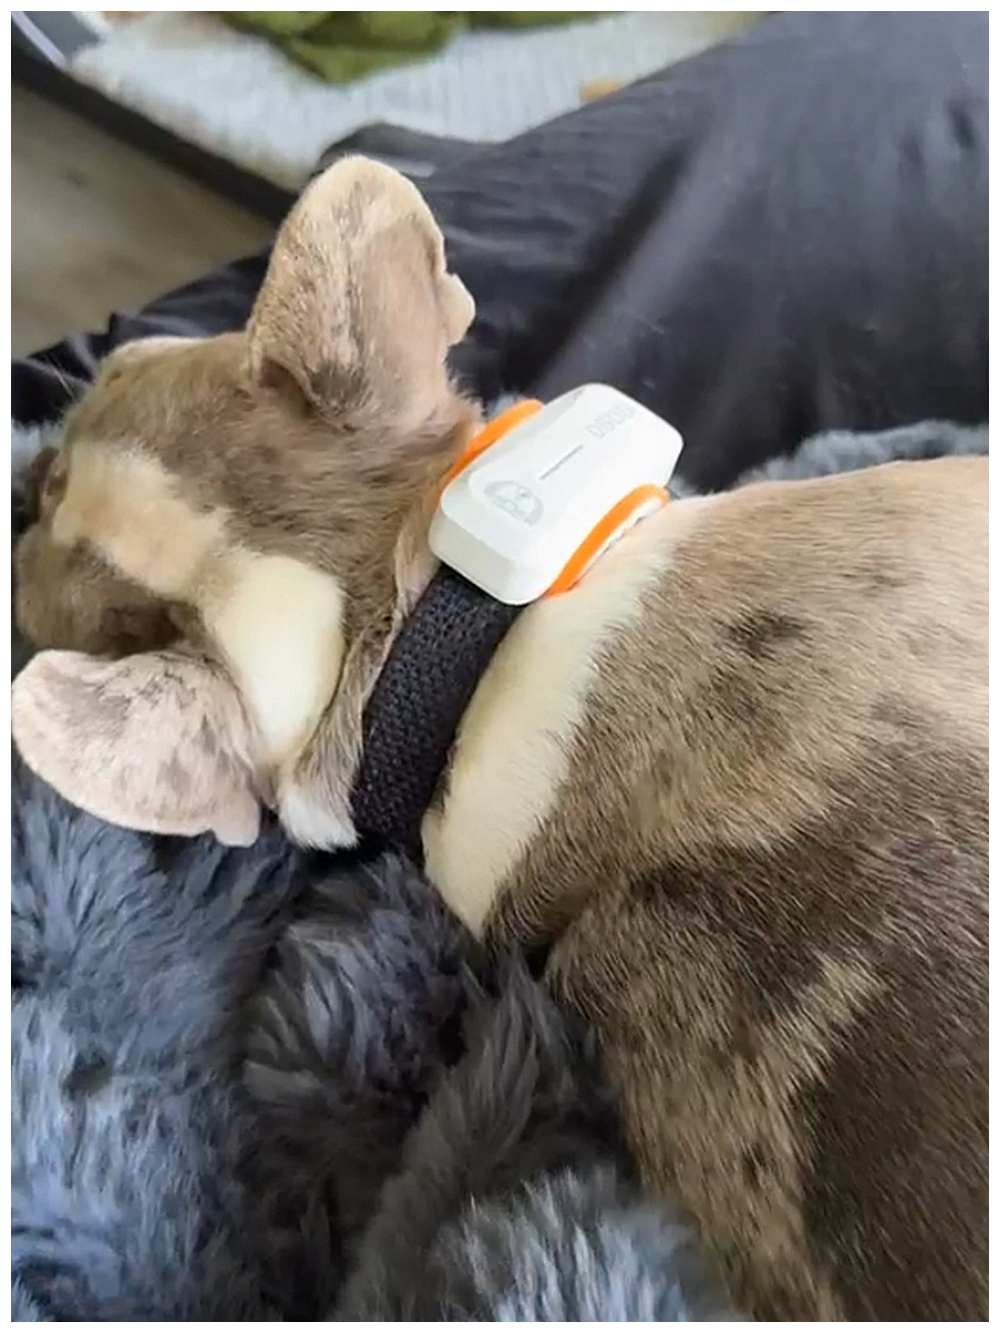
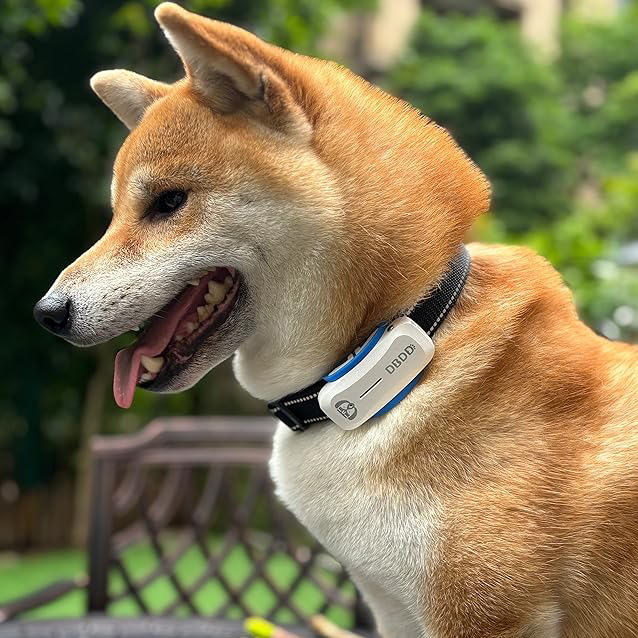
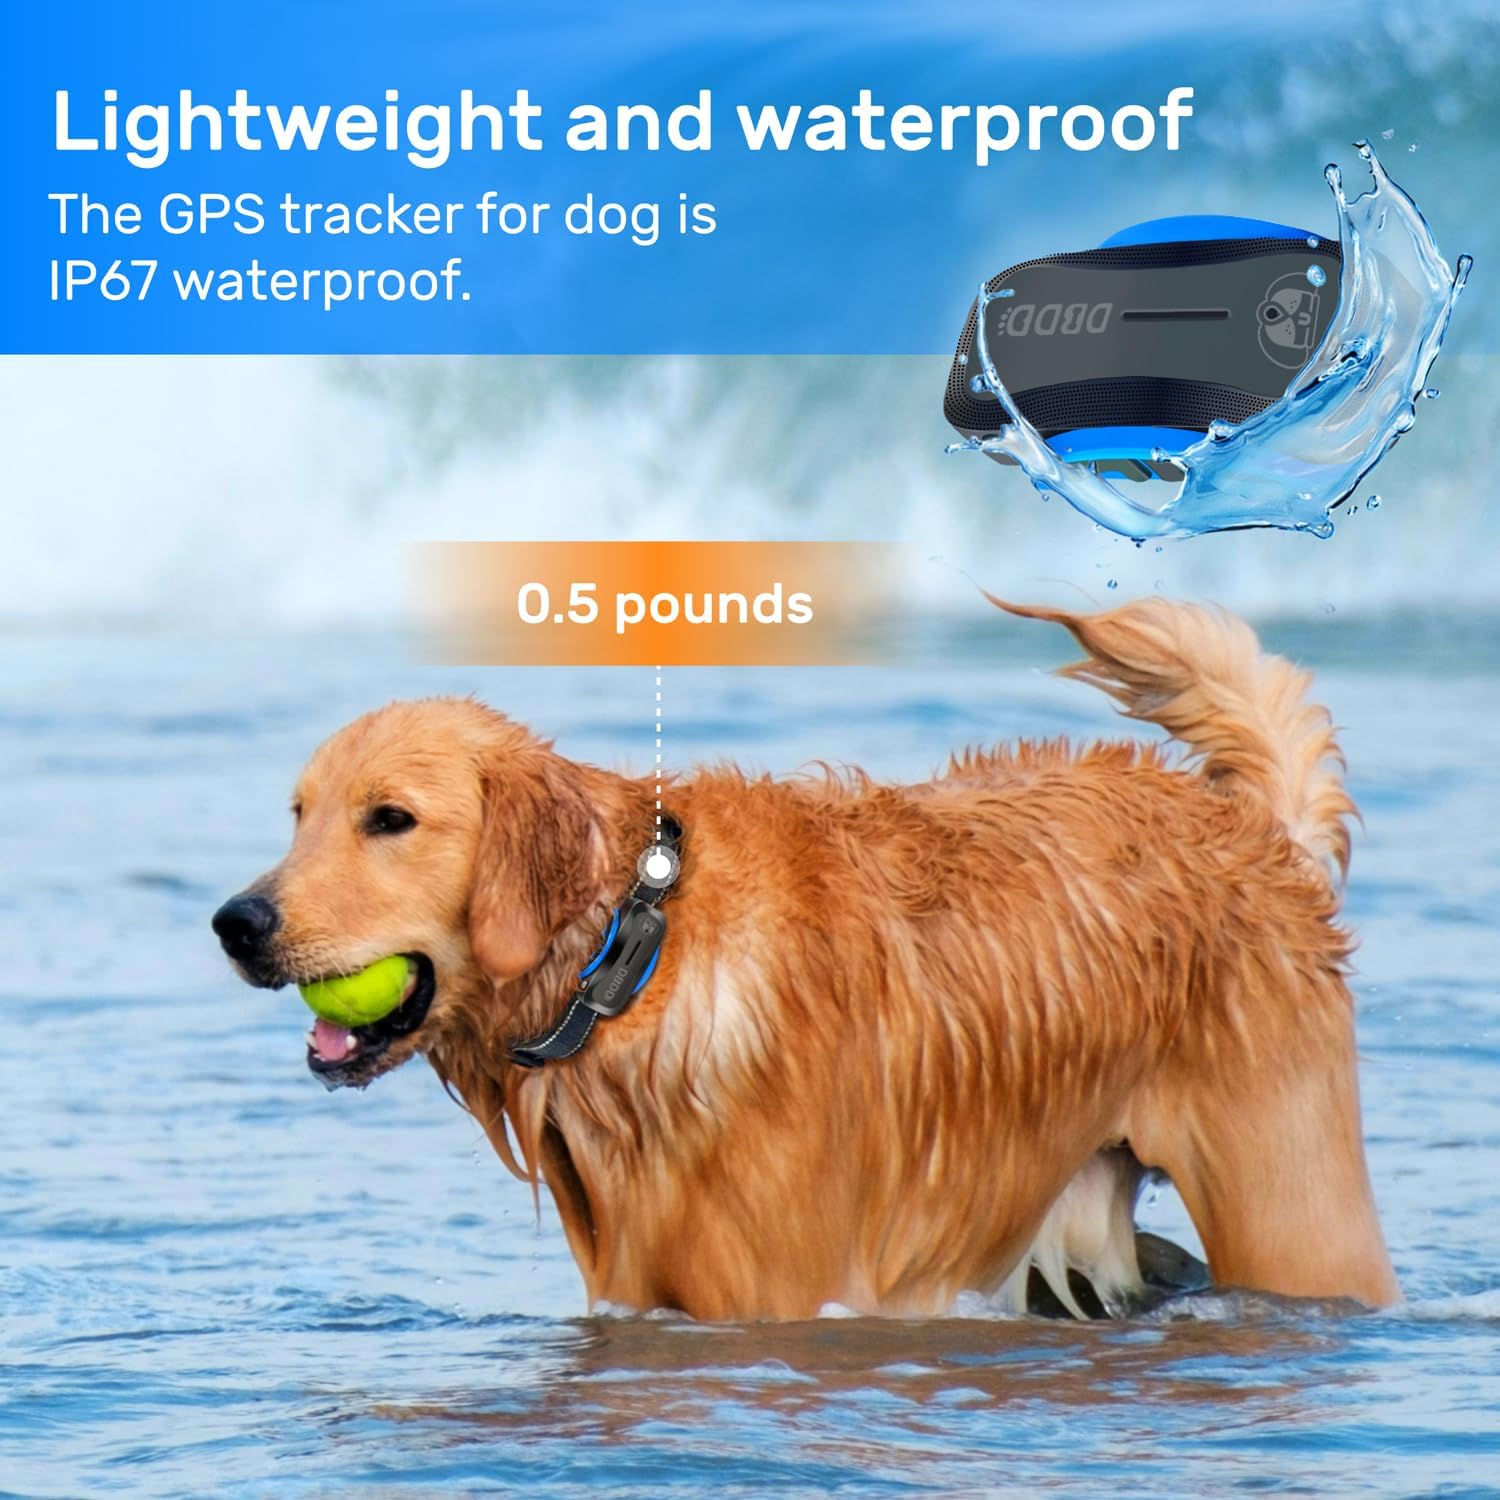
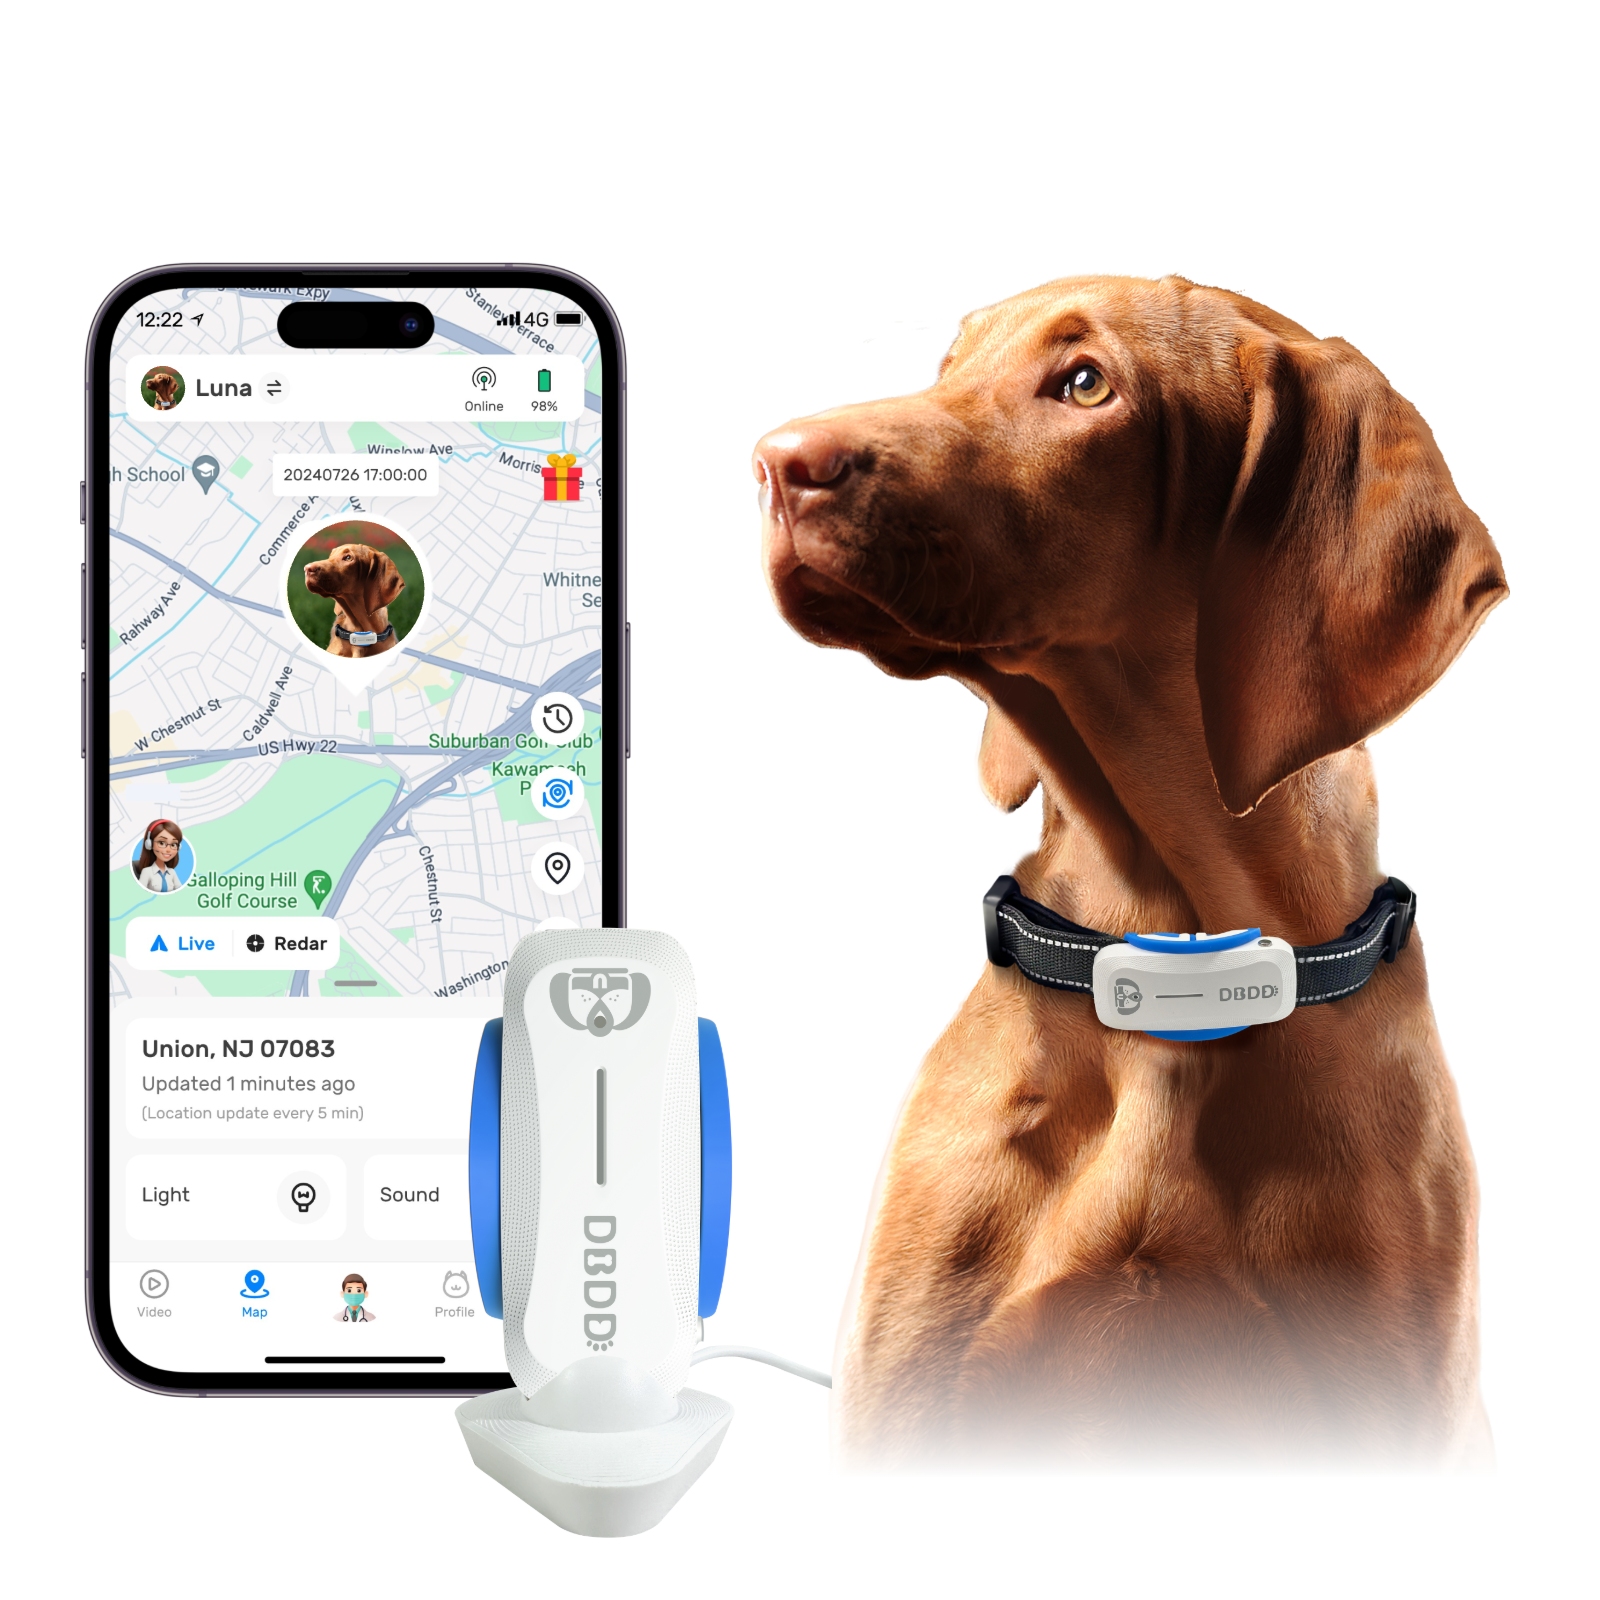
dog activity tracker
 4
(270件)
4
(270件)
 Limited Time Sale
Until the end
00
00
00
Free shipping on orders over 999 ※)
If you buy it for 999 or more, you can buy it on behalf of the customer. There is no material for the number of hands.
If you buy it for 999 or more, you can buy it on behalf of the customer. There is no material for the number of hands.
There is stock in your local store.
Please note that the sales price and tax displayed may differ between online and in-store. Also, the product may be out of stock in-store.


Coupon giveaway!
| Control number |
New :D892992971 second hand :D892992971 |
Manufacturer | dog activity | release date | 2025-05-15 | List price | $40 | ||
|---|---|---|---|---|---|---|---|---|---|
| prototype | activity tracker | ||||||||
| category | |||||||||
Wildlife Research#Domestic Animal Tracking
In today's fast-paced world, pet owners often find themselves with busy schedules and limited time to spend with their furry companions. This can lead to dogs becoming bored, anxious, or even developing behavioral issues. One solution to this problem is to invest in a dog activity tracker, a device that monitors your pet's activity levels, sleep patterns, and overall health. However, for those who prefer a more hands-on approach, setting up a DIY dog tracking system can be an exciting and rewarding project. In this article, we will explore the various components and steps involved in creating a DIY dog tracking system, as well as the benefits and challenges associated with this endeavor.
1. Understanding the Basics of a Dog Activity Tracker
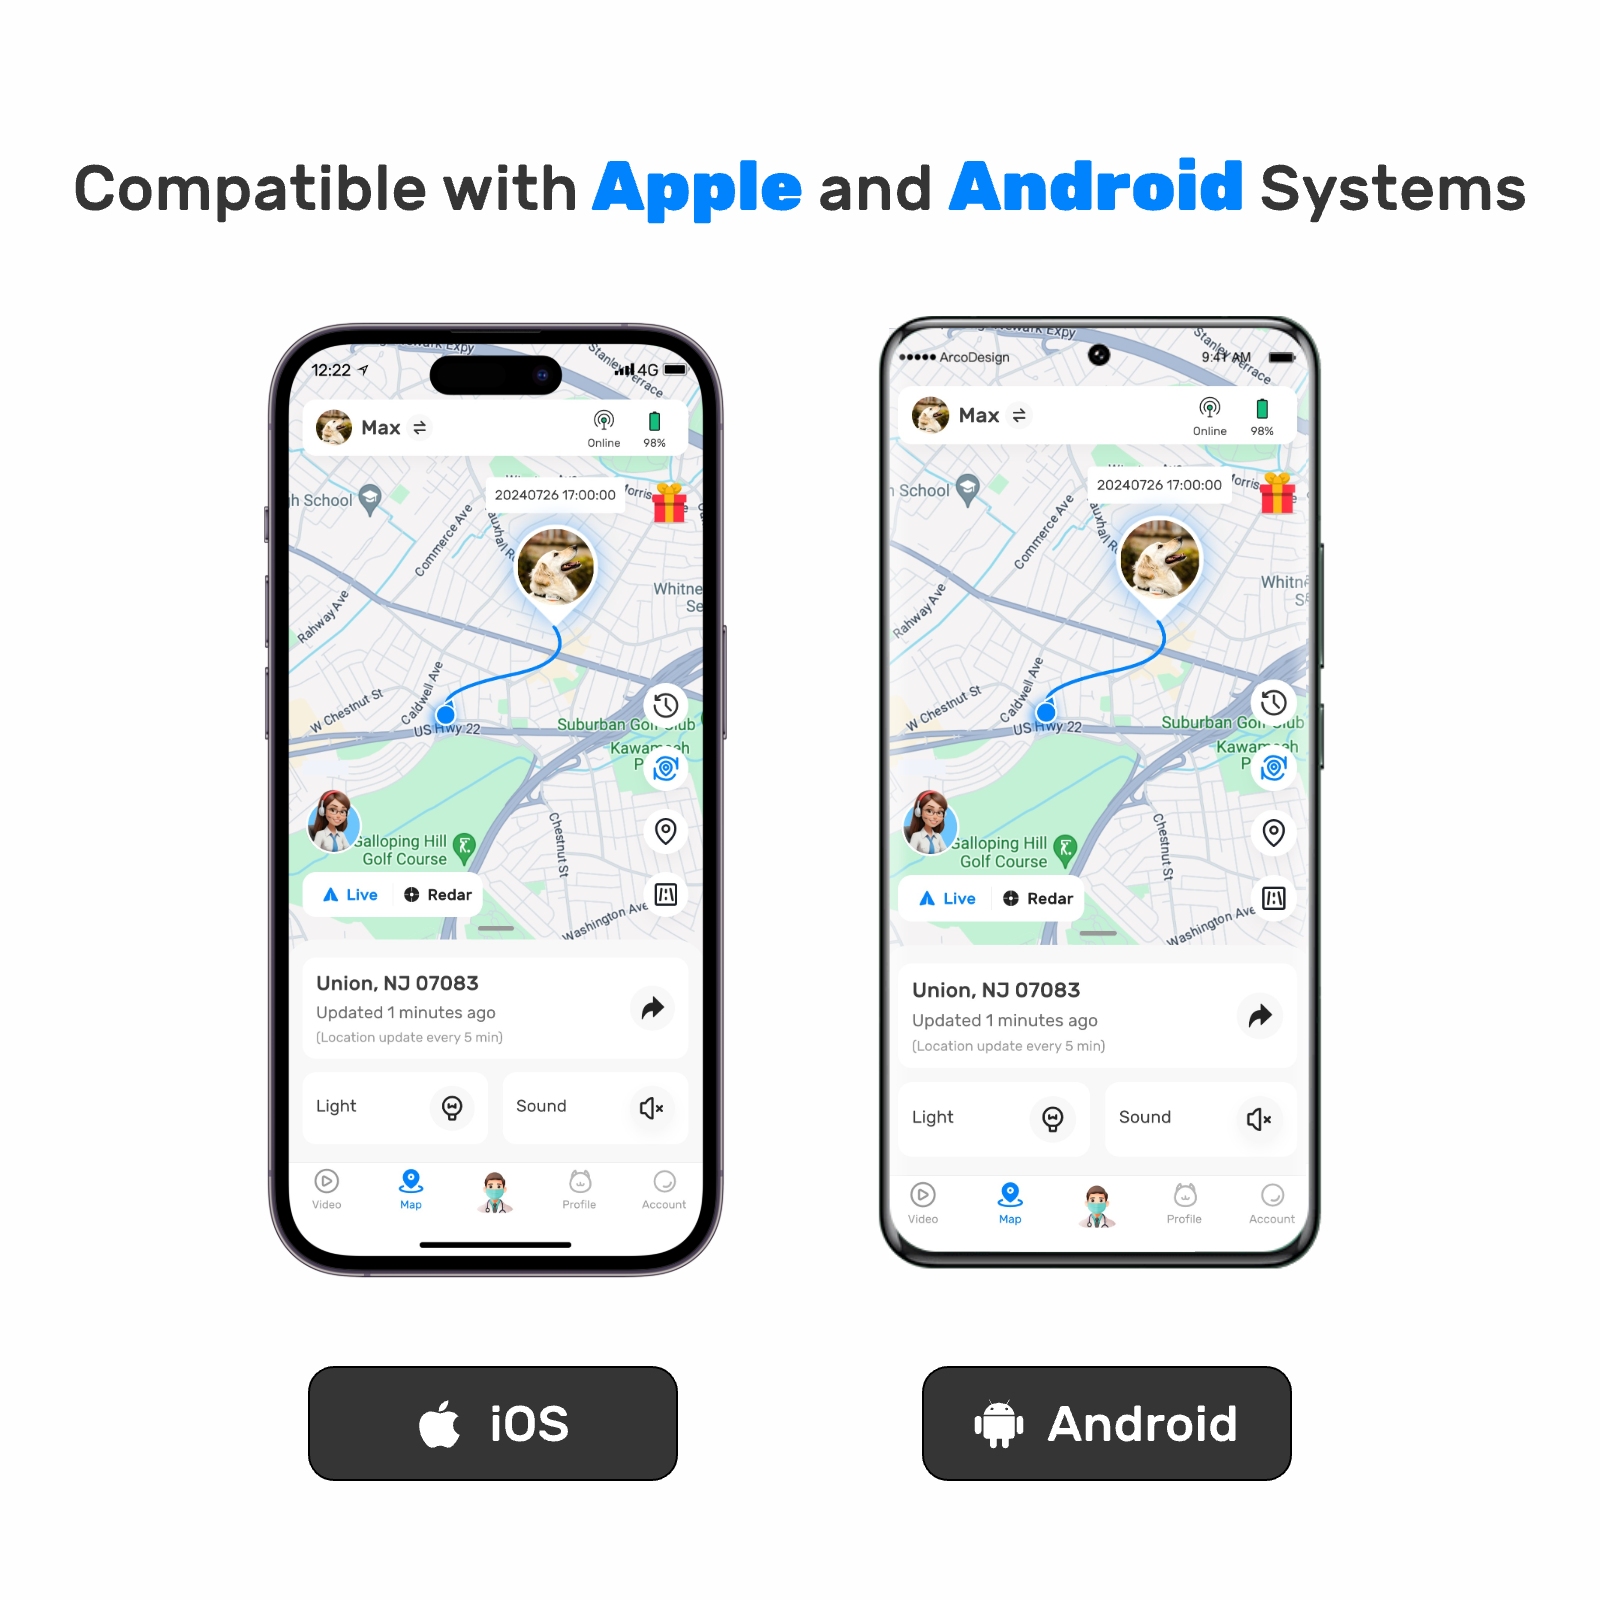
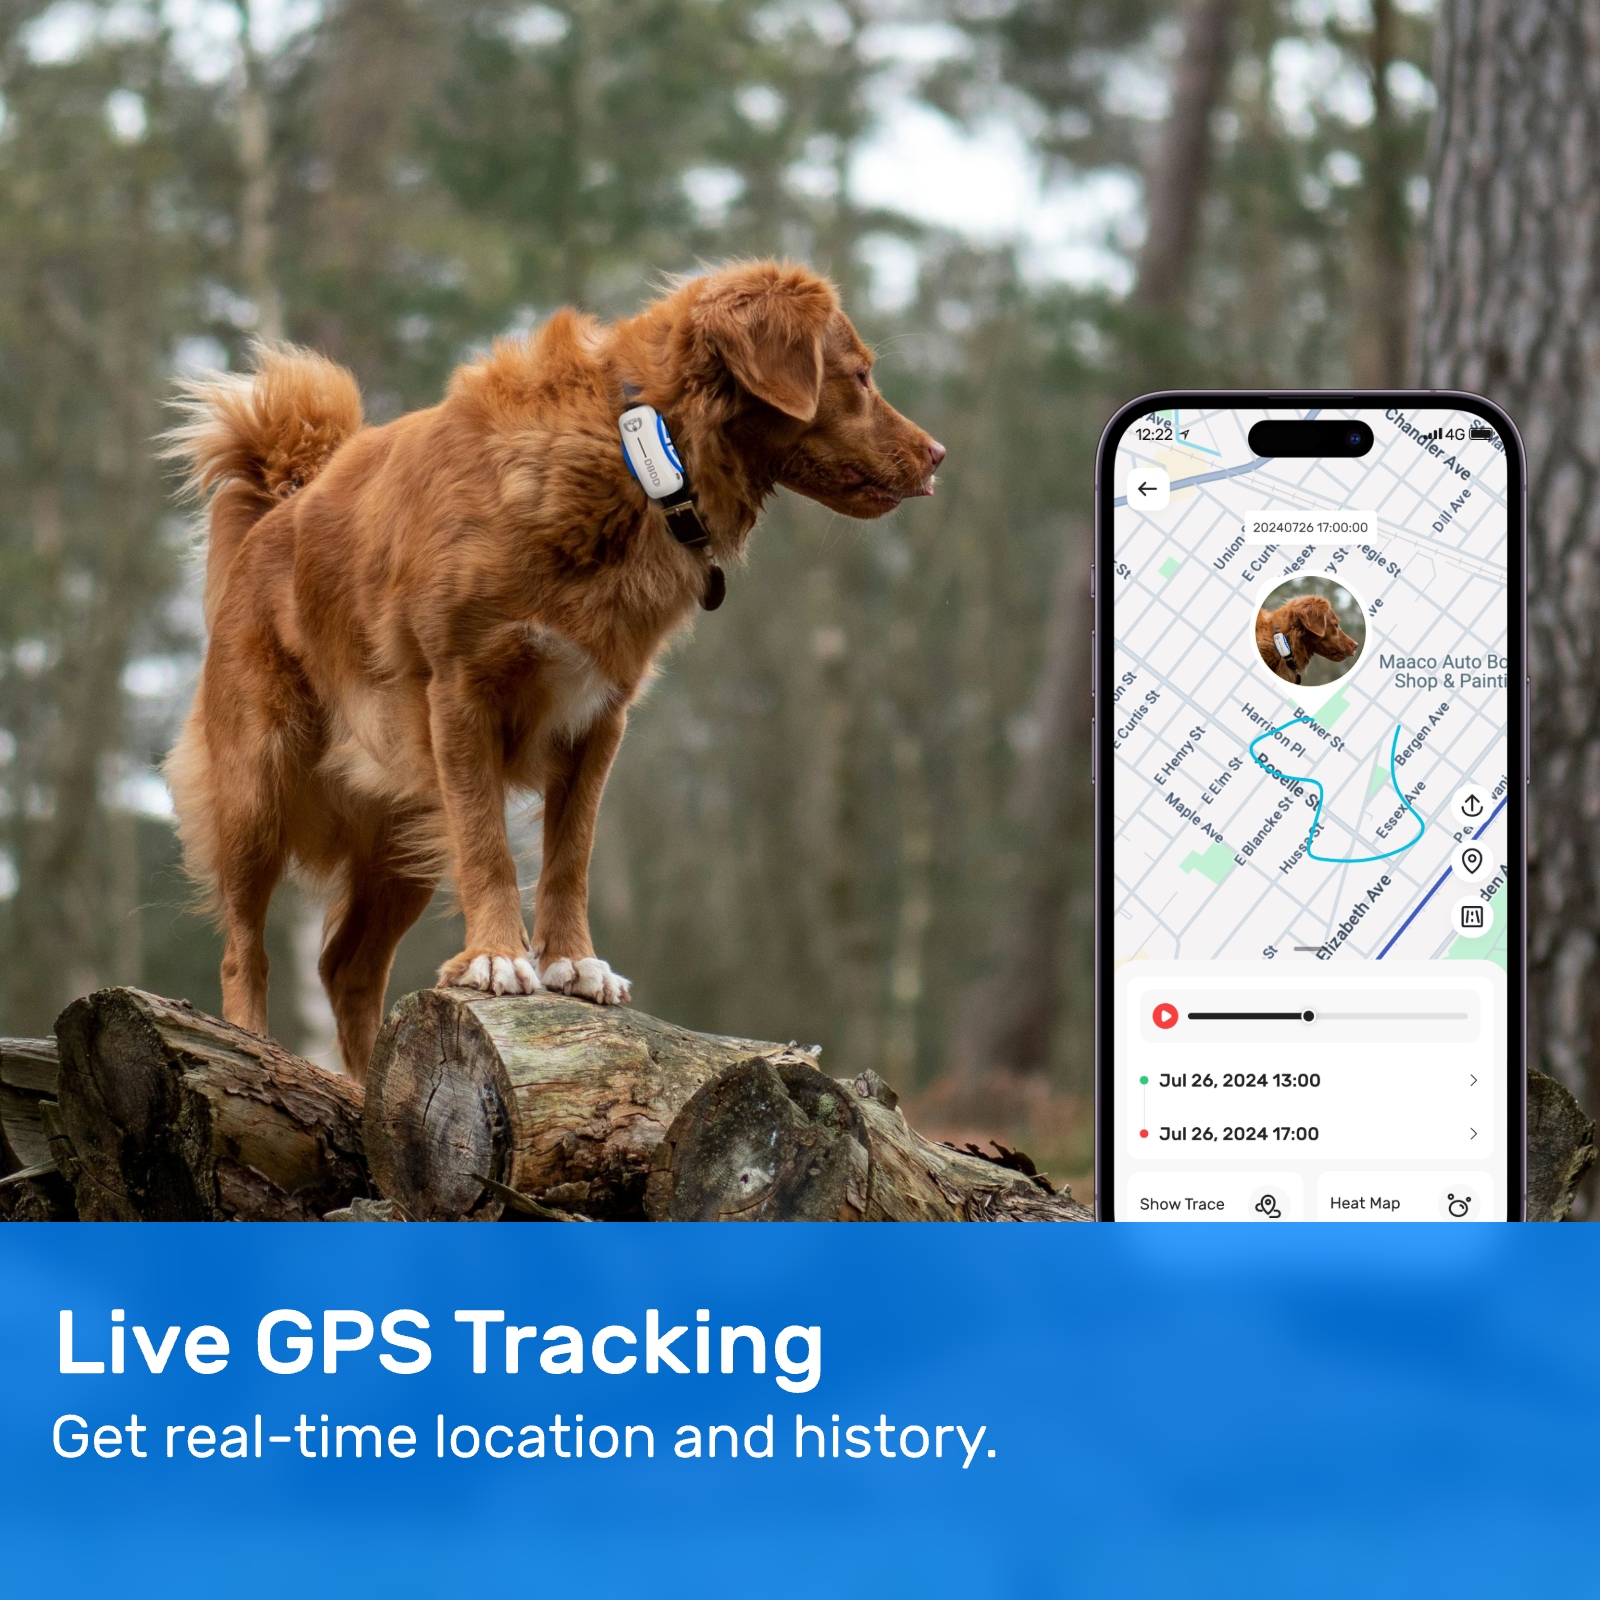
A dog activity tracker is a device that monitors and records your dog's daily activities, such as walking, running, playing, and sleeping. These devices typically use sensors and algorithms to analyze your pet's movements and provide insights into their overall health and well-being. Some popular features of dog activity trackers include:
- Step counting: Tracks the number of steps your dog takes throughout the day.
- Distance tracking: Calculates the total distance your dog has traveled.
- Sleep monitoring: Records the duration and quality of your dog's sleep.
- Heart rate monitoring: Measures your dog's heart rate during various activities.
- GPS tracking: Locates your dog's position using GPS technology.
2. Components of a DIY Dog Tracking System
To create a DIY dog tracking system, you will need several components, including:
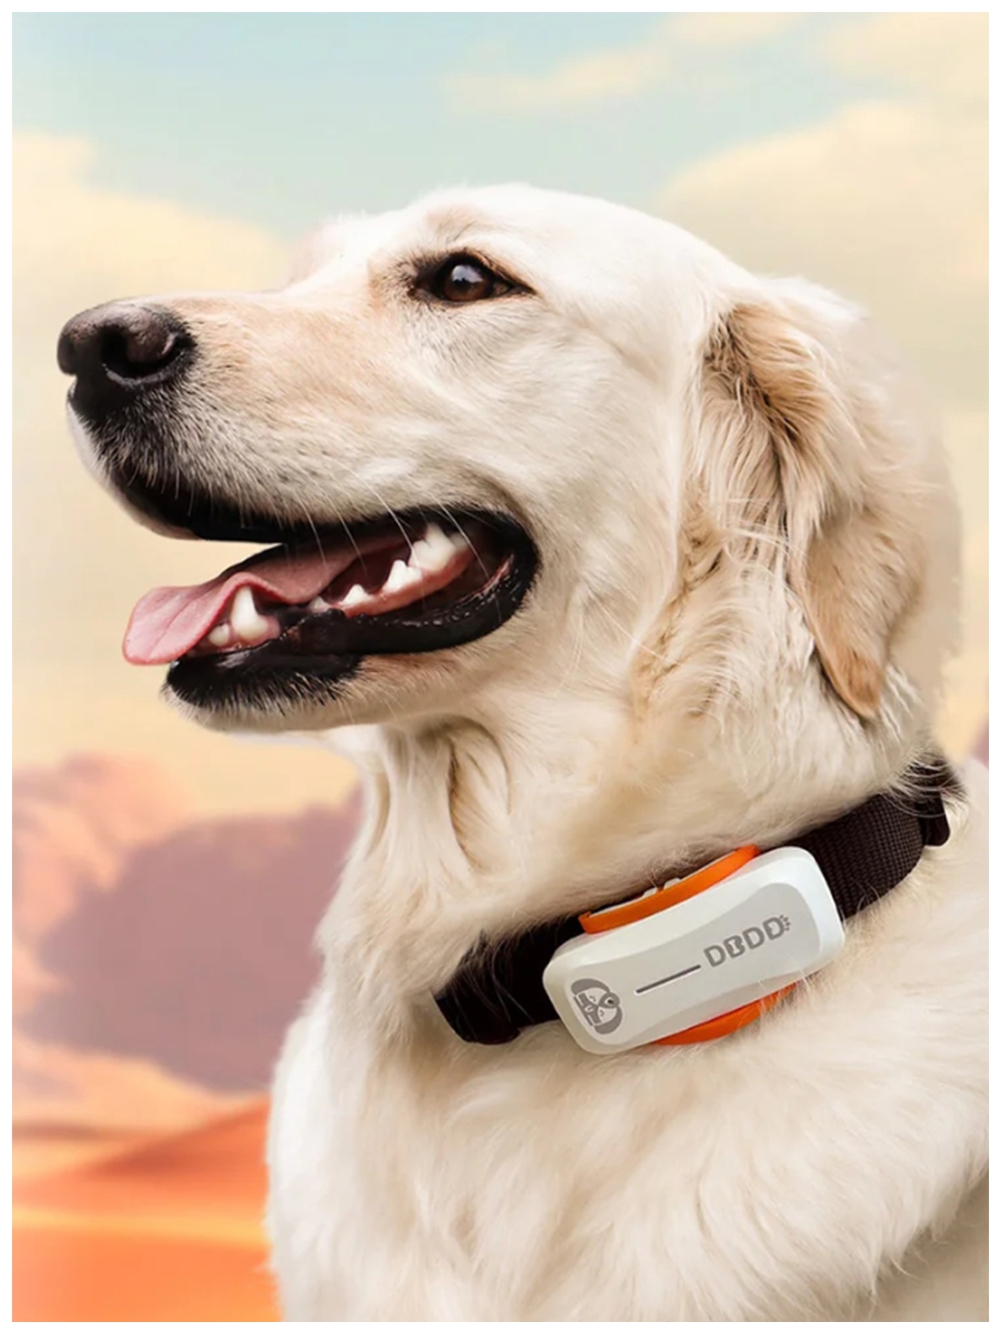
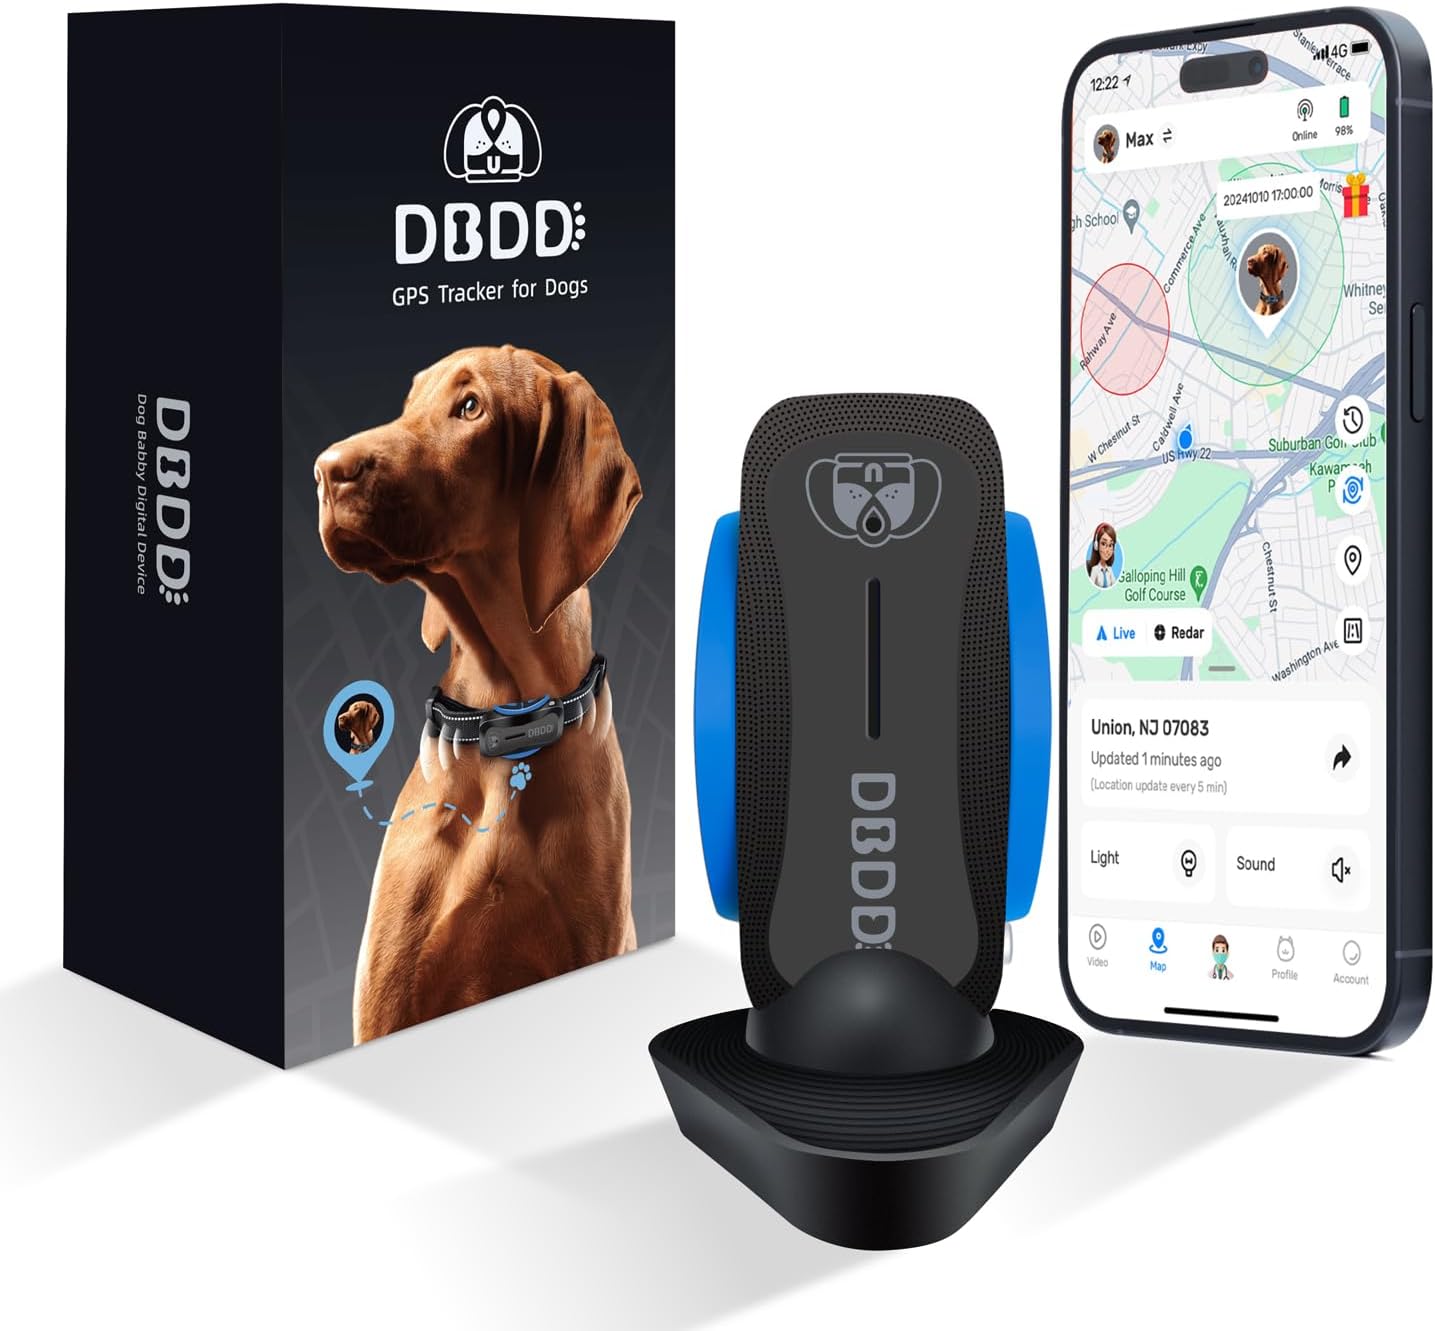
a. Wearable Device: This is the primary component of your dog tracking system, as it will be attached to your pet and used to collect data on their activities. You can either purchase an existing dog activity tracker or create your own using a microcontroller, such as an Arduino or Raspberry Pi, and various sensors.
b. Sensors: To accurately monitor your dog's activities, you will need a variety of sensors to collect data on their movements, heart rate, and other vital signs. Some common sensors used in dog activity trackers include accelerometers, gyroscopes, heart rate monitors, and GPS modules.
c. Power Source: Your wearable device will require a power source to function, such as a rechargeable battery. Ensure that the battery is compatible with your chosen microcontroller and has sufficient capacity to power the device for an extended period.
d. Data Transmission: To access the data collected by your dog tracking system, you will need a way to transmit the information from the wearable device to a central hub, such as a smartphone or computer. This can be achieved using wireless communication protocols, such as Bluetooth, Wi-Fi, or cellular networks.
e. Data Storage and Processing: Once the data has been transmitted, it will need to be stored and processed to provide meaningful insights into your dog's activities. This can be done using cloud storage services or local databases, and data processing can be handled by custom algorithms or existing software.
f. User Interface: To interact with your dog tracking system and view the collected data, you will need a user interface, such as a smartphone app or web-based dashboard. This interface should be user-friendly and provide visualizations of your dog's activities, sleep patterns, and overall health.
3. Setting Up Your DIY Dog Tracking System
Now that you have an understanding of the components required for a DIY dog tracking system, let's discuss the steps involved in setting up your project:
Step 1: Choose Your Microcontroller
Select a microcontroller that is compatible with the sensors you plan to use and has sufficient processing power to handle the data. Popular choices for DIY dog tracking systems include Arduino, Raspberry Pi, and ESP32.
Step 2: Select and Integrate Sensors
Choose the sensors you want to include in your dog tracking system and integrate them with your microcontroller. For example, you may want to use an accelerometer and gyroscope to track your dog's movements, a heart rate monitor to measure their vital signs, and a GPS module to locate their position.
Step 3: Design the Wearable Device
Design a wearable device that can securely attach to your dog and house the microcontroller and sensors. This can be done using 3D printing, laser cutting, or other fabrication techniques. Ensure that the device is comfortable for your dog to wear and can be easily removed for charging and maintenance.
Step 4: Implement Data Transmission
Choose a wireless communication protocol to transmit the data collected by your dog tracking system to a central hub. This can be done using Bluetooth, Wi-Fi, or cellular networks, depending on your requirements and the capabilities of your microcontroller.
Step 5: Develop Data Storage and Processing Solutions
Implement data storage and processing solutions to store and analyze the data collected by your dog tracking system. This can be done using cloud storage services, local databases, or custom algorithms.
Step 6: Create a User Interface
Develop a user interface, such as a smartphone app or web-based dashboard, to display the data collected by your dog tracking system. This interface should be user-friendly and provide visualizations of your dog's activities
Update Time:2025-05-15 21:38:52
1. Understanding the Basics of a Dog Activity Tracker
A dog activity tracker is a device that monitors and records your dog's daily activities, such as walking, running, playing, and sleeping. These devices typically use sensors and algorithms to analyze your pet's movements and provide insights into their overall health and well-being. Some popular features of dog activity trackers include:
- Step counting: Tracks the number of steps your dog takes throughout the day.
- Distance tracking: Calculates the total distance your dog has traveled.
- Sleep monitoring: Records the duration and quality of your dog's sleep.
- Heart rate monitoring: Measures your dog's heart rate during various activities.
- GPS tracking: Locates your dog's position using GPS technology.
2. Components of a DIY Dog Tracking System
To create a DIY dog tracking system, you will need several components, including:
a. Wearable Device: This is the primary component of your dog tracking system, as it will be attached to your pet and used to collect data on their activities. You can either purchase an existing dog activity tracker or create your own using a microcontroller, such as an Arduino or Raspberry Pi, and various sensors.
b. Sensors: To accurately monitor your dog's activities, you will need a variety of sensors to collect data on their movements, heart rate, and other vital signs. Some common sensors used in dog activity trackers include accelerometers, gyroscopes, heart rate monitors, and GPS modules.
c. Power Source: Your wearable device will require a power source to function, such as a rechargeable battery. Ensure that the battery is compatible with your chosen microcontroller and has sufficient capacity to power the device for an extended period.
d. Data Transmission: To access the data collected by your dog tracking system, you will need a way to transmit the information from the wearable device to a central hub, such as a smartphone or computer. This can be achieved using wireless communication protocols, such as Bluetooth, Wi-Fi, or cellular networks.
e. Data Storage and Processing: Once the data has been transmitted, it will need to be stored and processed to provide meaningful insights into your dog's activities. This can be done using cloud storage services or local databases, and data processing can be handled by custom algorithms or existing software.
f. User Interface: To interact with your dog tracking system and view the collected data, you will need a user interface, such as a smartphone app or web-based dashboard. This interface should be user-friendly and provide visualizations of your dog's activities, sleep patterns, and overall health.
3. Setting Up Your DIY Dog Tracking System
Now that you have an understanding of the components required for a DIY dog tracking system, let's discuss the steps involved in setting up your project:
Step 1: Choose Your Microcontroller
Select a microcontroller that is compatible with the sensors you plan to use and has sufficient processing power to handle the data. Popular choices for DIY dog tracking systems include Arduino, Raspberry Pi, and ESP32.
Step 2: Select and Integrate Sensors
Choose the sensors you want to include in your dog tracking system and integrate them with your microcontroller. For example, you may want to use an accelerometer and gyroscope to track your dog's movements, a heart rate monitor to measure their vital signs, and a GPS module to locate their position.
Step 3: Design the Wearable Device
Design a wearable device that can securely attach to your dog and house the microcontroller and sensors. This can be done using 3D printing, laser cutting, or other fabrication techniques. Ensure that the device is comfortable for your dog to wear and can be easily removed for charging and maintenance.
Step 4: Implement Data Transmission
Choose a wireless communication protocol to transmit the data collected by your dog tracking system to a central hub. This can be done using Bluetooth, Wi-Fi, or cellular networks, depending on your requirements and the capabilities of your microcontroller.
Step 5: Develop Data Storage and Processing Solutions
Implement data storage and processing solutions to store and analyze the data collected by your dog tracking system. This can be done using cloud storage services, local databases, or custom algorithms.
Step 6: Create a User Interface
Develop a user interface, such as a smartphone app or web-based dashboard, to display the data collected by your dog tracking system. This interface should be user-friendly and provide visualizations of your dog's activities
Update Time:2025-05-15 21:38:52


Correction of product information
If you notice any omissions or errors in the product information on this page, please use the correction request form below.
Correction Request Form


