


New ArrivalsBack in stock


teddy bear dog
 4.8
(410件)
4.8
(410件)
 Limited Time Sale
Until the end
00
00
00
Free shipping on orders over 999 ※)
If you buy it for 999 or more, you can buy it on behalf of the customer. There is no material for the number of hands.
If you buy it for 999 or more, you can buy it on behalf of the customer. There is no material for the number of hands.
There is stock in your local store.
Please note that the sales price and tax displayed may differ between online and in-store. Also, the product may be out of stock in-store.


Coupon giveaway!
| Control number |
New :D865326106 second hand :D865326106 |
Manufacturer | teddy bear | release date | 2025-05-15 | List price | $35 | ||
|---|---|---|---|---|---|---|---|---|---|
| prototype | bear dog | ||||||||
| category | |||||||||
Mobile Tech#Bluetooth Tracking Accessories
Creating a DIY dog tracking system can be an exciting and rewarding project for any pet owner, especially if you have a beloved teddy bear dog. These small, fluffy companions are known for their endearing resemblance to the iconic stuffed toy, but they also share a playful and sometimes mischievous nature that can lead them into unexpected adventures. Whether your teddy bear dog is wandering off in the backyard or getting lost during a walk, having a reliable tracking system can provide peace of mind and ensure their safety. In this article, we will explore the components needed to build a DIY dog tracking system, discuss the benefits, and provide step-by-step instructions to help you create one tailored specifically for your furry friend.
### Why Build a DIY Dog Tracking System?
Commercial dog tracking systems can be expensive, and some may not meet the specific needs of smaller breeds like the teddy bear dog. A DIY system allows you to customize the setup based on your budget, environment, and the unique habits of your pet. Additionally, building your own system can be a fun learning experience, offering insights into electronics, programming, and GPS technology.
Teddy bear dogs, with their compact size and energetic demeanor, often require special attention when it comes to safety. They might dart out of open doors or wander into areas where larger dogs wouldn't dare to go. By setting up a personalized tracking system, you can monitor their movements more effectively and intervene quickly if they venture too far.
### Components Needed for a DIY Dog Tracking System
To create a functional dog tracking system, you'll need several key components:
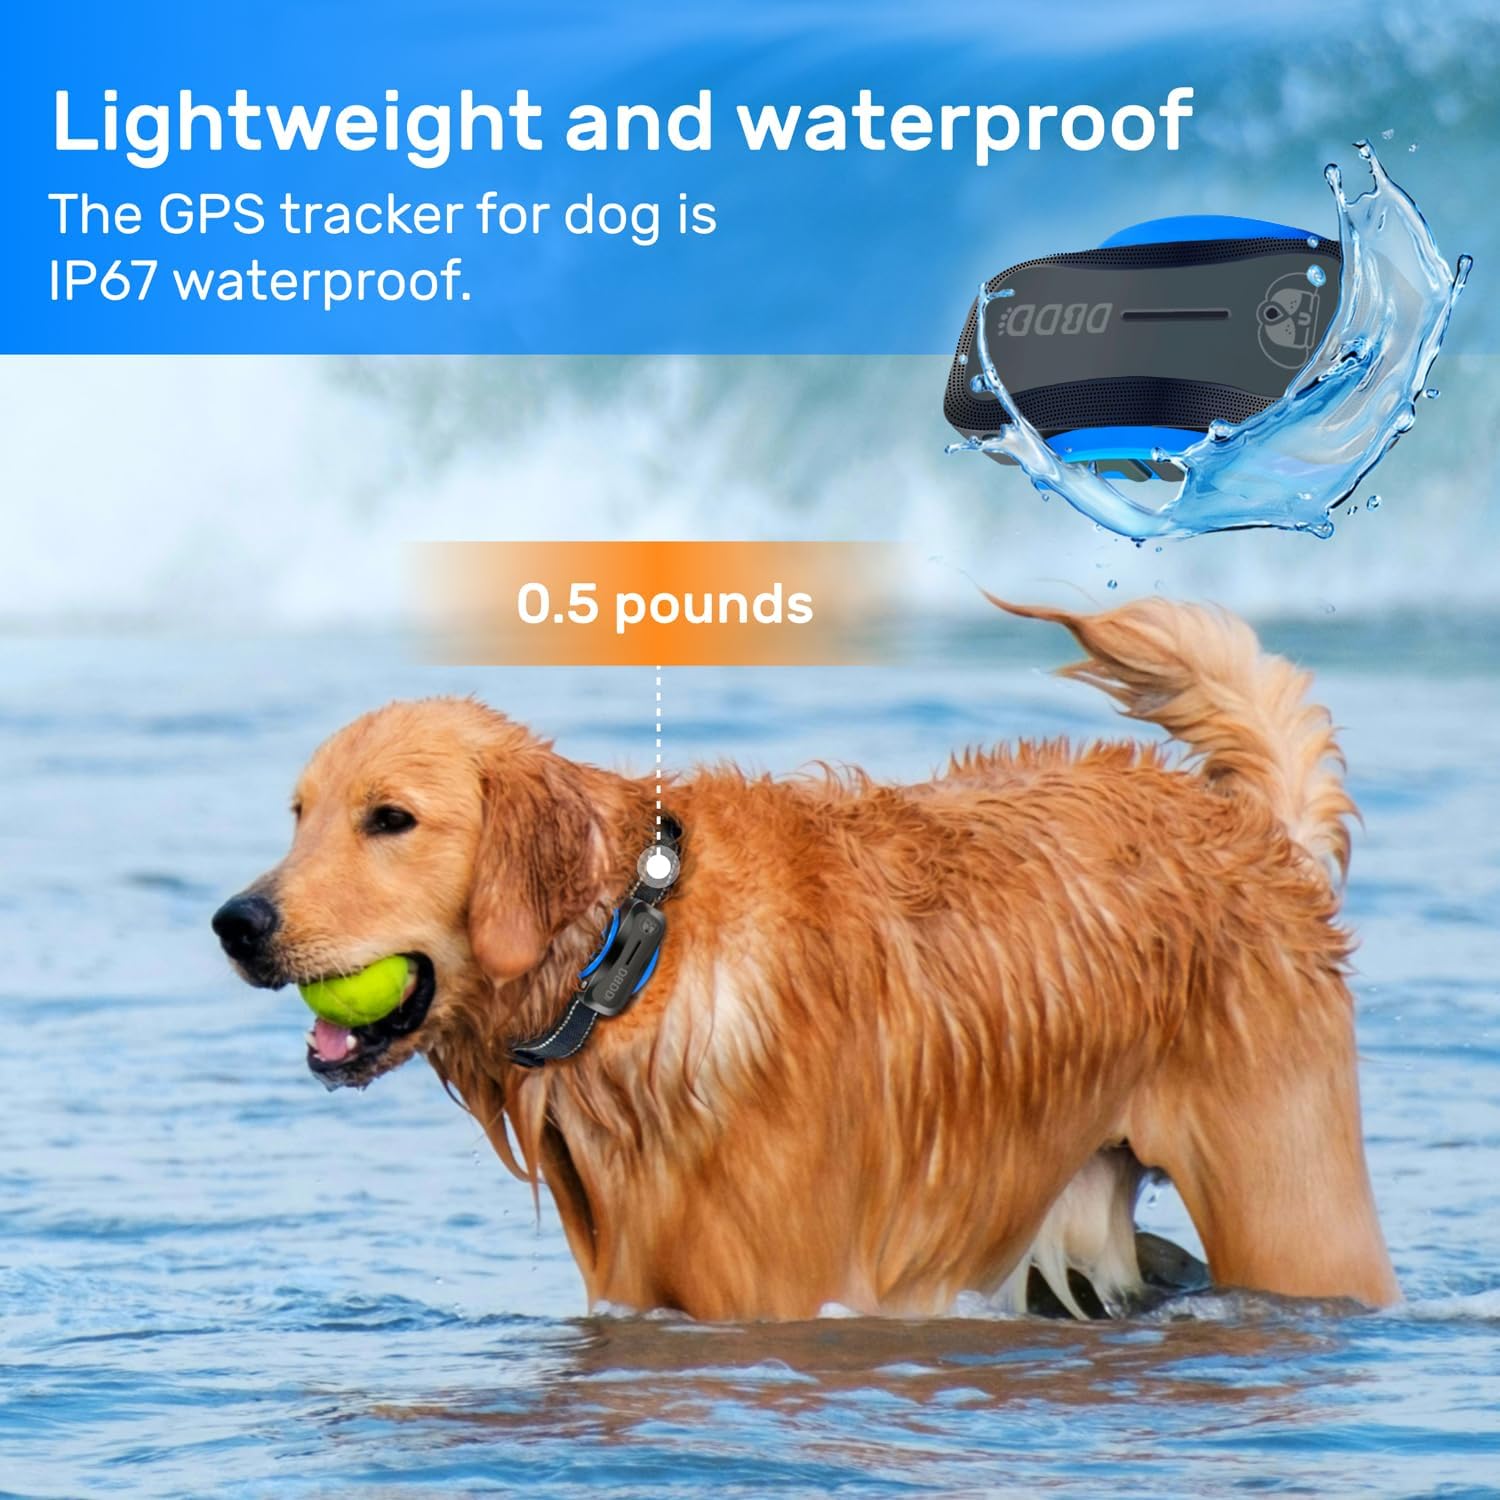
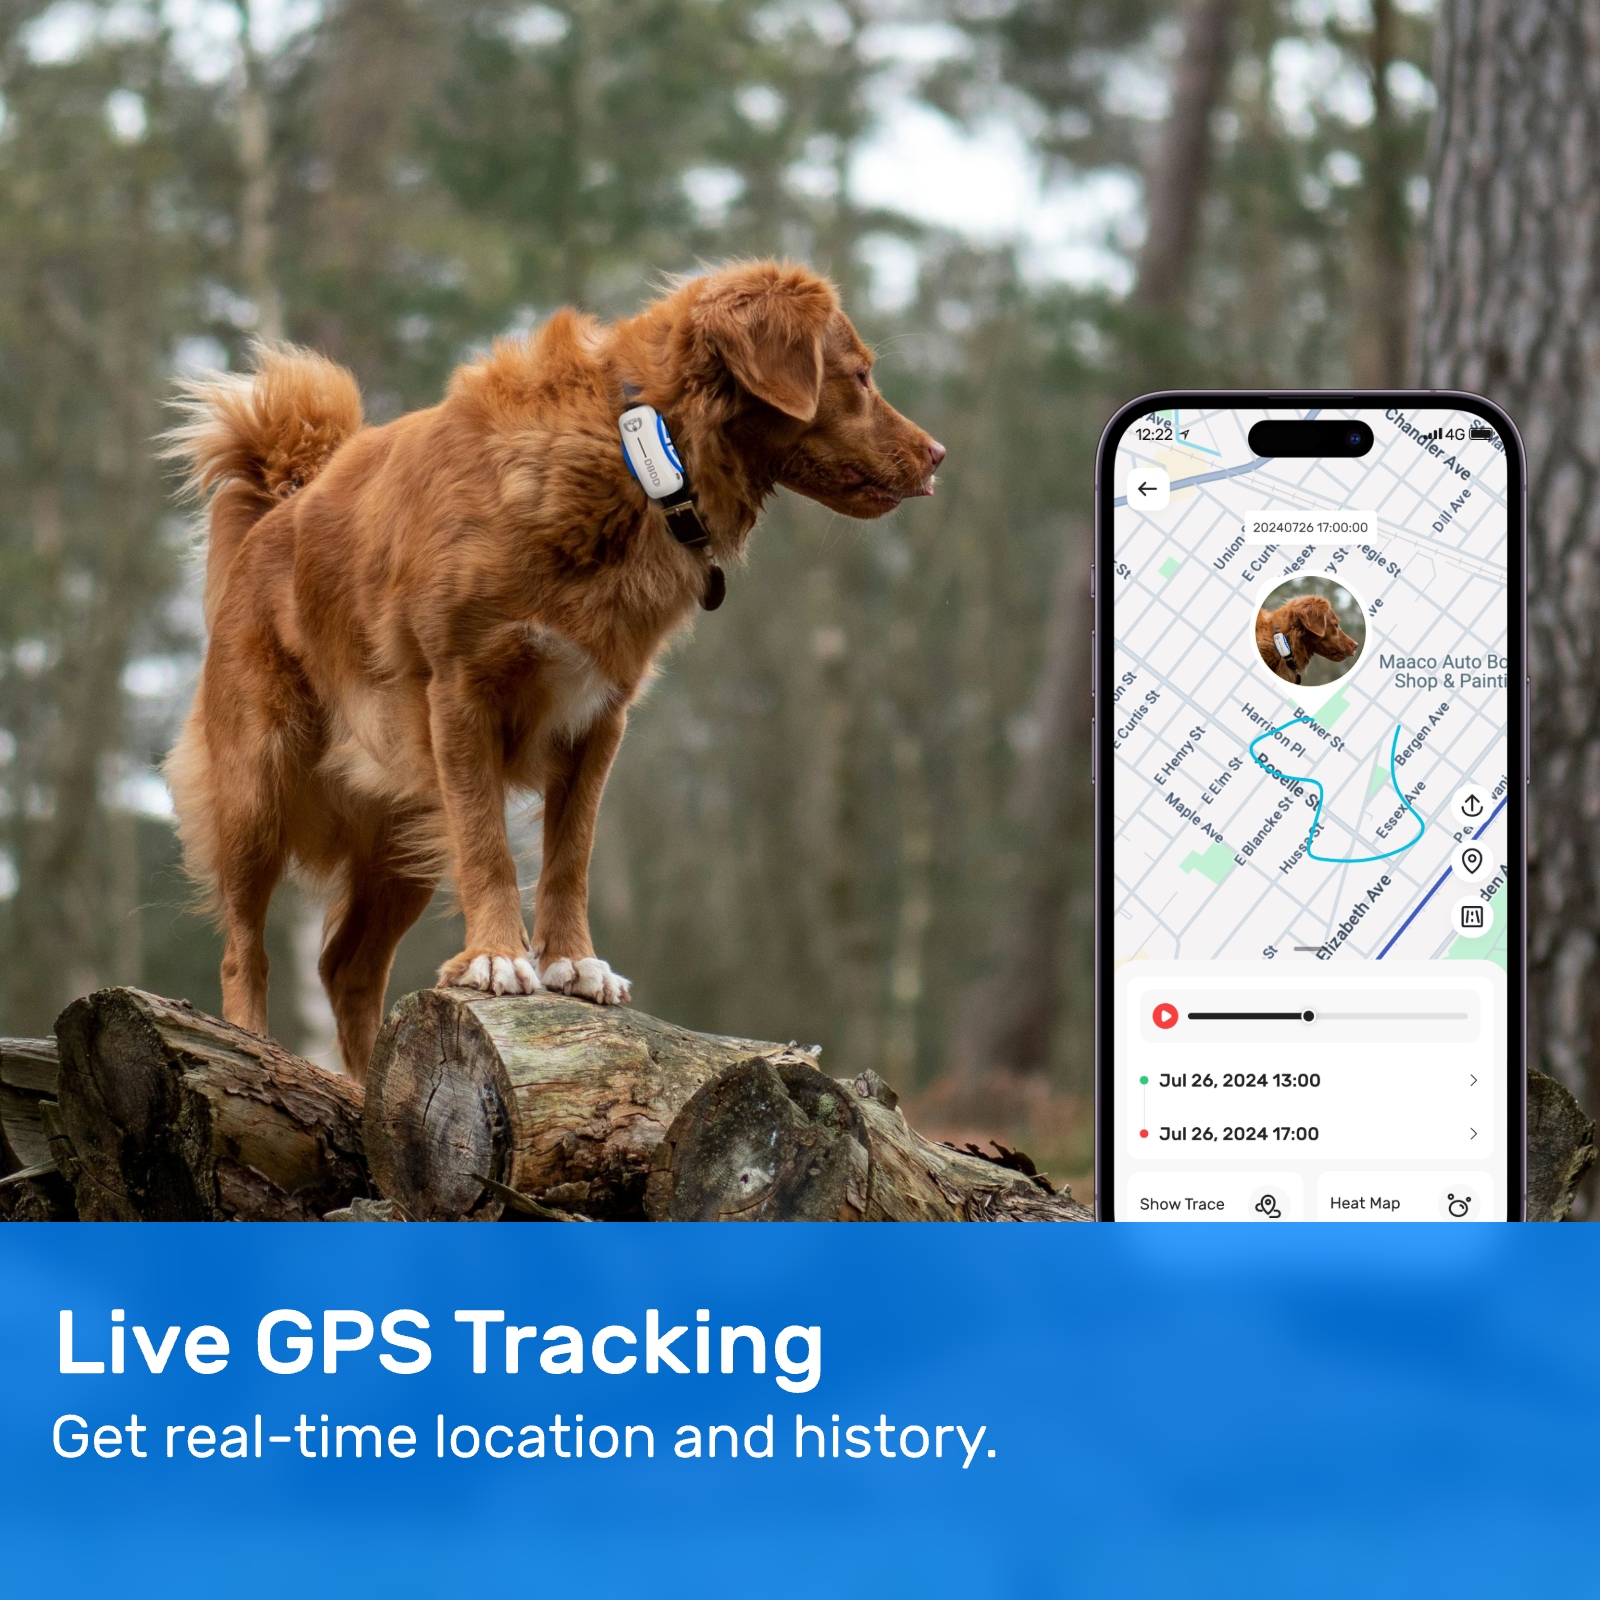
1. **GPS Module**: This is the heart of your tracking system. A GPS module will pinpoint your teddy bear dog's location using satellite signals. Look for a compact, lightweight model suitable for small pets.
2. **Microcontroller**: Devices like Arduino or Raspberry Pi can process data from the GPS module and send it to your smartphone or computer. Choose a microcontroller that balances power consumption and processing capabilities.
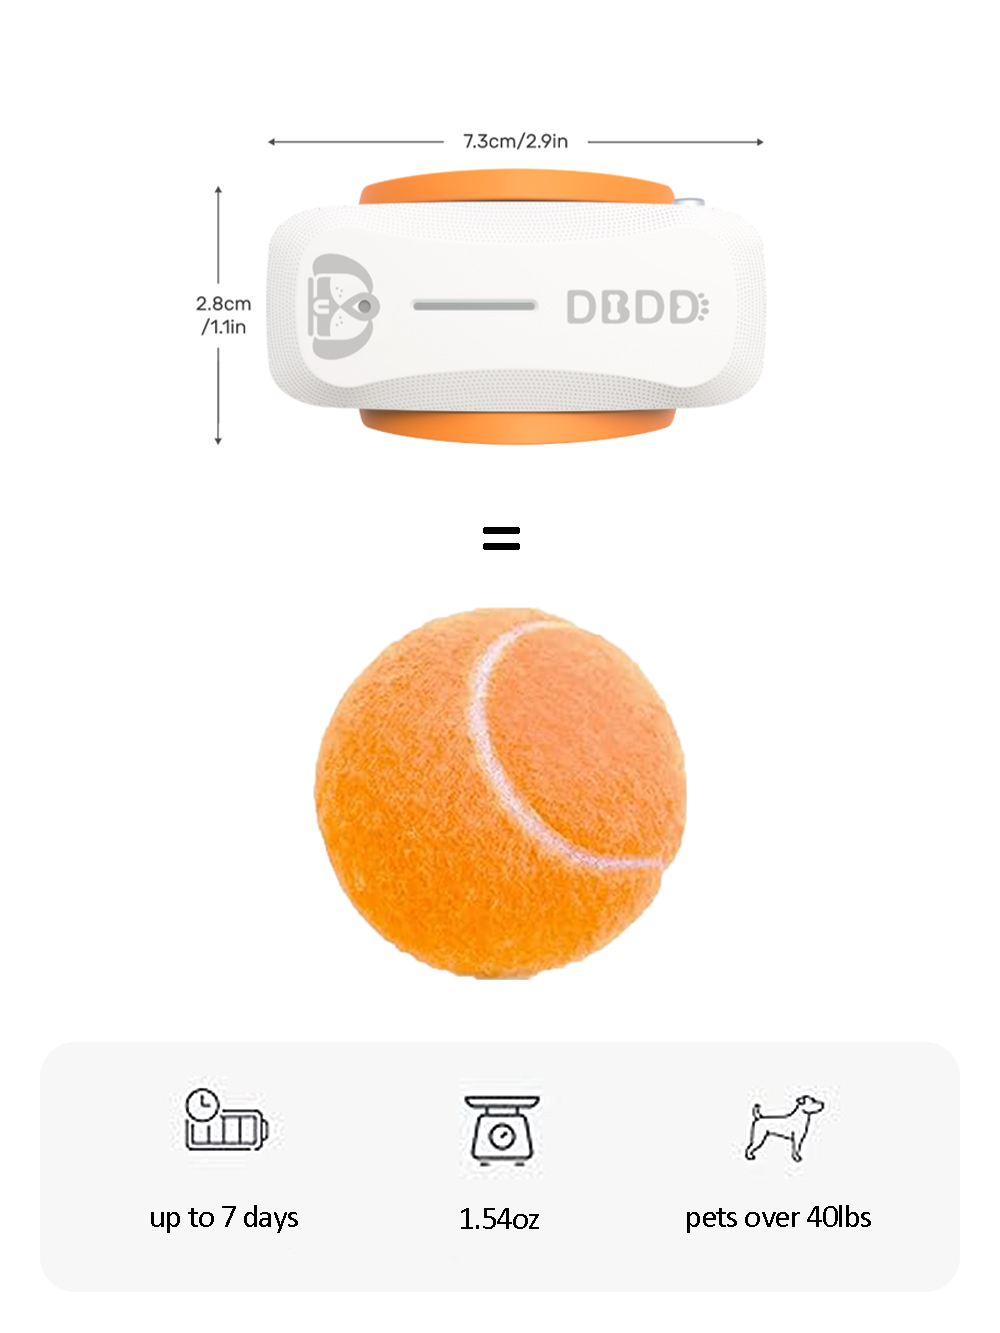
3. **Battery Pack**: Since your teddy bear dog is small, the battery should be lightweight yet long-lasting enough to sustain operation throughout the day.
4. **Bluetooth or Wi-Fi Module**: For real-time updates, integrate a Bluetooth or Wi-Fi module to transmit location data wirelessly. This ensures you receive instant notifications about your dog's whereabouts.
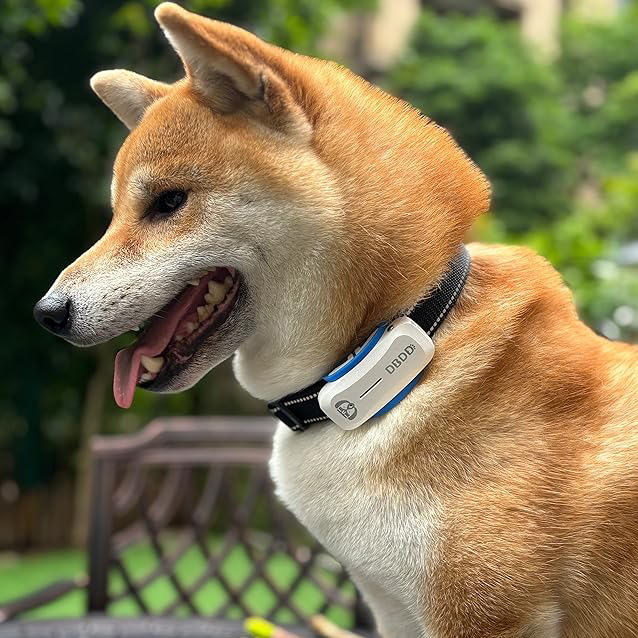
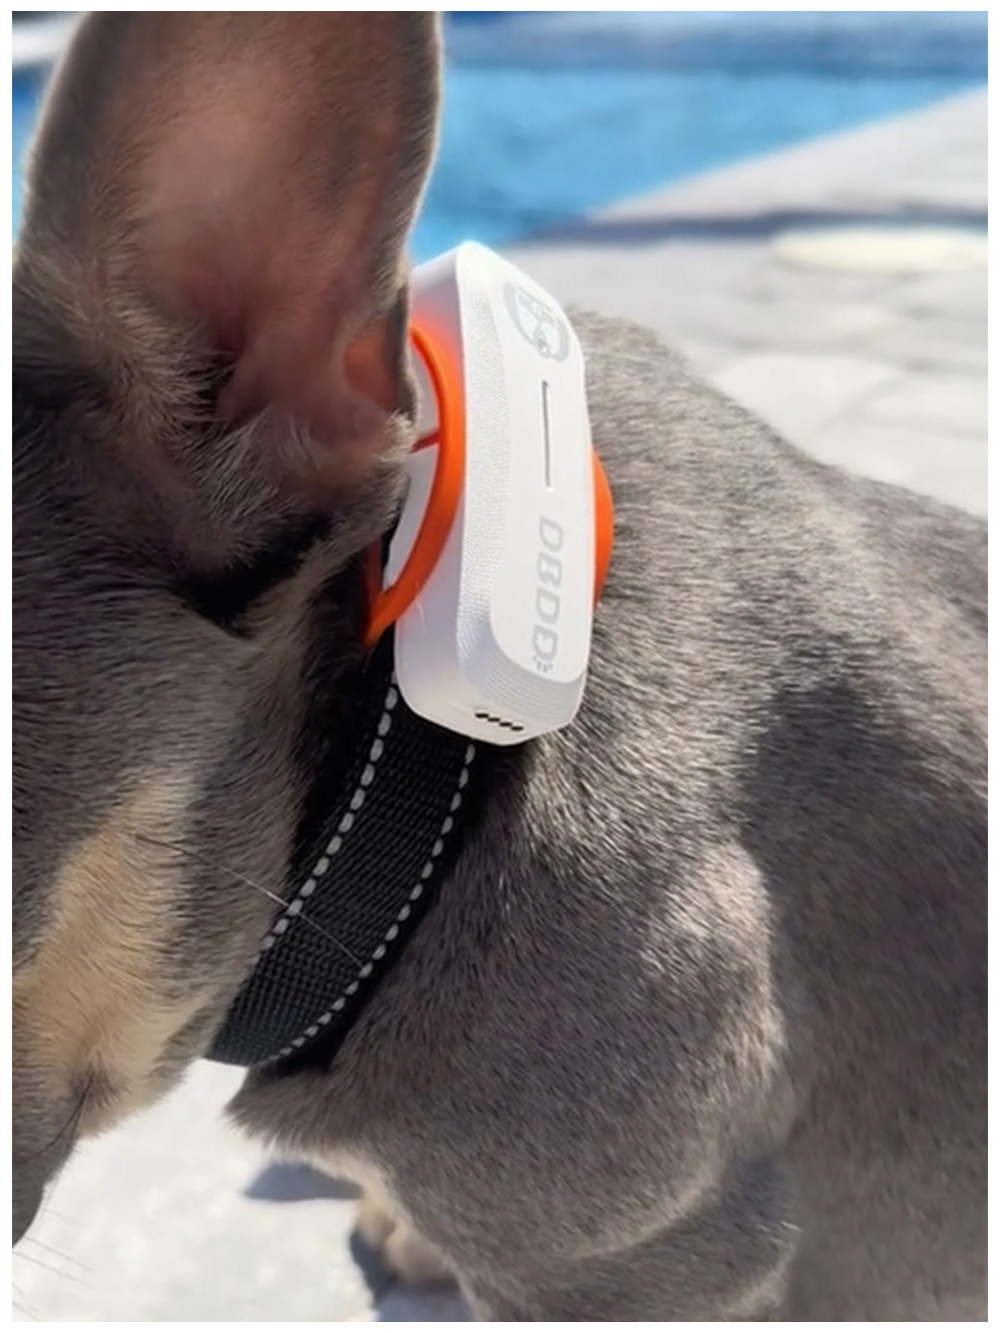
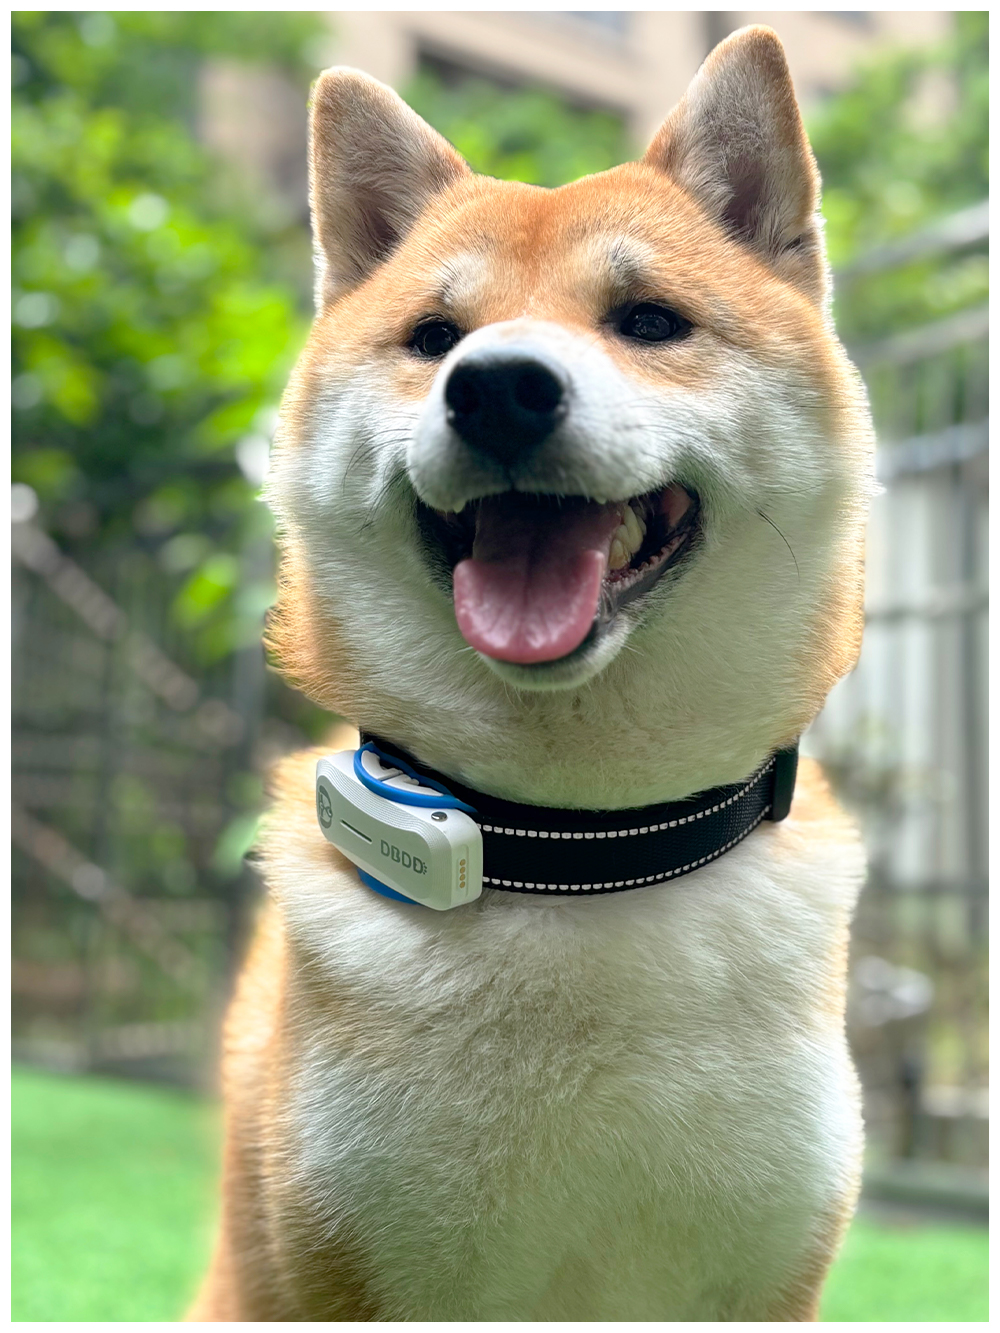
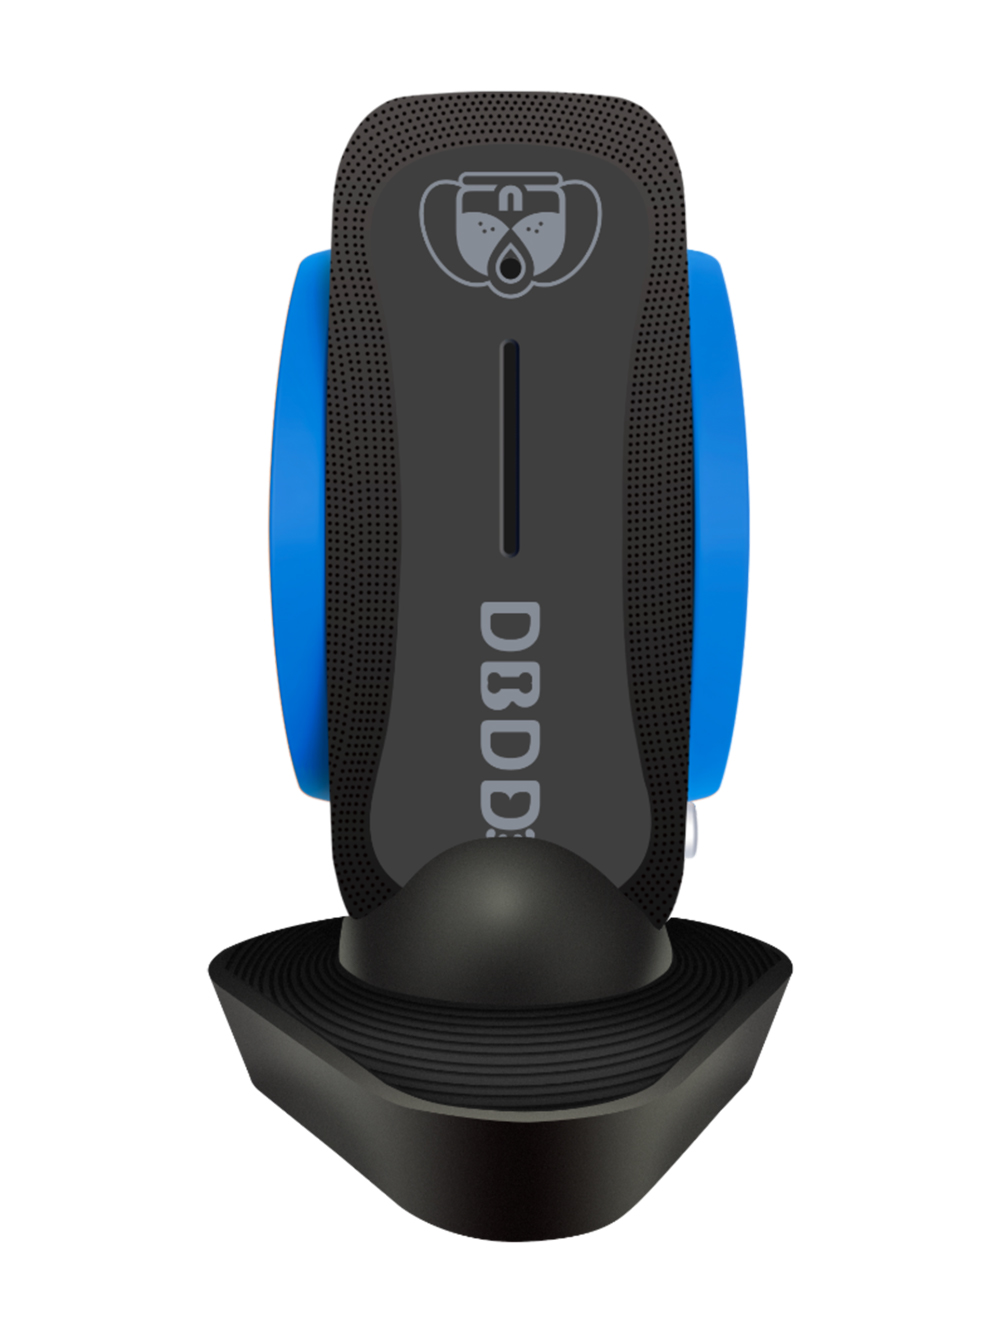
5. **Enclosure**: Protect all electronic components with a waterproof and durable enclosure. It should fit comfortably around your teddy bear dog’s collar without causing discomfort.
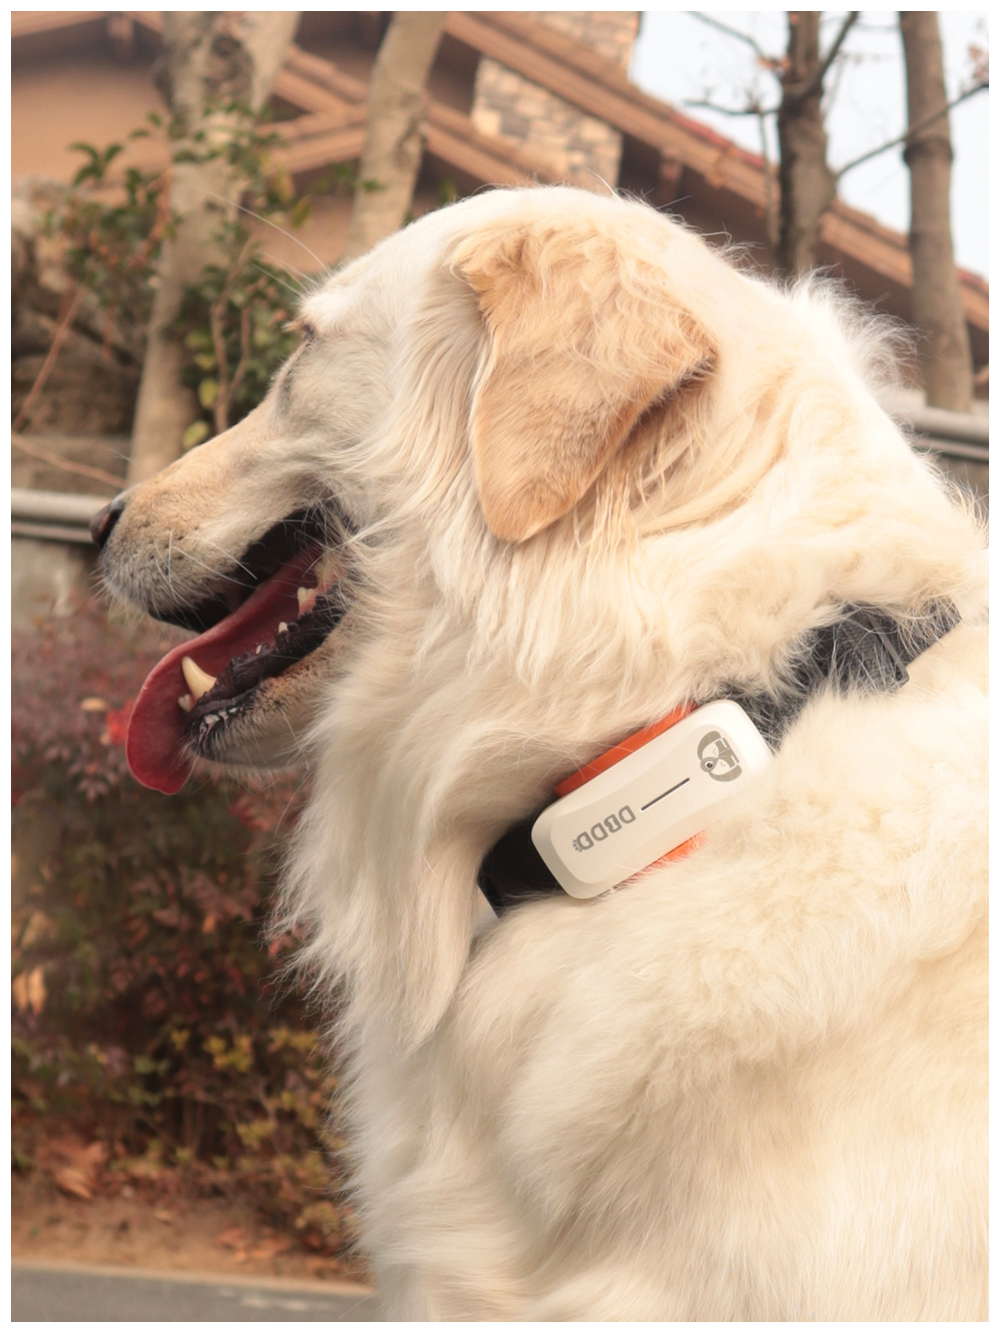
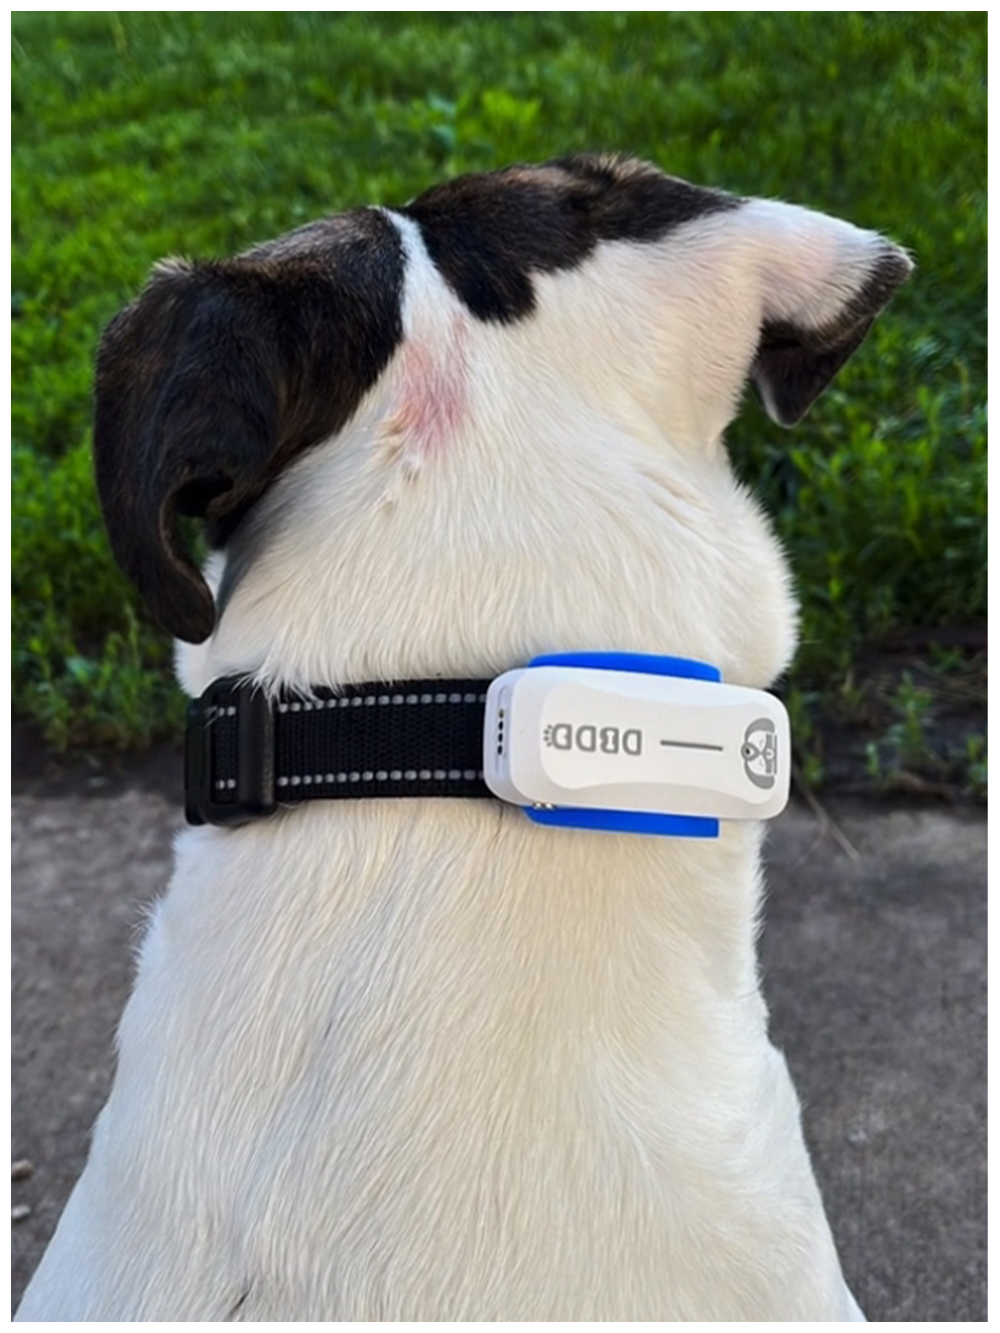
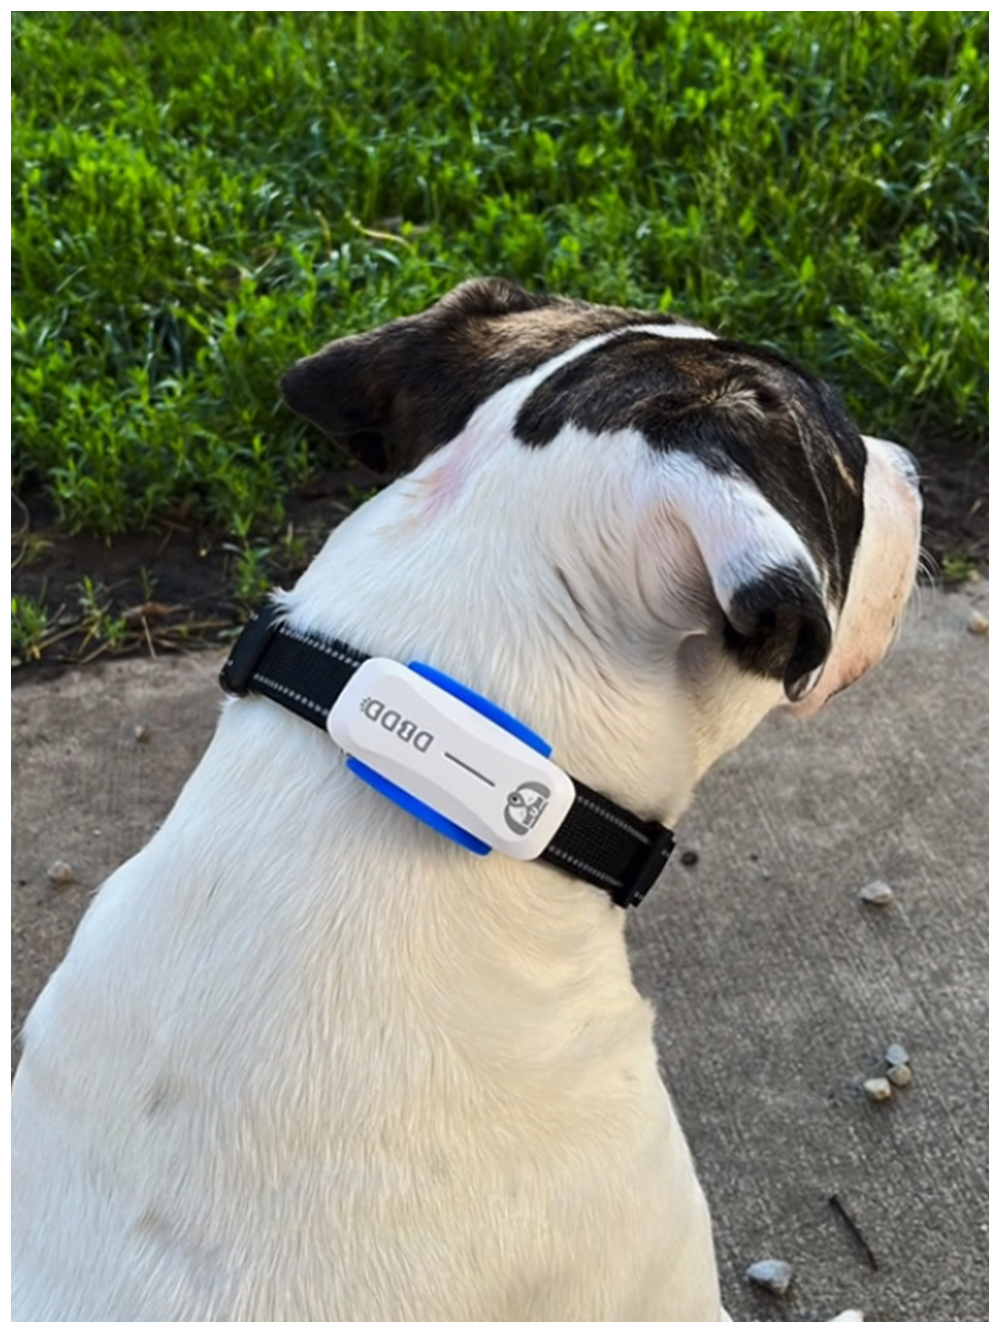
6. **Collar Adapter**: Attach the tracking device securely to your dog’s collar using a custom adapter or harness. Ensure it doesn’t interfere with their movement or cause irritation.
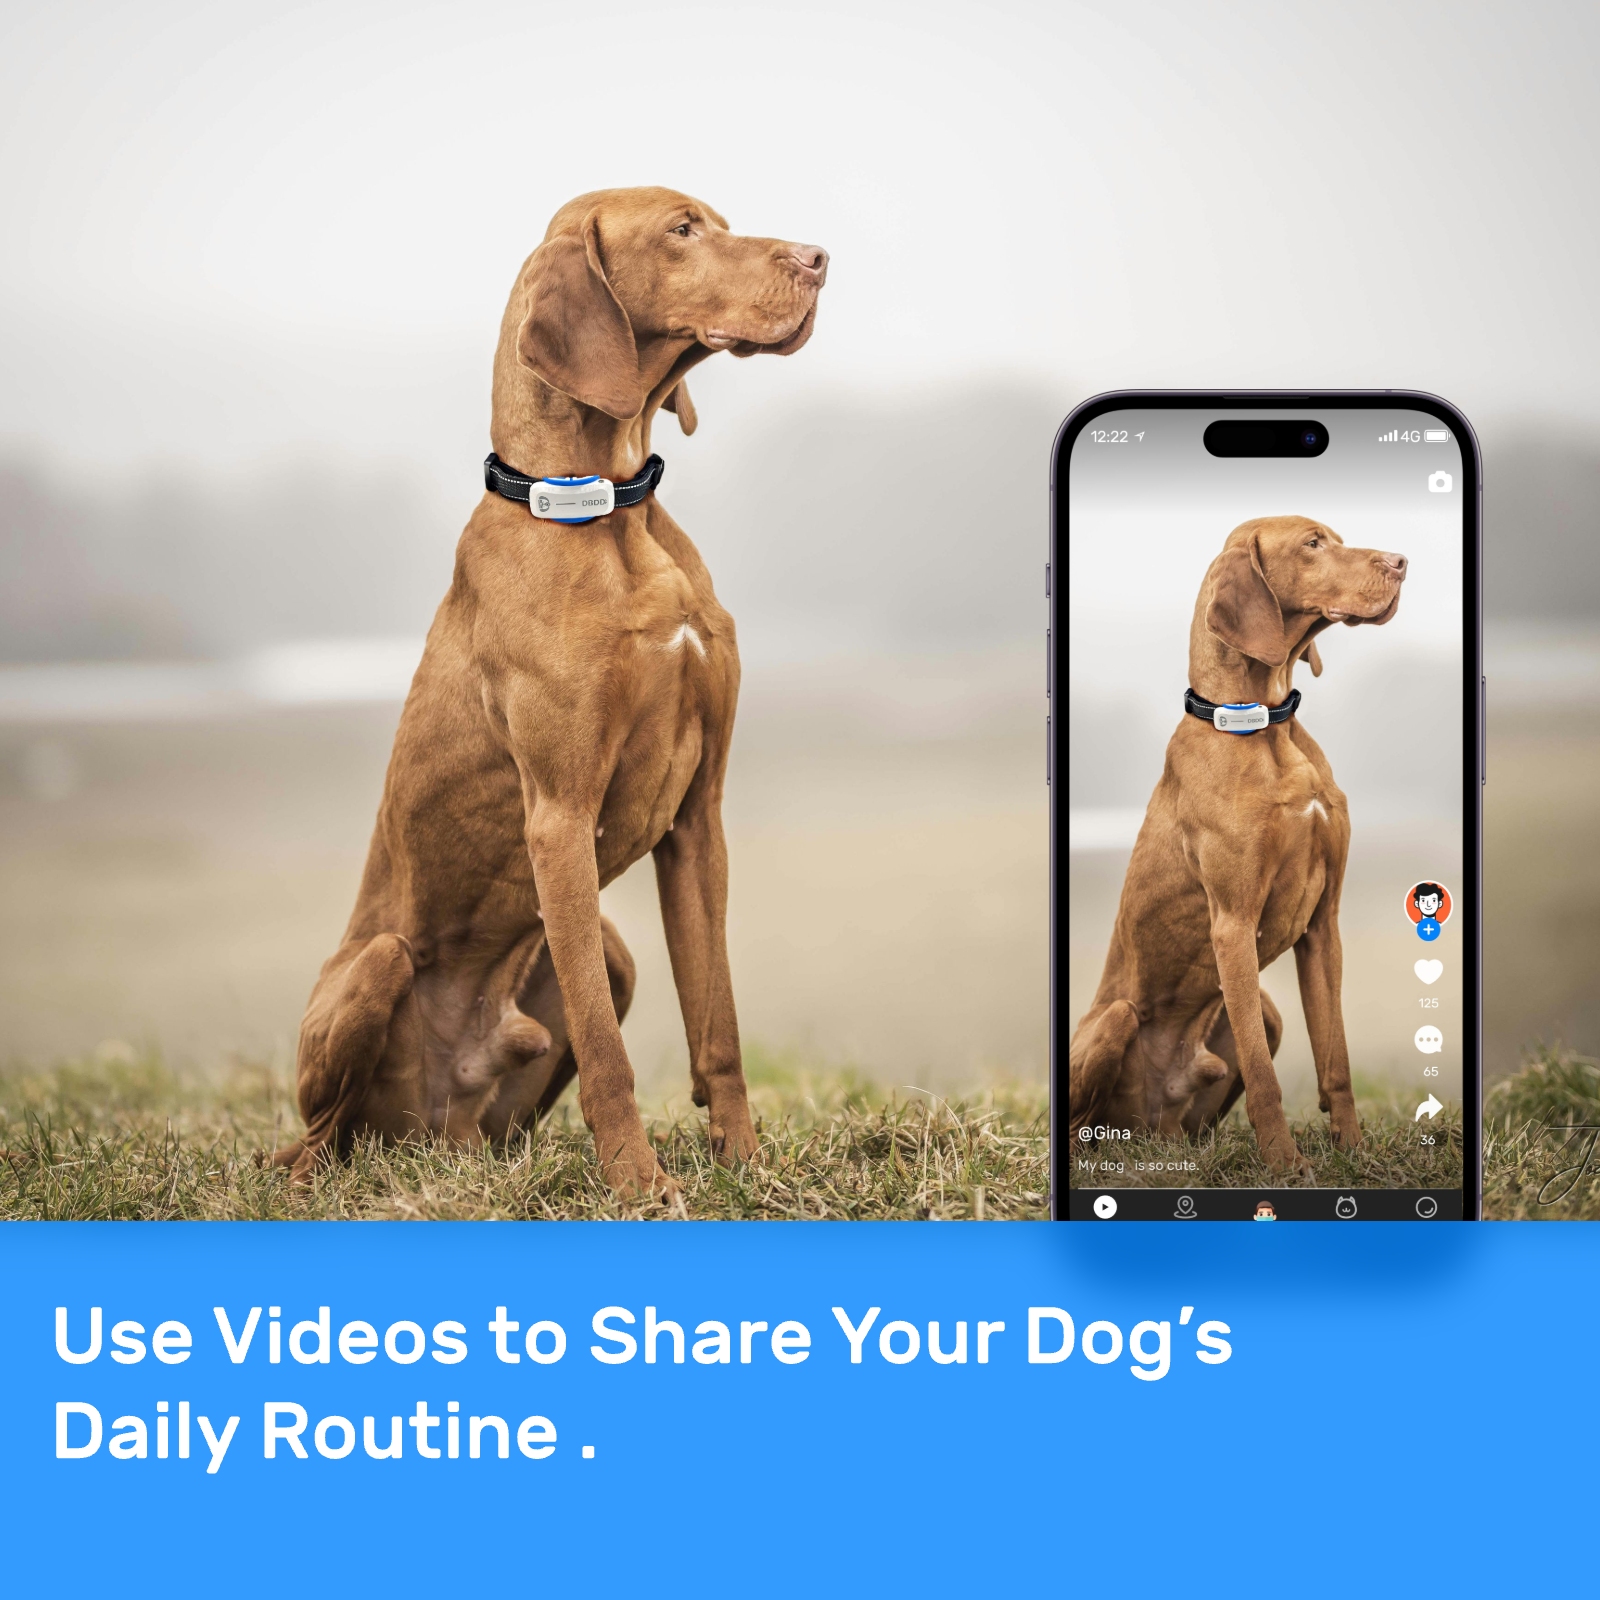
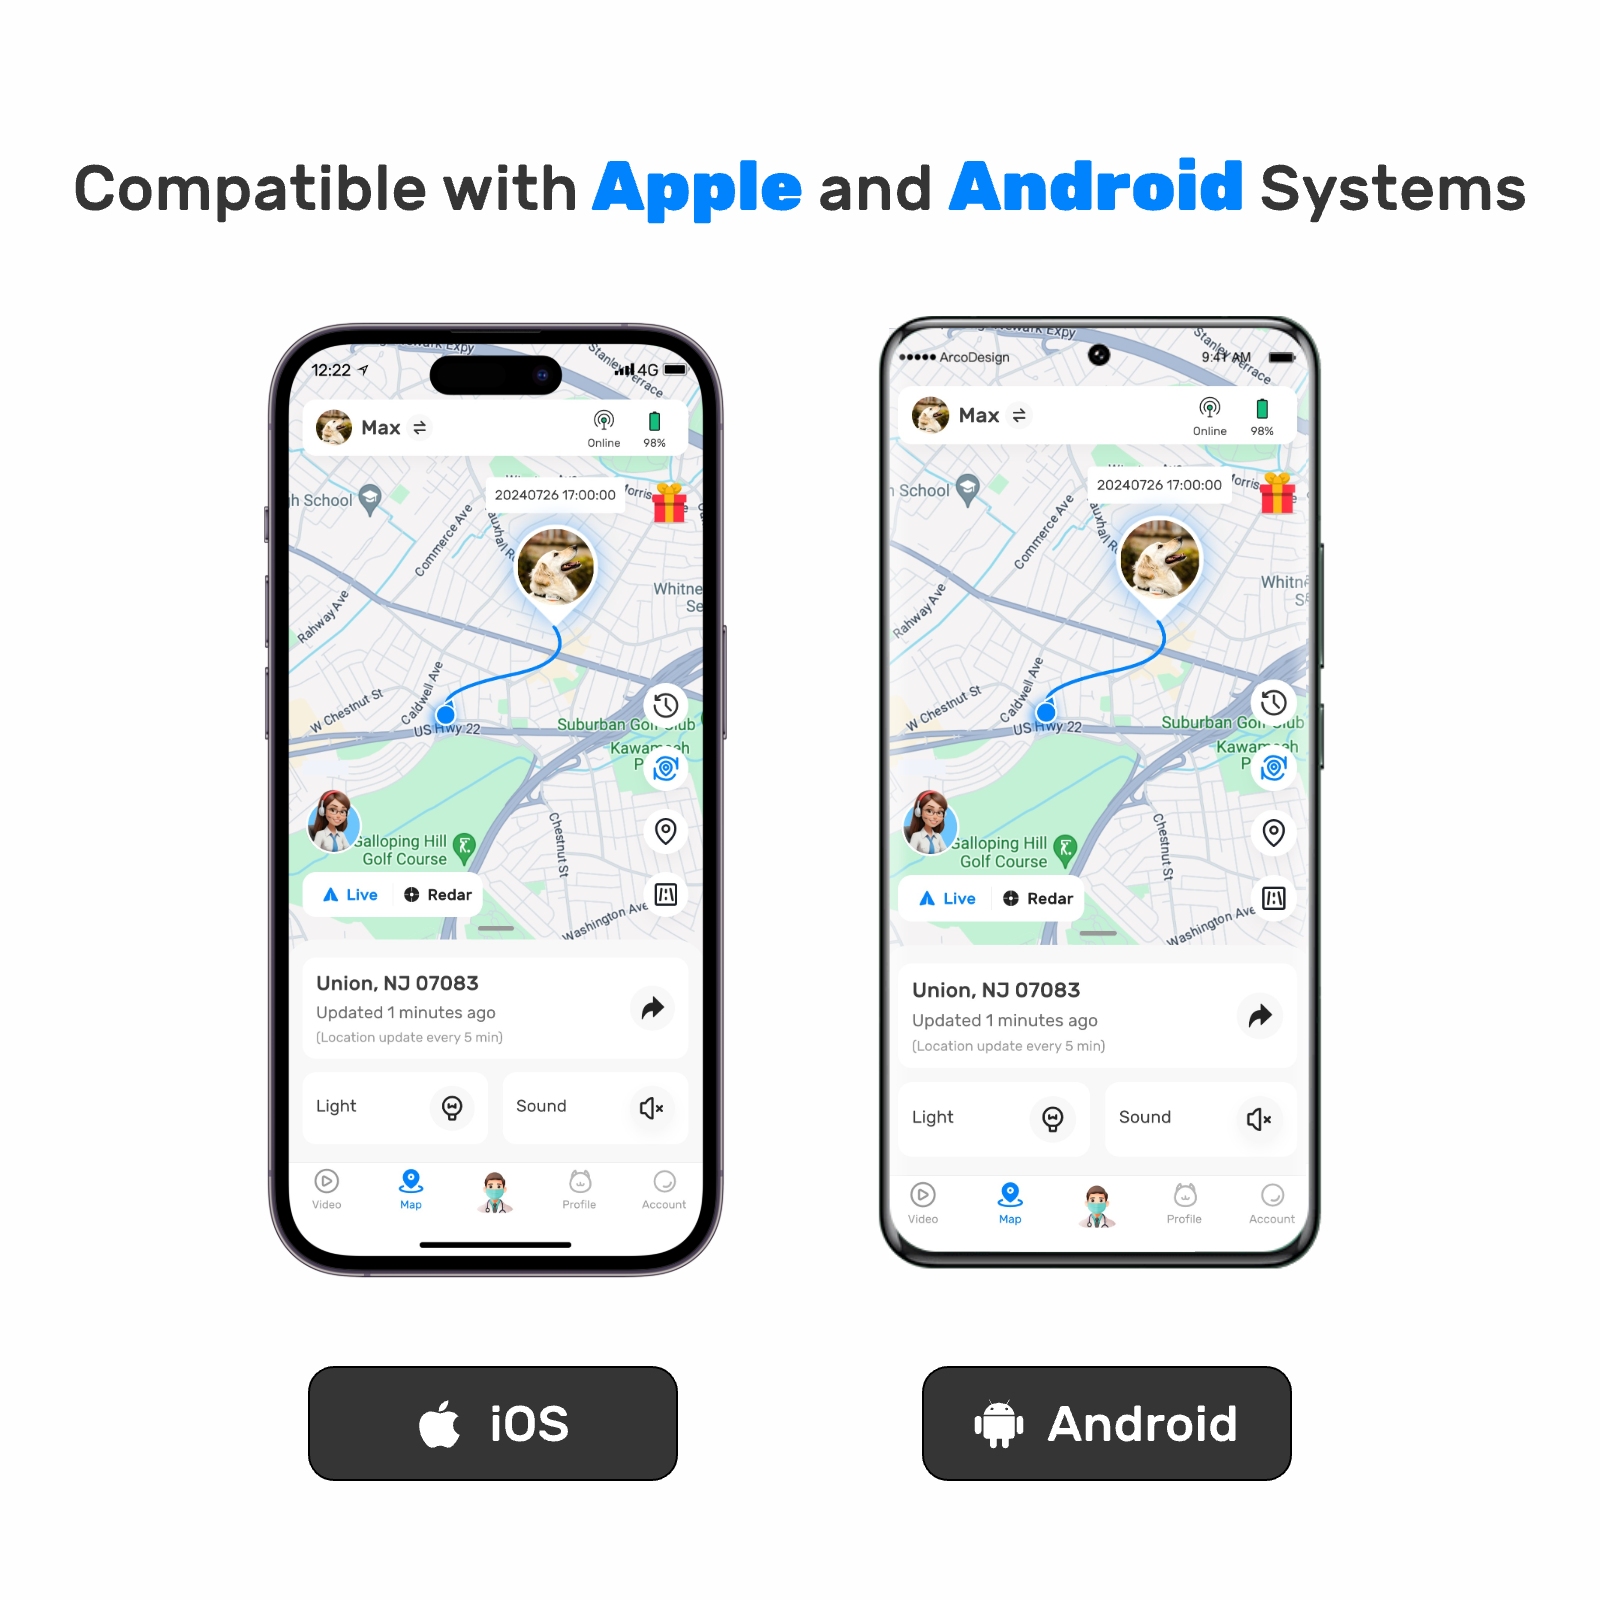
7. **Mobile App or Software**: Develop or download software that displays your dog’s location on a map. Many open-source platforms offer templates for creating such applications.
8. **Antenna (Optional)**: If you want stronger signal reception, consider adding a small external antenna to enhance GPS accuracy.
### Benefits of a DIY Dog Tracking System
There are numerous advantages to constructing your own tracking system rather than purchasing a pre-made solution:
- **Cost-Effective**: Building a DIY system typically costs less than buying a commercial product. You only pay for the components you actually use.
- **Customization**: Tailor the design specifically for your teddy bear dog. Adjust the size, weight, and features to suit their lifestyle and temperament.
- **Learning Opportunity**: Assembling a tracking system teaches valuable skills in electronics, coding, and problem-solving.
- **Control Over Data**: With a DIY setup, you maintain full control over how data is collected, stored, and shared. There’s no reliance on third-party servers or subscription services.
- **Improved Safety**: Knowing exactly where your teddy bear dog is at all times reduces anxiety and helps prevent accidents.
### Step-by-Step Guide to Building Your System
#### Step 1: Gather Materials
Collect all necessary components mentioned earlier. Purchase high-quality parts to ensure longevity and reliability. Consider visiting online marketplaces or local hobby stores for affordable options.
#### Step 2: Assemble the Electronics
Start by connecting the GPS module to the microcontroller. Follow the manufacturer’s instructions to solder wires correctly and test each connection. Next, attach the Bluetooth or Wi-Fi module to enable wireless communication. Power everything through the battery pack, ensuring proper voltage levels.
#### Step 3: Program the Microcontroller
Write code to configure the GPS module and establish communication between devices. Use libraries available in platforms like Arduino IDE to simplify development. The program should log coordinates periodically and send them via Bluetooth or Wi-Fi to your mobile device.
Here’s a basic example of what the code might look like:

```cpp
#include
#include
TinyGPSPlus gps;
SoftwareSerial serialGps(4, 3); // RX, TX pins
void setup() {
Serial.begin(9600);
serialGps.begin(9600);
}

void loop() {
while (serialGps.available() > 0) {
gps.encode(serialGps.read());
if (gps.location.isValid()) {
Serial.print("Latitude: ");
Serial.println(gps.location.lat(), 6);
Serial.print("Longitude: ");
Serial.println(gps.location.lng(), 6);
}
}
}
```
This script reads GPS data and outputs latitude and longitude values to the serial monitor. Modify it to transmit data over Bluetooth or Wi-Fi instead.
#### Step 4: Create a Mobile Interface
Design a simple app or web interface to display your teddy bear dog’s location. Platforms like MIT App Inventor allow beginners to drag-and-drop elements without extensive coding knowledge. Alternatively, write native apps using frameworks like React Native or Swift.
Ensure the application includes a live map feature showing real-time updates. Include additional functionalities like geofencing, which alerts you if your dog crosses predefined boundaries.
#### Step 5: Mount the Device
Once testing confirms the system works, mount it onto your teddy bear dog’s collar. Use velcro straps or elastic bands to secure the enclosure snugly but comfortably. Avoid overtightening, as this could irritate your pet.
#### Step 6: Test Thoroughly
Before relying on the tracker, conduct thorough tests under various conditions. Check its performance indoors, outdoors, near trees, and in open fields. Verify battery life and adjust settings if necessary to extend runtime.
### Tips for Optimizing Your System
- **Power Management**: Implement sleep modes or low-power states to conserve energy. Schedule periodic wake-ups for data transmission rather than continuous operation.
- **Lightweight Design**: Keep the total weight below 100 grams to avoid burdening your teddy bear dog. Every gram counts for smaller breeds.
- **Durability**: Reinforce the enclosure against water, dust, and impacts. Outdoor adventures demand rugged hardware.
- **User-Friendly Interface**: Make sure the mobile app is intuitive and easy to navigate even for non-tech-savvy users.
### Common Challenges and Solutions
While building a DIY dog tracking system offers many benefits, there are potential challenges to address:
- **Signal Interference**: Tall buildings, dense forests, or underground structures can block GPS signals. To mitigate this, combine GPS with other technologies like cellular triangulation or beacon-based systems.
- **Limited Battery Life**: Compact batteries may not last long enough for extended outings. Invest in rechargeable lithium-ion packs and optimize power usage.
- **Comfort Issues**: Improperly fitted trackers can rub against your teddy bear dog’s skin or restrict movement. Regularly check the collar area for signs of discomfort or irritation.
- **Data Accuracy**: Occasionally, GPS readings may drift due to environmental factors. Calibrate the device regularly and recalibrate when switching locations.
### Conclusion
A DIY dog tracking system empowers you to safeguard your teddy bear dog while fostering creativity and technical growth. By assembling and programming your own device, you gain unparalleled control over its functionality and adaptability. Remember to prioritize comfort, durability, and ease of use when designing the system. With careful planning and execution, you’ll enjoy years of worry-free adventures with your cherished companion.
Update Time:2025-05-15 03:38:42
### Why Build a DIY Dog Tracking System?
Commercial dog tracking systems can be expensive, and some may not meet the specific needs of smaller breeds like the teddy bear dog. A DIY system allows you to customize the setup based on your budget, environment, and the unique habits of your pet. Additionally, building your own system can be a fun learning experience, offering insights into electronics, programming, and GPS technology.
Teddy bear dogs, with their compact size and energetic demeanor, often require special attention when it comes to safety. They might dart out of open doors or wander into areas where larger dogs wouldn't dare to go. By setting up a personalized tracking system, you can monitor their movements more effectively and intervene quickly if they venture too far.
### Components Needed for a DIY Dog Tracking System
To create a functional dog tracking system, you'll need several key components:
1. **GPS Module**: This is the heart of your tracking system. A GPS module will pinpoint your teddy bear dog's location using satellite signals. Look for a compact, lightweight model suitable for small pets.
2. **Microcontroller**: Devices like Arduino or Raspberry Pi can process data from the GPS module and send it to your smartphone or computer. Choose a microcontroller that balances power consumption and processing capabilities.
3. **Battery Pack**: Since your teddy bear dog is small, the battery should be lightweight yet long-lasting enough to sustain operation throughout the day.
4. **Bluetooth or Wi-Fi Module**: For real-time updates, integrate a Bluetooth or Wi-Fi module to transmit location data wirelessly. This ensures you receive instant notifications about your dog's whereabouts.
5. **Enclosure**: Protect all electronic components with a waterproof and durable enclosure. It should fit comfortably around your teddy bear dog’s collar without causing discomfort.
6. **Collar Adapter**: Attach the tracking device securely to your dog’s collar using a custom adapter or harness. Ensure it doesn’t interfere with their movement or cause irritation.
7. **Mobile App or Software**: Develop or download software that displays your dog’s location on a map. Many open-source platforms offer templates for creating such applications.
8. **Antenna (Optional)**: If you want stronger signal reception, consider adding a small external antenna to enhance GPS accuracy.
### Benefits of a DIY Dog Tracking System
There are numerous advantages to constructing your own tracking system rather than purchasing a pre-made solution:
- **Cost-Effective**: Building a DIY system typically costs less than buying a commercial product. You only pay for the components you actually use.
- **Customization**: Tailor the design specifically for your teddy bear dog. Adjust the size, weight, and features to suit their lifestyle and temperament.
- **Learning Opportunity**: Assembling a tracking system teaches valuable skills in electronics, coding, and problem-solving.
- **Control Over Data**: With a DIY setup, you maintain full control over how data is collected, stored, and shared. There’s no reliance on third-party servers or subscription services.
- **Improved Safety**: Knowing exactly where your teddy bear dog is at all times reduces anxiety and helps prevent accidents.
### Step-by-Step Guide to Building Your System
#### Step 1: Gather Materials
Collect all necessary components mentioned earlier. Purchase high-quality parts to ensure longevity and reliability. Consider visiting online marketplaces or local hobby stores for affordable options.
#### Step 2: Assemble the Electronics
Start by connecting the GPS module to the microcontroller. Follow the manufacturer’s instructions to solder wires correctly and test each connection. Next, attach the Bluetooth or Wi-Fi module to enable wireless communication. Power everything through the battery pack, ensuring proper voltage levels.
#### Step 3: Program the Microcontroller
Write code to configure the GPS module and establish communication between devices. Use libraries available in platforms like Arduino IDE to simplify development. The program should log coordinates periodically and send them via Bluetooth or Wi-Fi to your mobile device.
Here’s a basic example of what the code might look like:
```cpp
#include
#include
TinyGPSPlus gps;
SoftwareSerial serialGps(4, 3); // RX, TX pins
void setup() {
Serial.begin(9600);
serialGps.begin(9600);
}
void loop() {
while (serialGps.available() > 0) {
gps.encode(serialGps.read());
if (gps.location.isValid()) {
Serial.print("Latitude: ");
Serial.println(gps.location.lat(), 6);
Serial.print("Longitude: ");
Serial.println(gps.location.lng(), 6);
}
}
}
```
This script reads GPS data and outputs latitude and longitude values to the serial monitor. Modify it to transmit data over Bluetooth or Wi-Fi instead.
#### Step 4: Create a Mobile Interface
Design a simple app or web interface to display your teddy bear dog’s location. Platforms like MIT App Inventor allow beginners to drag-and-drop elements without extensive coding knowledge. Alternatively, write native apps using frameworks like React Native or Swift.
Ensure the application includes a live map feature showing real-time updates. Include additional functionalities like geofencing, which alerts you if your dog crosses predefined boundaries.
#### Step 5: Mount the Device
Once testing confirms the system works, mount it onto your teddy bear dog’s collar. Use velcro straps or elastic bands to secure the enclosure snugly but comfortably. Avoid overtightening, as this could irritate your pet.
#### Step 6: Test Thoroughly
Before relying on the tracker, conduct thorough tests under various conditions. Check its performance indoors, outdoors, near trees, and in open fields. Verify battery life and adjust settings if necessary to extend runtime.
### Tips for Optimizing Your System
- **Power Management**: Implement sleep modes or low-power states to conserve energy. Schedule periodic wake-ups for data transmission rather than continuous operation.
- **Lightweight Design**: Keep the total weight below 100 grams to avoid burdening your teddy bear dog. Every gram counts for smaller breeds.
- **Durability**: Reinforce the enclosure against water, dust, and impacts. Outdoor adventures demand rugged hardware.
- **User-Friendly Interface**: Make sure the mobile app is intuitive and easy to navigate even for non-tech-savvy users.
### Common Challenges and Solutions
While building a DIY dog tracking system offers many benefits, there are potential challenges to address:
- **Signal Interference**: Tall buildings, dense forests, or underground structures can block GPS signals. To mitigate this, combine GPS with other technologies like cellular triangulation or beacon-based systems.
- **Limited Battery Life**: Compact batteries may not last long enough for extended outings. Invest in rechargeable lithium-ion packs and optimize power usage.
- **Comfort Issues**: Improperly fitted trackers can rub against your teddy bear dog’s skin or restrict movement. Regularly check the collar area for signs of discomfort or irritation.
- **Data Accuracy**: Occasionally, GPS readings may drift due to environmental factors. Calibrate the device regularly and recalibrate when switching locations.
### Conclusion
A DIY dog tracking system empowers you to safeguard your teddy bear dog while fostering creativity and technical growth. By assembling and programming your own device, you gain unparalleled control over its functionality and adaptability. Remember to prioritize comfort, durability, and ease of use when designing the system. With careful planning and execution, you’ll enjoy years of worry-free adventures with your cherished companion.
Update Time:2025-05-15 03:38:42
Bluetooth Tracking Accessories Daily rankings


Correction of product information
If you notice any omissions or errors in the product information on this page, please use the correction request form below.
Correction Request Form


