


New ArrivalsBack in stock


smart collar for dogs
 4.8
(49件)
4.8
(49件)
 Limited Time Sale
Until the end
00
00
00
Free shipping on orders over 999 ※)
If you buy it for 999 or more, you can buy it on behalf of the customer. There is no material for the number of hands.
If you buy it for 999 or more, you can buy it on behalf of the customer. There is no material for the number of hands.
There is stock in your local store.
Please note that the sales price and tax displayed may differ between online and in-store. Also, the product may be out of stock in-store.


Coupon giveaway!
| Control number |
New :D946490263 second hand :D946490263 |
Manufacturer | smart collar | release date | 2025-05-15 | List price | $45 | ||
|---|---|---|---|---|---|---|---|---|---|
| prototype | collar for | ||||||||
| category | |||||||||
Senior Care#Elderly Pet Monitoring
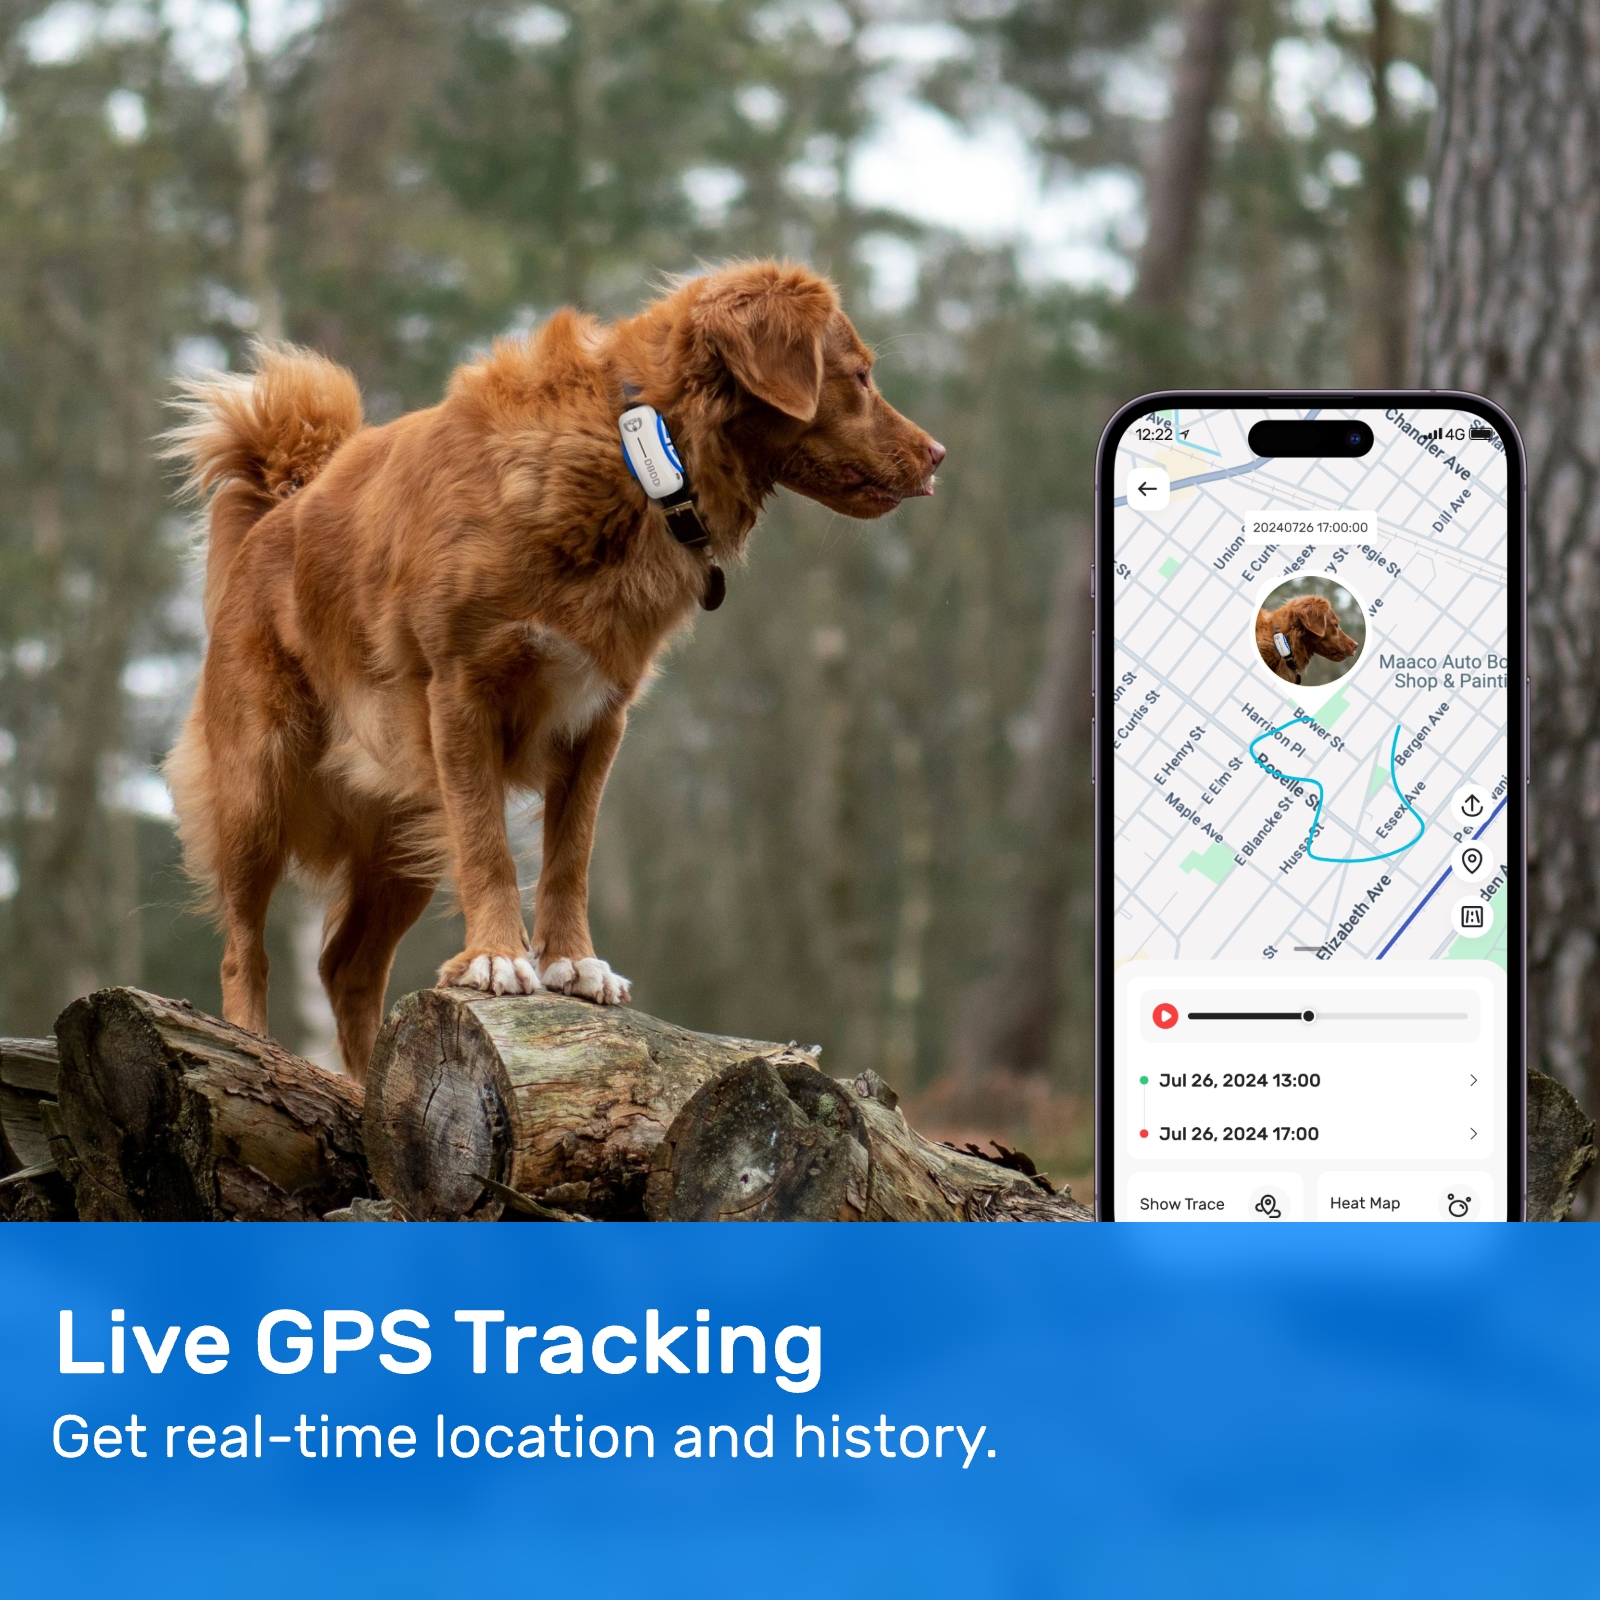
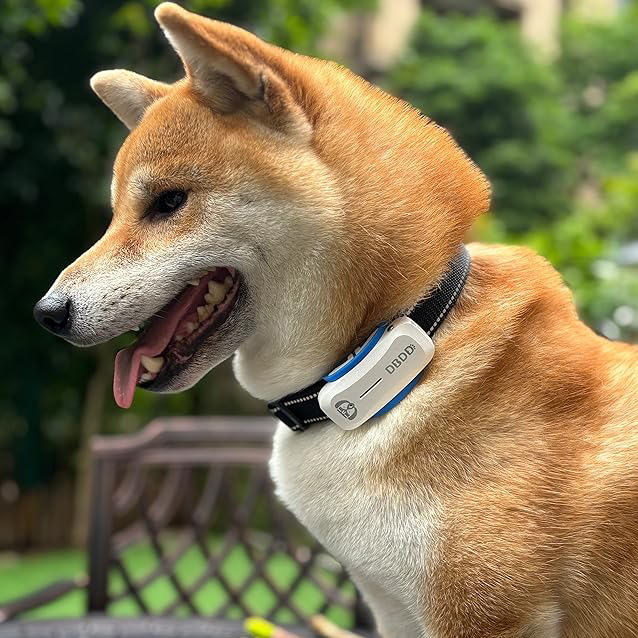
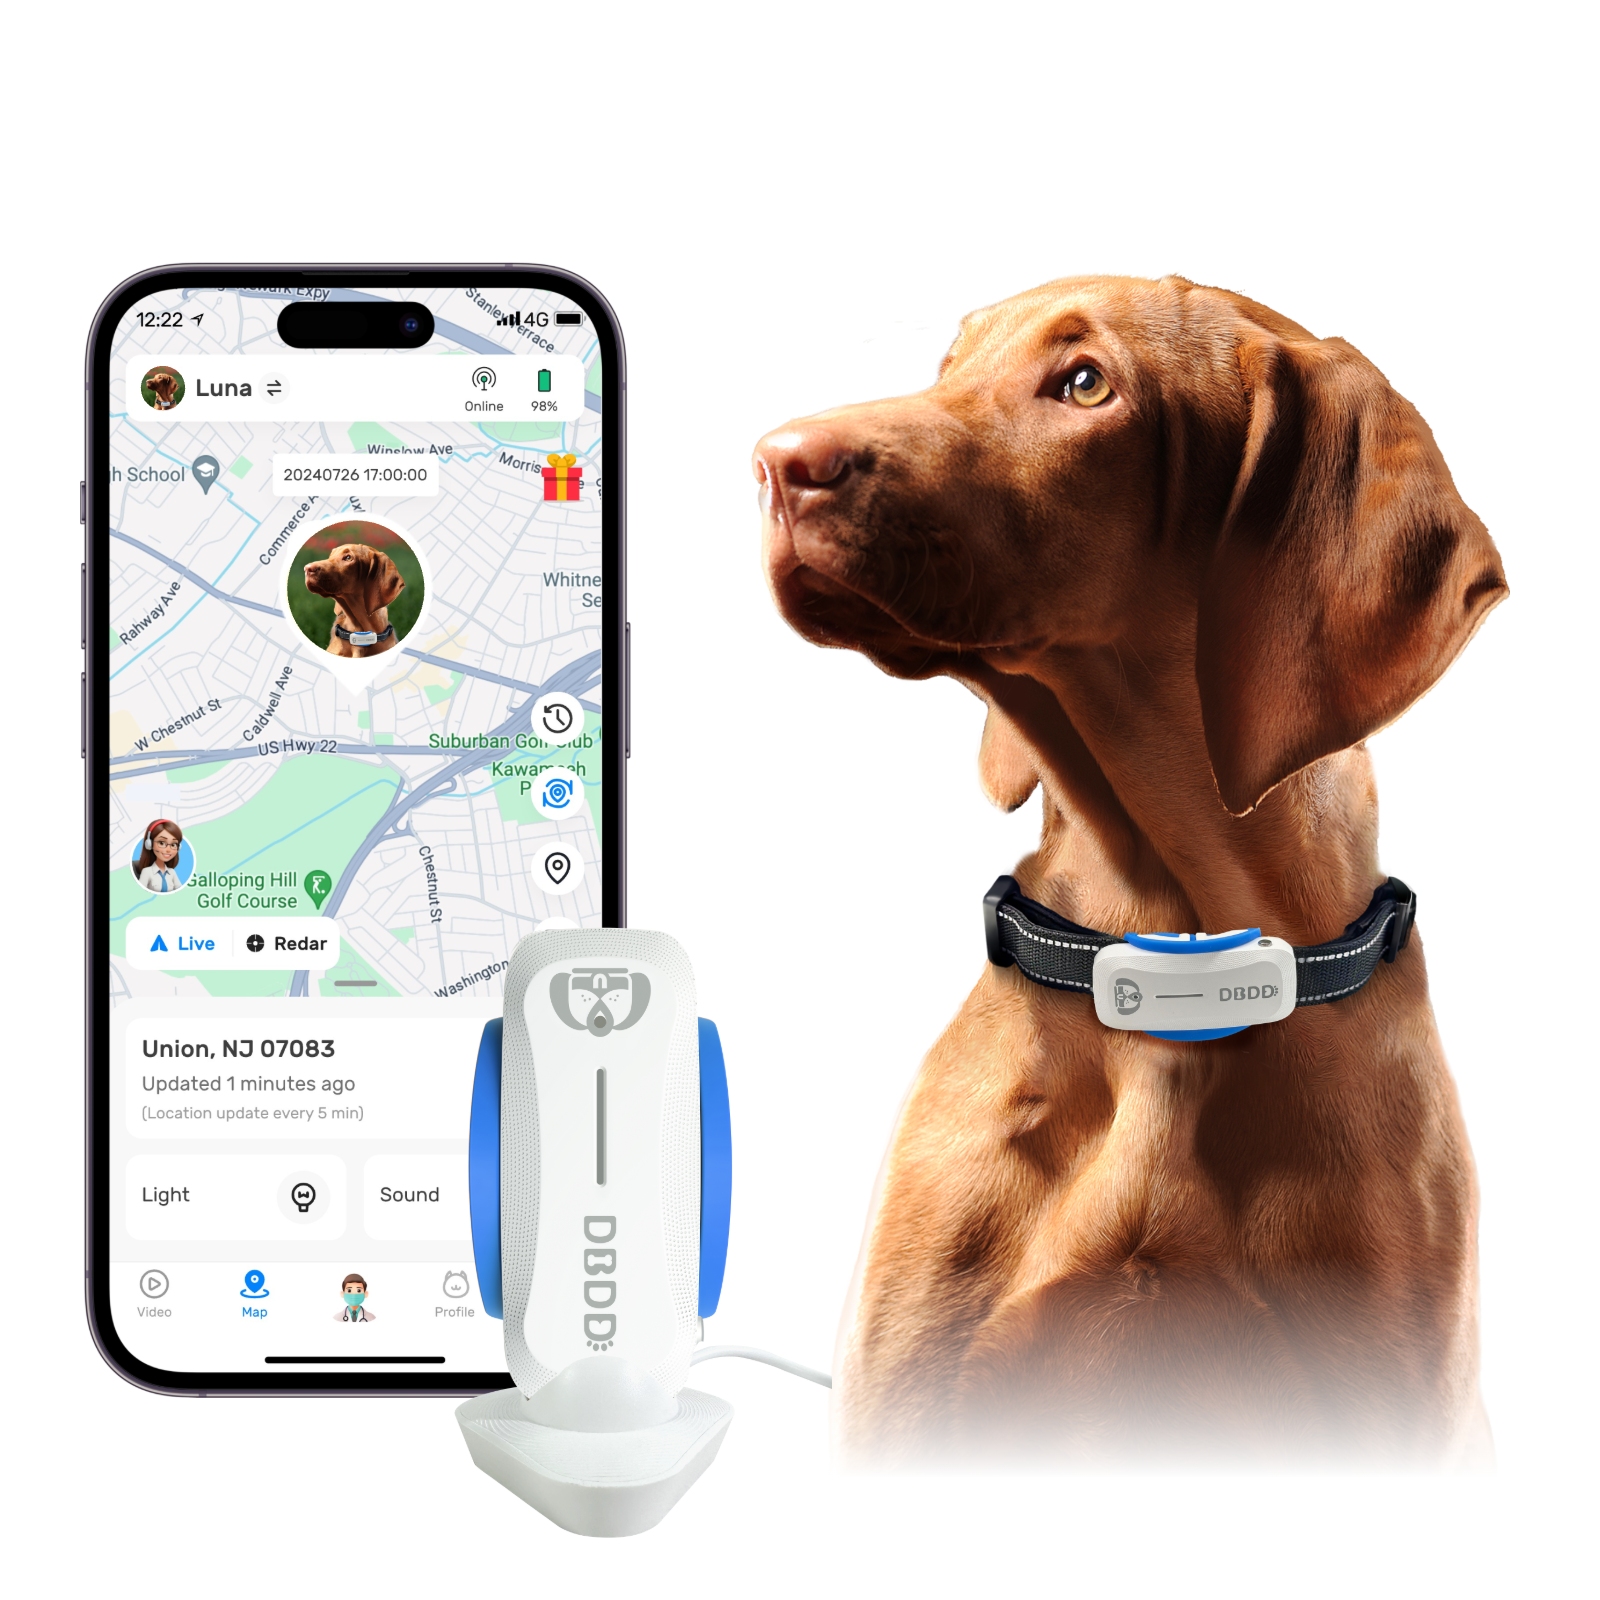
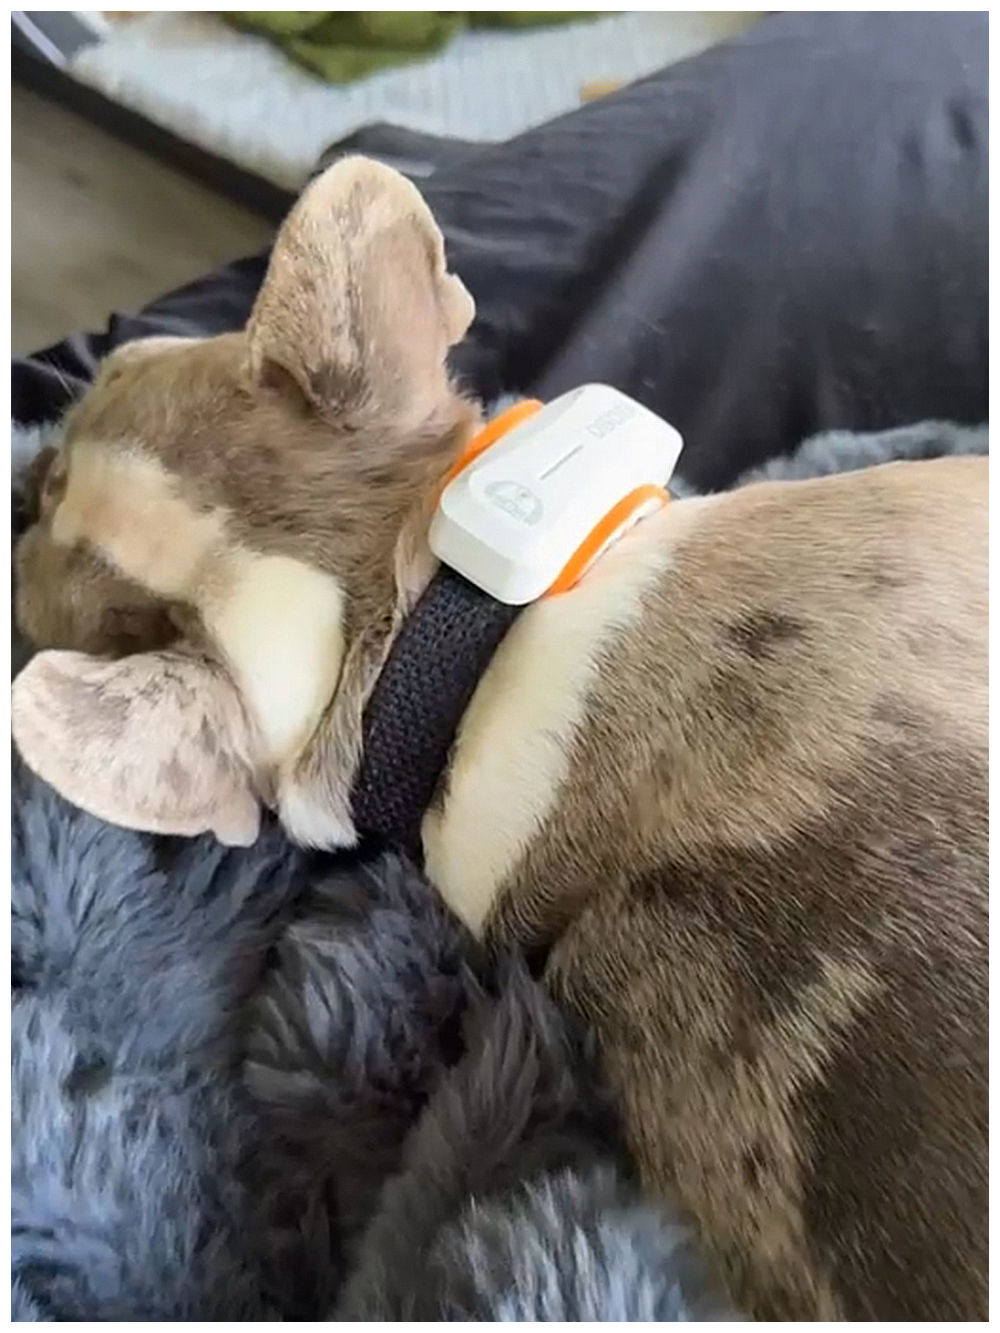
In recent years, the concept of a DIY dog tracking system has gained significant traction among pet owners. The increasing availability of affordable and advanced technology has made it possible for individuals to create their own systems at home, providing peace of mind when it comes to monitoring their pets' whereabouts. At the heart of many of these setups lies the smart collar for dogs, an innovative piece of wearable tech that combines GPS, Wi-Fi, and Bluetooth capabilities to track a dog's location in real time.
The smart collar for dogs is more than just a fashion statement or a simple identification tag. It represents a technological leap forward in pet care, offering features such as geofencing, activity monitoring, and health alerts. For those who want to take control of their pet's safety without relying on expensive commercial solutions, building a DIY dog tracking system can be both rewarding and cost-effective. This article will guide you through the process of setting up your own system using a smart collar for dogs, discussing the necessary components, software options, and tips for maximizing its effectiveness.
### Understanding the Smart Collar for Dogs
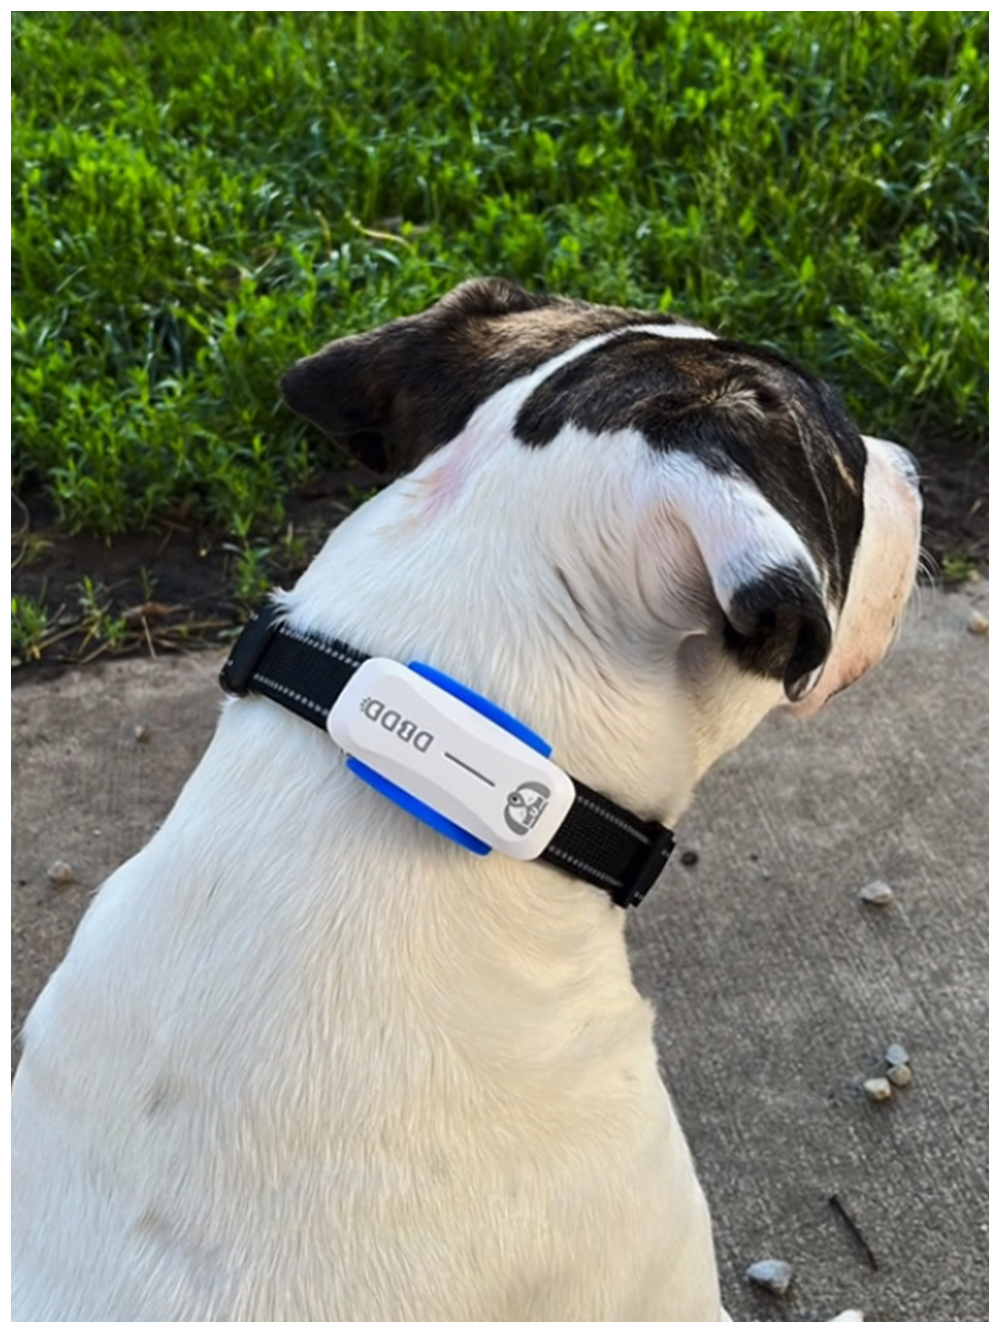
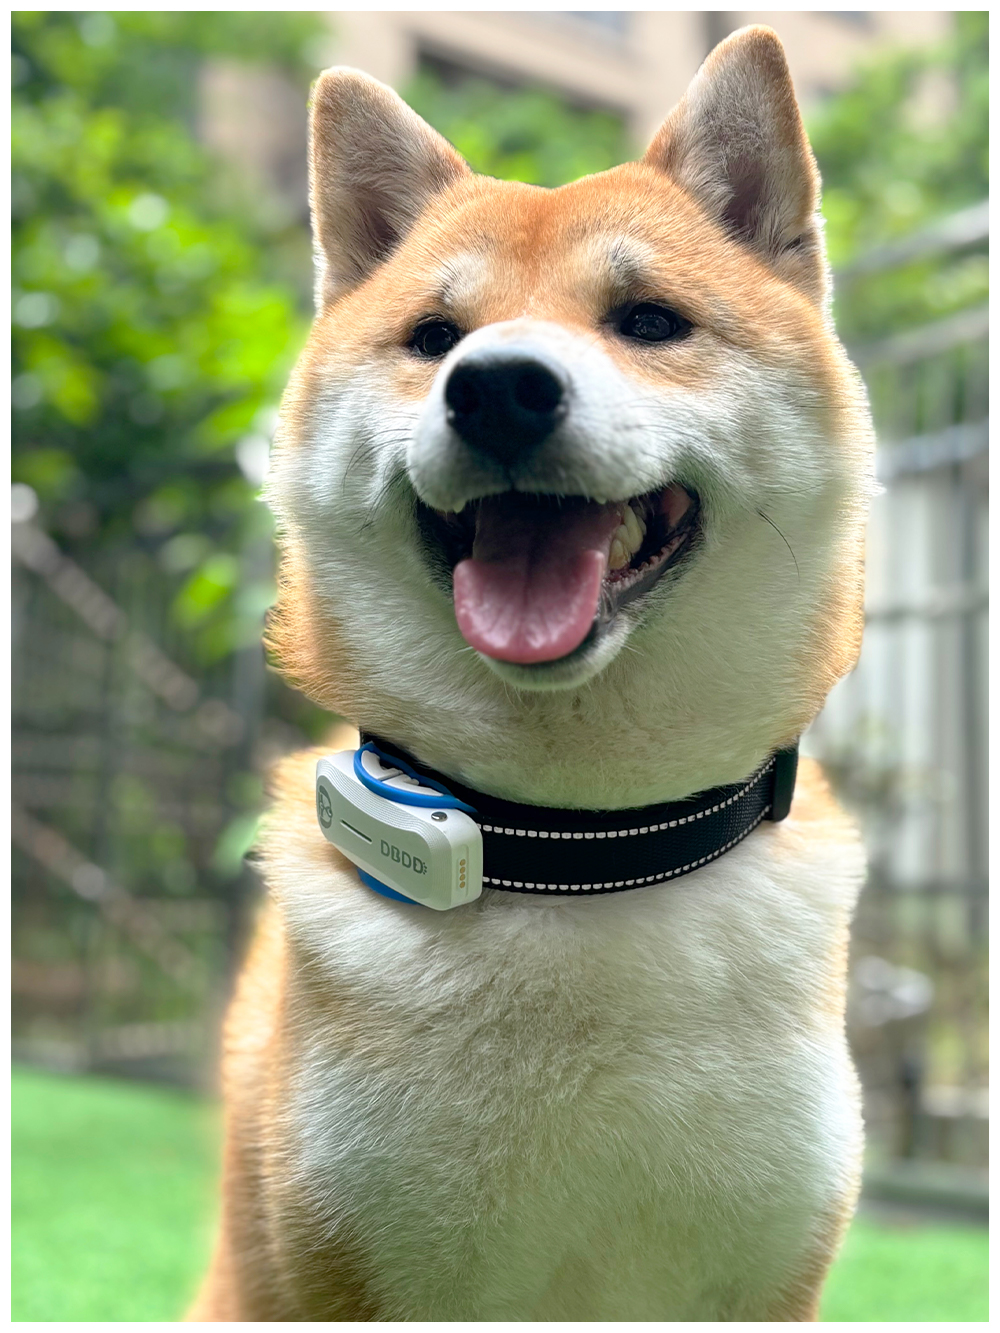
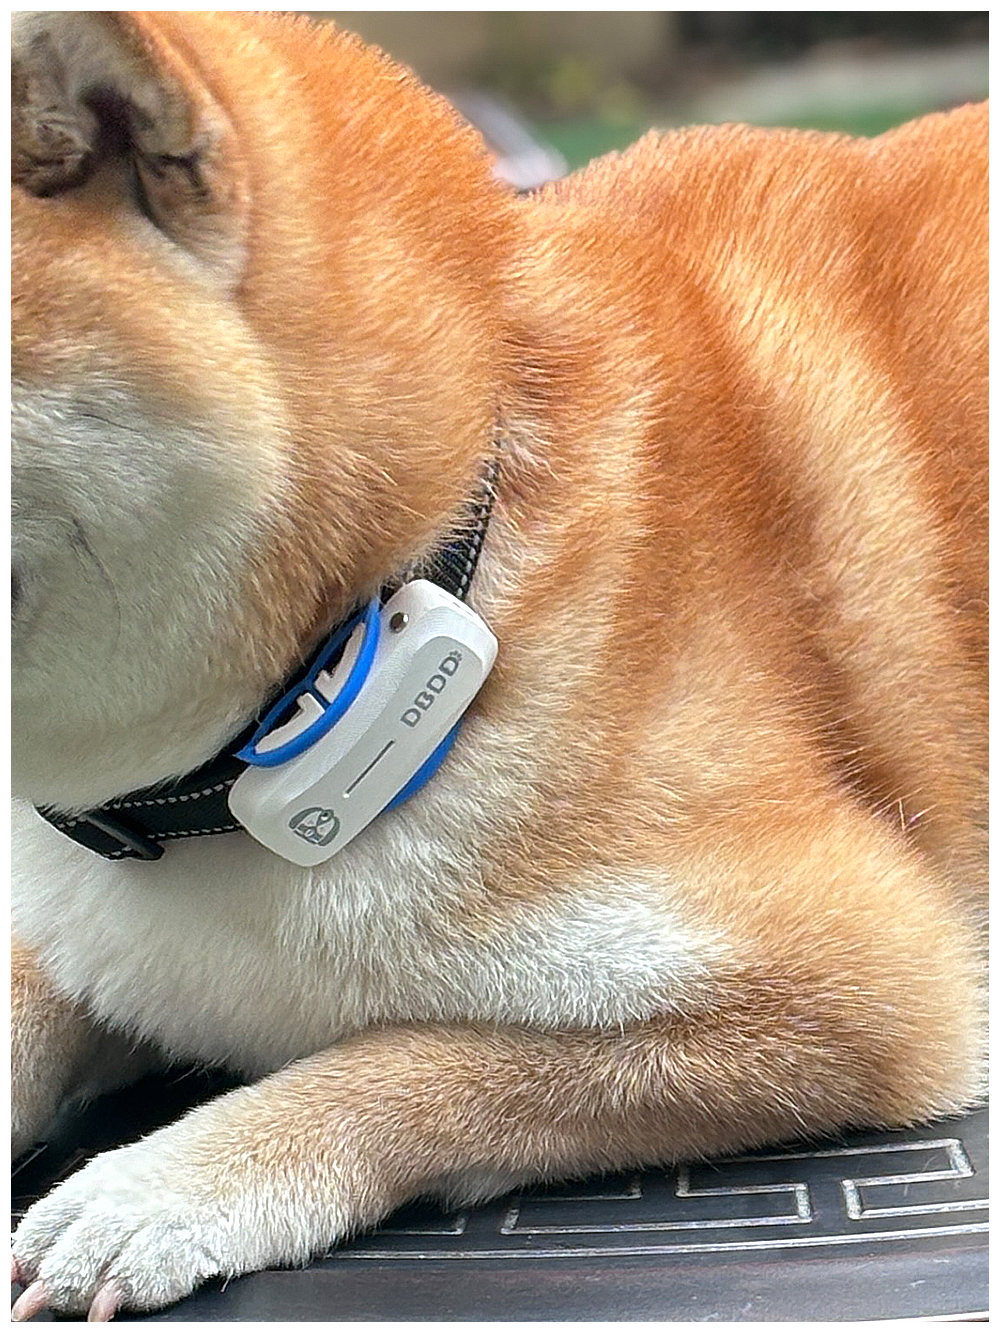
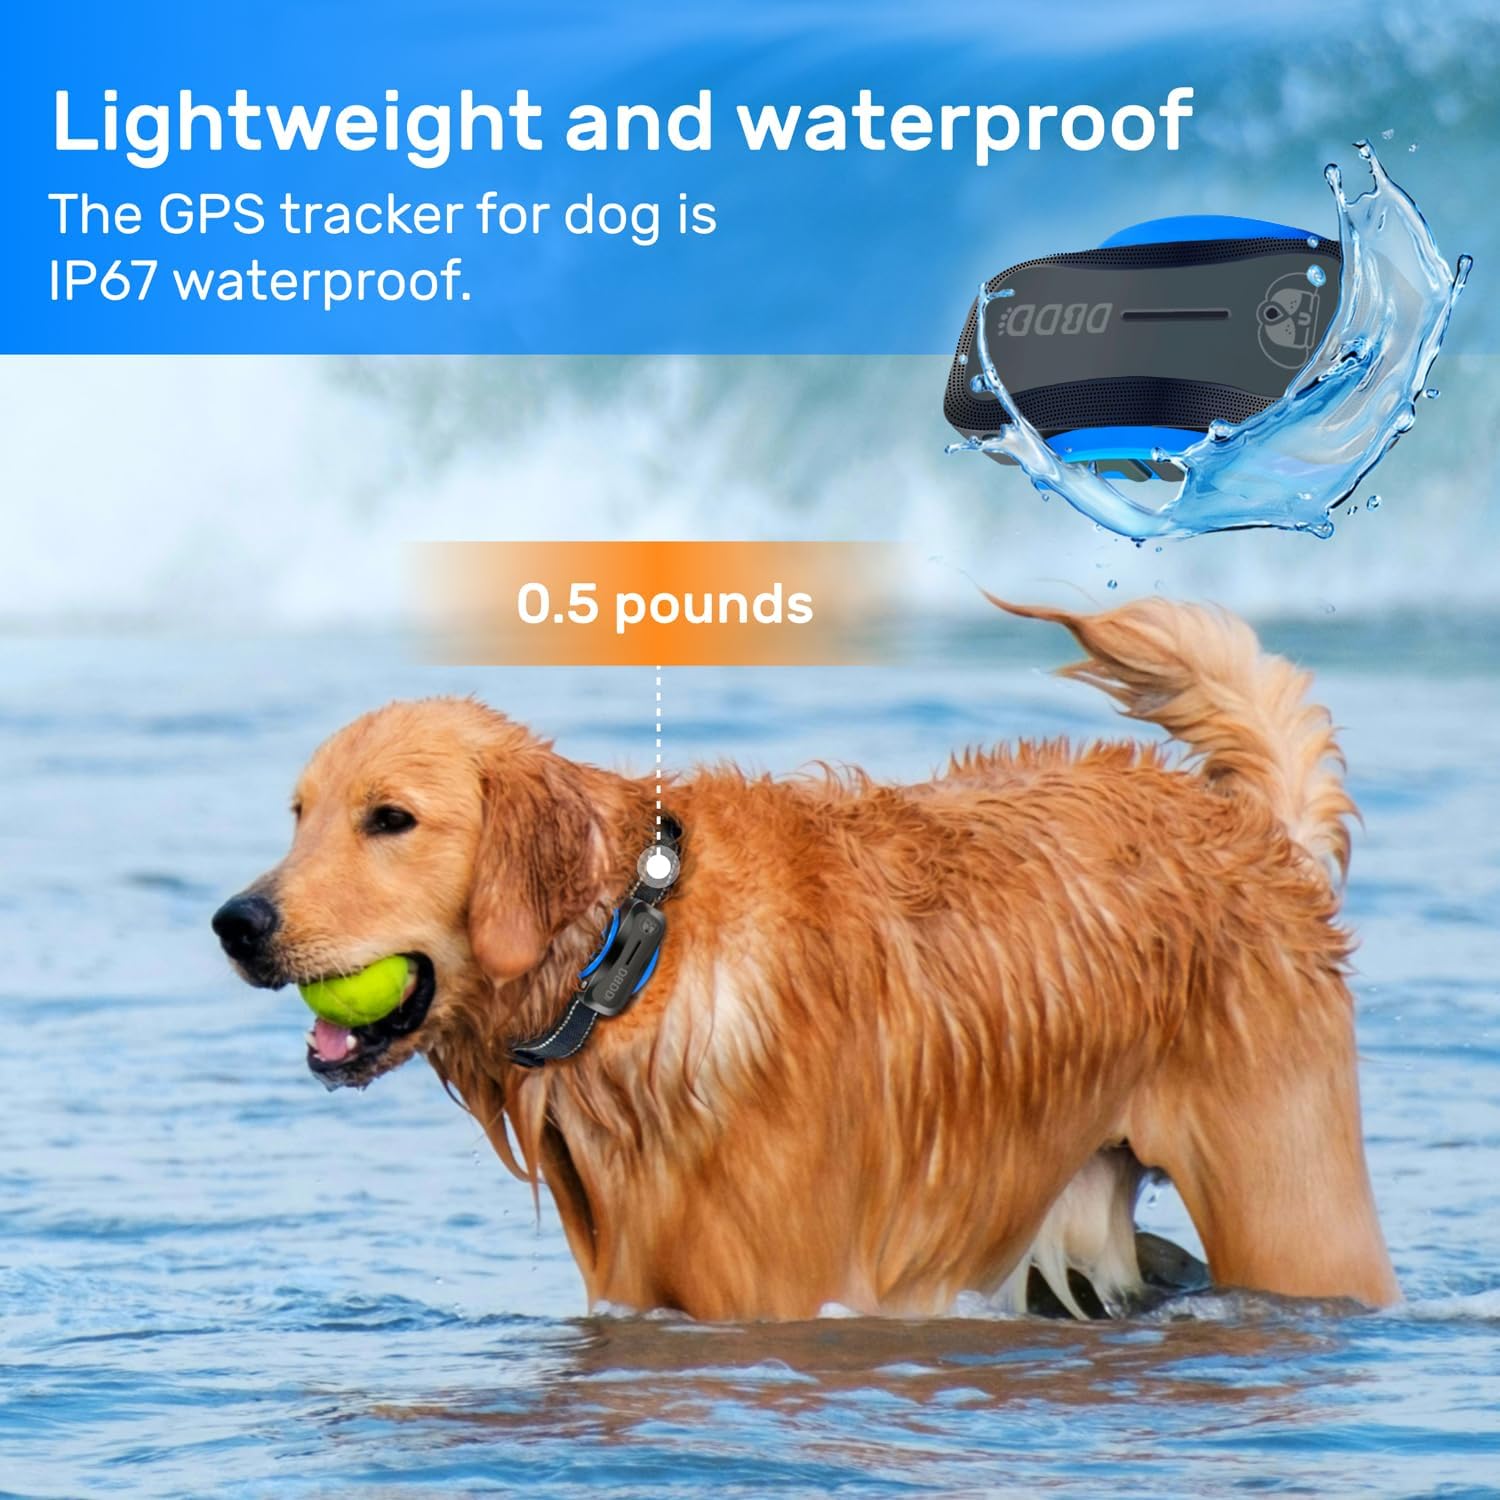
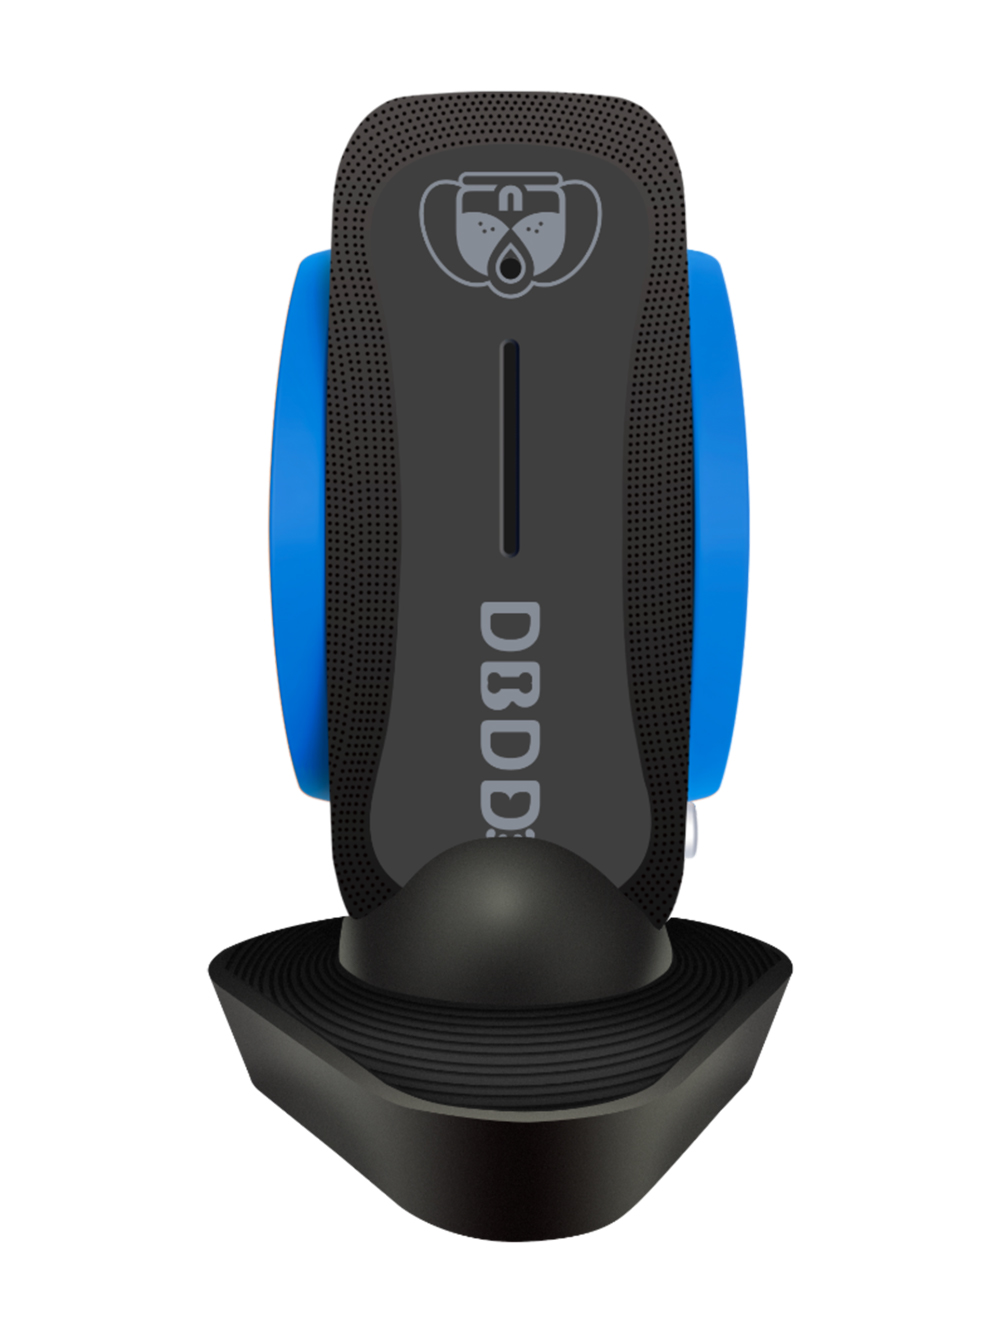
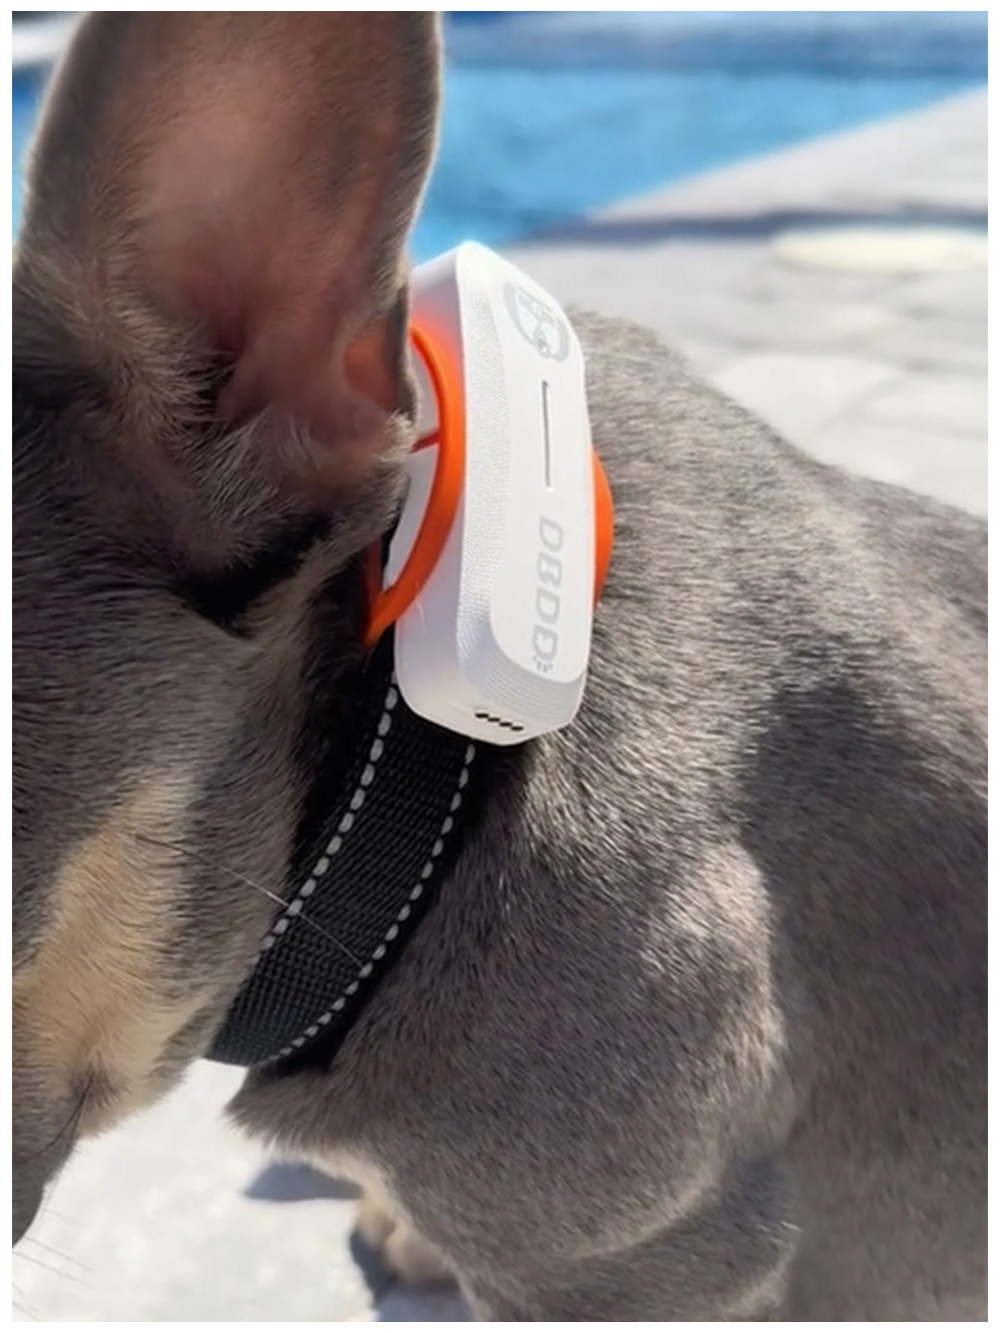
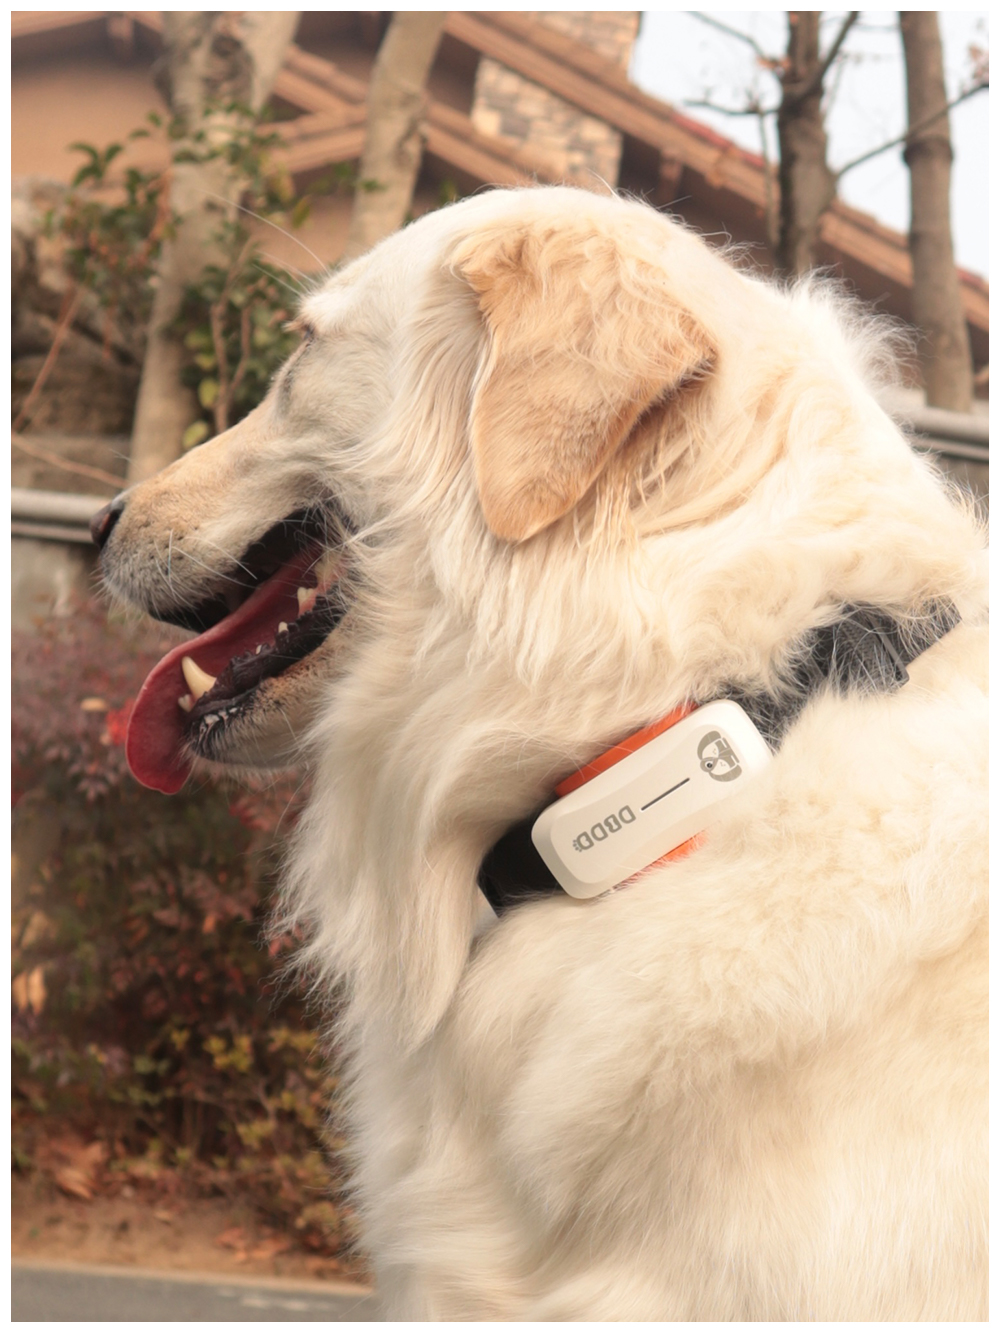
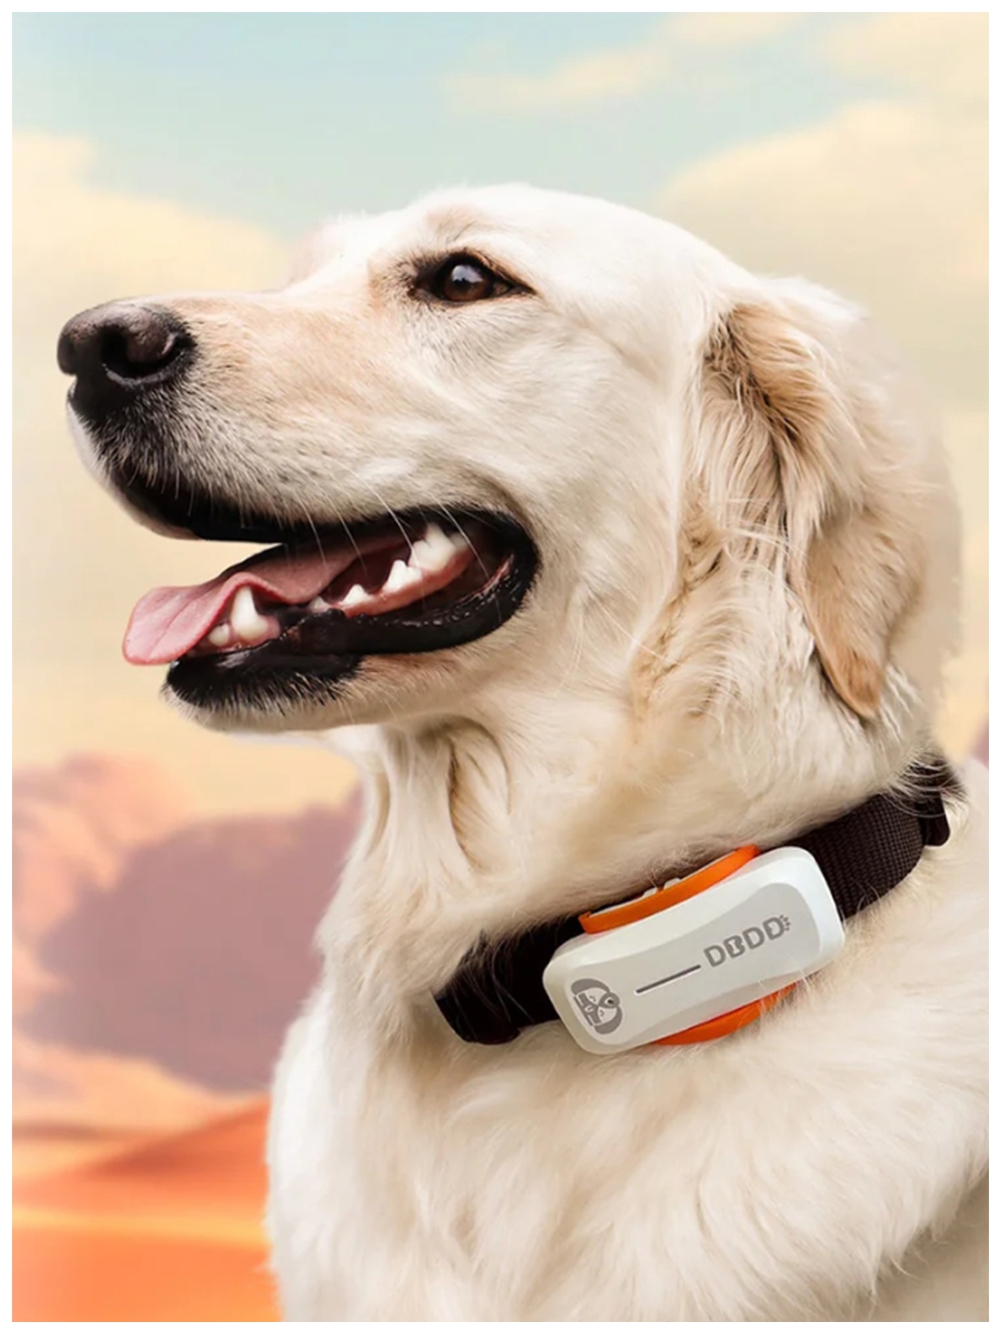
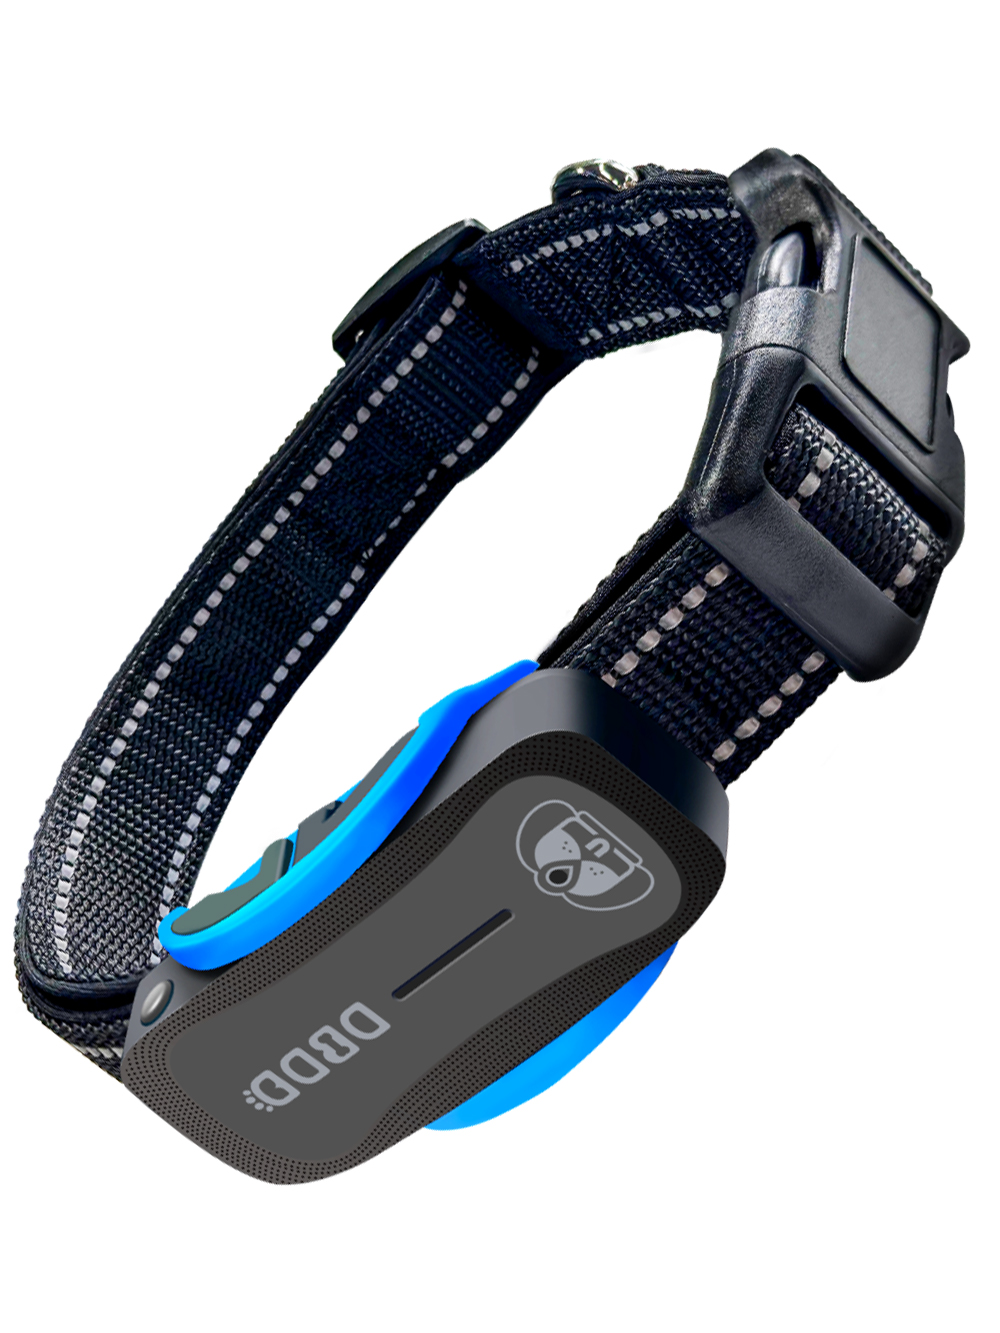
A smart collar for dogs typically consists of a lightweight, comfortable band equipped with sensors and communication modules. These collars are designed to be durable, water-resistant, and adjustable to fit various breeds and sizes. Inside the collar, there is usually a small GPS module that communicates with satellites to determine the dog's precise location. Additionally, some models include accelerometers to monitor movement patterns and even heart rate monitors to assess the dog's physical condition.
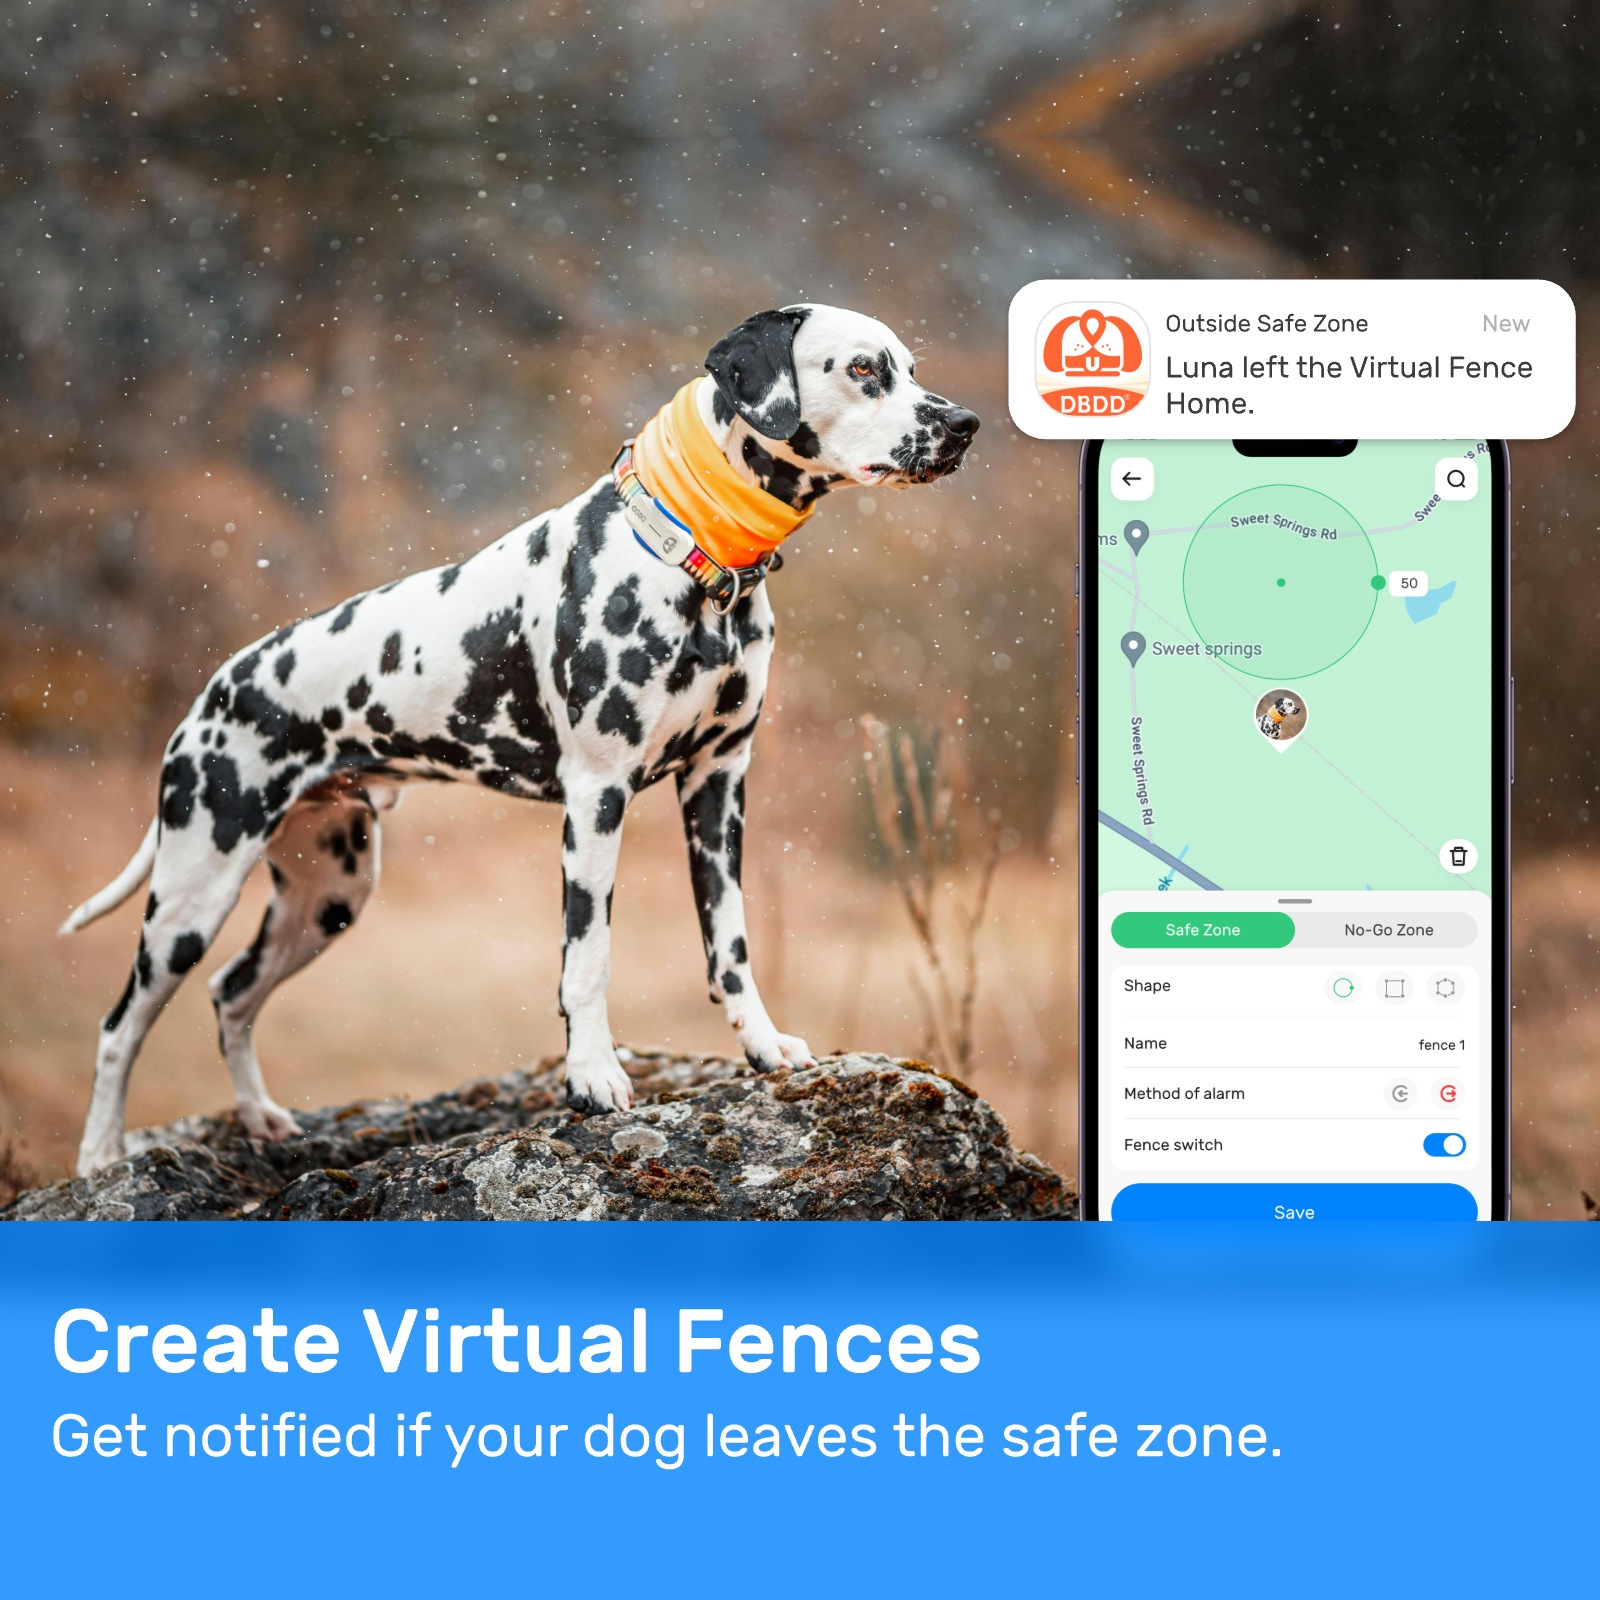
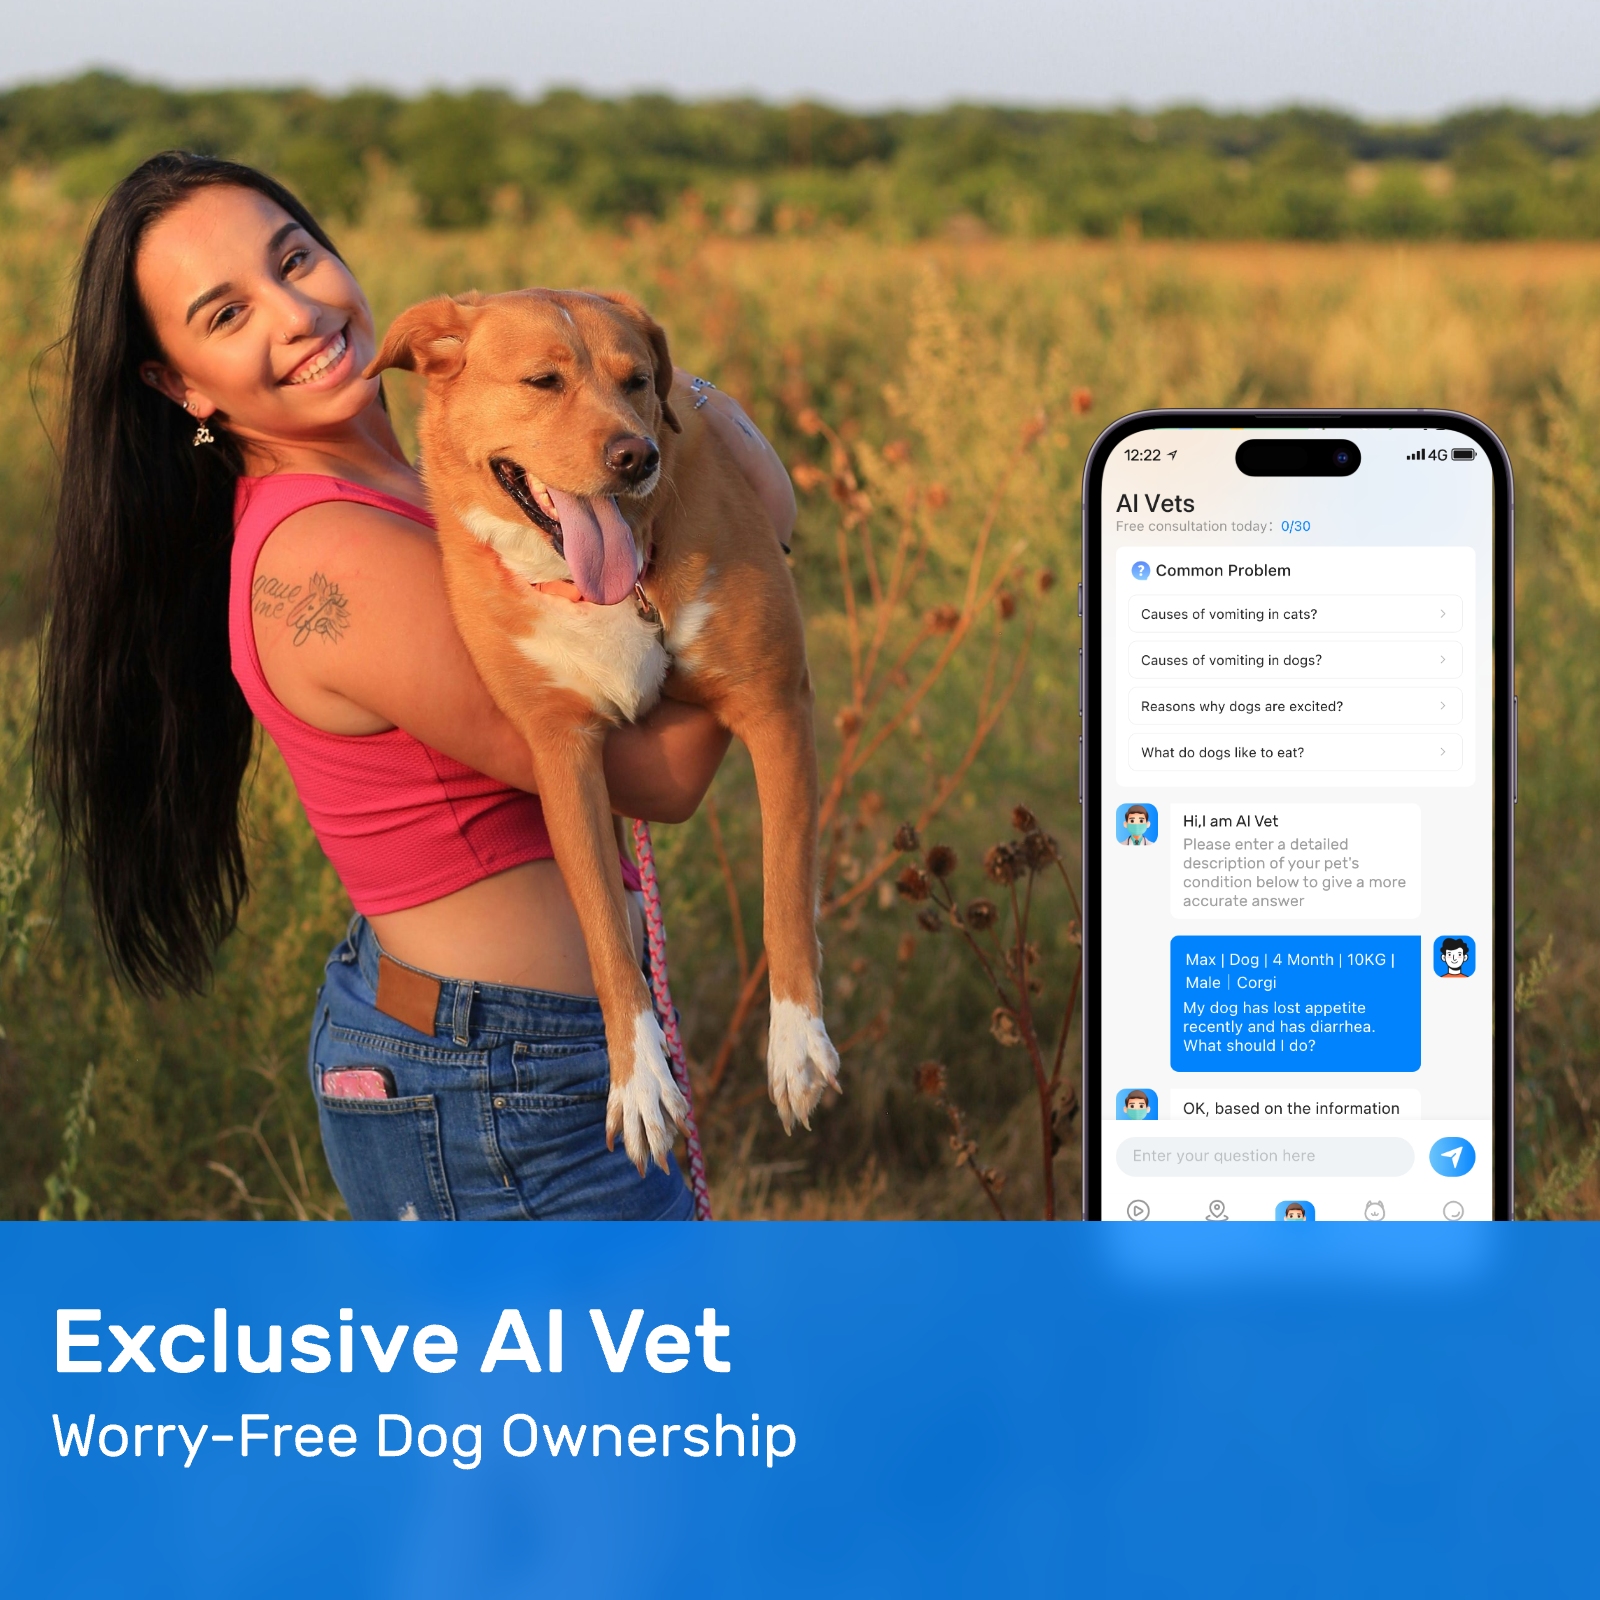
One of the key advantages of a smart collar for dogs is its ability to connect wirelessly to smartphones or computers via apps. This connection allows pet owners to view live updates about their dog's location on a map interface. Moreover, certain collars offer additional functionalities like bark detection, sleep analysis, and even virtual boundaries that notify you if your dog strays too far from home. By integrating these features into a DIY setup, you can tailor the system to meet your specific needs while ensuring your dog remains safe.
### Components Required for a DIY Dog Tracking System

To build your own dog tracking system, you'll need several essential components:
1. **Smart Collar for Dogs**: Choose a model that supports open APIs (Application Programming Interfaces) so you can integrate it with custom software. Look for collars that have long battery life, rechargeable batteries, and compatibility with multiple network protocols.
2. **GPS Module**: If your chosen smart collar doesn't already include GPS functionality, you may need to purchase a separate GPS module. Ensure it supports global satellite networks for accurate positioning anywhere in the world.
3. **Bluetooth/Wi-Fi Adapter**: Depending on how far you plan to track your dog, Bluetooth might suffice for short distances, whereas Wi-Fi could extend coverage within your home or yard.
4. **Microcontroller Board**: Devices like Arduino or Raspberry Pi serve as the brain of your system, processing data from the collar and transmitting it to your device.
5. **Power Supply**: Opt for rechargeable lithium-ion batteries to power your microcontroller and other peripherals continuously.
6. **Enclosure**: Protect all electronic components by housing them in a waterproof case attached to the collar.
7. **Software Development Tools**: Familiarize yourself with programming languages such as Python or C++ to write scripts that interact with the collar's API.
### Setting Up Your DIY Dog Tracking System
Once you've gathered all the necessary parts, follow these steps to assemble and configure your DIY dog tracking system:
#### Step 1: Assemble Hardware Components

Begin by attaching the GPS module, Bluetooth/Wi-Fi adapter, and microcontroller board to the enclosure. Make sure everything fits snugly but leaves room for airflow to prevent overheating. Connect wires between each component according to their respective pinouts, paying close attention to polarity and voltage levels.
#### Step 2: Install Firmware on Microcontroller
Download the appropriate firmware for your microcontroller and upload it using a USB cable connected to your computer. This firmware should initialize communication between the GPS module and any wireless interfaces.
#### Step 3: Configure Smart Collar for Dogs
Pair the smart collar with your microcontroller by following the manufacturer's instructions. Most collars require pairing over Bluetooth before they can communicate with external devices.
#### Step 4: Develop Custom Software
Using your preferred coding environment, develop a program that retrieves positional data from the GPS module and sends it to your smartphone or tablet. You can also incorporate logic to trigger notifications when your dog crosses predefined geofences.
#### Step 5: Test the System
Before deploying your DIY dog tracking system, conduct thorough testing under controlled conditions. Walk around with your dog while monitoring the app to ensure accurate readings and reliable connectivity. Adjust settings as needed based on performance feedback.
### Enhancing Your DIY Dog Tracking System
While basic functionality provides valuable insights into your dog's movements, enhancing your system can unlock even more possibilities:
- **Integration with Social Media**: Share updates about your dog's adventures automatically by linking your tracking app to platforms like Facebook or Instagram.
- **Environmental Sensors**: Add temperature or humidity sensors to the collar to warn you of potentially dangerous weather conditions affecting your dog.
- **Voice Commands**: Incorporate voice recognition technology to issue commands remotely, helping guide your dog back home if lost.
- **Automated Feeding Systems**: Synchronize feeding schedules with your tracking data to optimize meal times based on activity levels.
### Benefits of Using a Smart Collar for Dogs in a DIY Setup
Implementing a smart collar for dogs in your DIY tracking system offers numerous benefits beyond mere location tracking:
- **Improved Safety**: Knowing exactly where your dog is at all times reduces anxiety and increases response time during emergencies.
- **Health Monitoring**: Continuous activity tracking helps identify changes in behavior that might indicate underlying health issues.
- **Cost Savings**: Building your own system eliminates recurring subscription fees associated with commercial products.
- **Personalization**: Tailor every aspect of the system to suit your lifestyle and preferences, creating a truly unique solution.
### Challenges and Considerations
Despite its advantages, constructing a DIY dog tracking system does come with challenges:
- **Technical Knowledge**: Successfully assembling and programming such a system requires familiarity with electronics and software development.
- **Battery Life**: Balancing power consumption against desired features can be tricky, especially if adding extra sensors.
- **Signal Interference**: Urban environments or heavily wooded areas may disrupt GPS signals, leading to inaccurate readings.
- **Privacy Concerns**: Be mindful of privacy implications when sharing location data publicly or storing sensitive information locally.
### Conclusion
Creating a DIY dog tracking system centered around a smart collar for dogs empowers pet owners to safeguard their furry friends autonomously. By leveraging readily available technologies and applying creativity, anyone can craft a personalized solution that enhances both convenience and security. While initial setup demands effort and expertise, the resulting peace of mind makes it well worth the investment. Whether you're protecting your beloved companion from wandering off or simply gaining deeper insight into their daily routines, incorporating a smart collar for dogs into your life promises countless rewards.
Update Time:2025-05-15 19:30:53
The smart collar for dogs is more than just a fashion statement or a simple identification tag. It represents a technological leap forward in pet care, offering features such as geofencing, activity monitoring, and health alerts. For those who want to take control of their pet's safety without relying on expensive commercial solutions, building a DIY dog tracking system can be both rewarding and cost-effective. This article will guide you through the process of setting up your own system using a smart collar for dogs, discussing the necessary components, software options, and tips for maximizing its effectiveness.
### Understanding the Smart Collar for Dogs
A smart collar for dogs typically consists of a lightweight, comfortable band equipped with sensors and communication modules. These collars are designed to be durable, water-resistant, and adjustable to fit various breeds and sizes. Inside the collar, there is usually a small GPS module that communicates with satellites to determine the dog's precise location. Additionally, some models include accelerometers to monitor movement patterns and even heart rate monitors to assess the dog's physical condition.
One of the key advantages of a smart collar for dogs is its ability to connect wirelessly to smartphones or computers via apps. This connection allows pet owners to view live updates about their dog's location on a map interface. Moreover, certain collars offer additional functionalities like bark detection, sleep analysis, and even virtual boundaries that notify you if your dog strays too far from home. By integrating these features into a DIY setup, you can tailor the system to meet your specific needs while ensuring your dog remains safe.
### Components Required for a DIY Dog Tracking System
To build your own dog tracking system, you'll need several essential components:
1. **Smart Collar for Dogs**: Choose a model that supports open APIs (Application Programming Interfaces) so you can integrate it with custom software. Look for collars that have long battery life, rechargeable batteries, and compatibility with multiple network protocols.
2. **GPS Module**: If your chosen smart collar doesn't already include GPS functionality, you may need to purchase a separate GPS module. Ensure it supports global satellite networks for accurate positioning anywhere in the world.
3. **Bluetooth/Wi-Fi Adapter**: Depending on how far you plan to track your dog, Bluetooth might suffice for short distances, whereas Wi-Fi could extend coverage within your home or yard.
4. **Microcontroller Board**: Devices like Arduino or Raspberry Pi serve as the brain of your system, processing data from the collar and transmitting it to your device.
5. **Power Supply**: Opt for rechargeable lithium-ion batteries to power your microcontroller and other peripherals continuously.
6. **Enclosure**: Protect all electronic components by housing them in a waterproof case attached to the collar.
7. **Software Development Tools**: Familiarize yourself with programming languages such as Python or C++ to write scripts that interact with the collar's API.
### Setting Up Your DIY Dog Tracking System
Once you've gathered all the necessary parts, follow these steps to assemble and configure your DIY dog tracking system:
#### Step 1: Assemble Hardware Components
Begin by attaching the GPS module, Bluetooth/Wi-Fi adapter, and microcontroller board to the enclosure. Make sure everything fits snugly but leaves room for airflow to prevent overheating. Connect wires between each component according to their respective pinouts, paying close attention to polarity and voltage levels.
#### Step 2: Install Firmware on Microcontroller
Download the appropriate firmware for your microcontroller and upload it using a USB cable connected to your computer. This firmware should initialize communication between the GPS module and any wireless interfaces.
#### Step 3: Configure Smart Collar for Dogs
Pair the smart collar with your microcontroller by following the manufacturer's instructions. Most collars require pairing over Bluetooth before they can communicate with external devices.
#### Step 4: Develop Custom Software
Using your preferred coding environment, develop a program that retrieves positional data from the GPS module and sends it to your smartphone or tablet. You can also incorporate logic to trigger notifications when your dog crosses predefined geofences.
#### Step 5: Test the System
Before deploying your DIY dog tracking system, conduct thorough testing under controlled conditions. Walk around with your dog while monitoring the app to ensure accurate readings and reliable connectivity. Adjust settings as needed based on performance feedback.
### Enhancing Your DIY Dog Tracking System
While basic functionality provides valuable insights into your dog's movements, enhancing your system can unlock even more possibilities:
- **Integration with Social Media**: Share updates about your dog's adventures automatically by linking your tracking app to platforms like Facebook or Instagram.
- **Environmental Sensors**: Add temperature or humidity sensors to the collar to warn you of potentially dangerous weather conditions affecting your dog.
- **Voice Commands**: Incorporate voice recognition technology to issue commands remotely, helping guide your dog back home if lost.
- **Automated Feeding Systems**: Synchronize feeding schedules with your tracking data to optimize meal times based on activity levels.
### Benefits of Using a Smart Collar for Dogs in a DIY Setup
Implementing a smart collar for dogs in your DIY tracking system offers numerous benefits beyond mere location tracking:
- **Improved Safety**: Knowing exactly where your dog is at all times reduces anxiety and increases response time during emergencies.
- **Health Monitoring**: Continuous activity tracking helps identify changes in behavior that might indicate underlying health issues.
- **Cost Savings**: Building your own system eliminates recurring subscription fees associated with commercial products.
- **Personalization**: Tailor every aspect of the system to suit your lifestyle and preferences, creating a truly unique solution.
### Challenges and Considerations
Despite its advantages, constructing a DIY dog tracking system does come with challenges:
- **Technical Knowledge**: Successfully assembling and programming such a system requires familiarity with electronics and software development.
- **Battery Life**: Balancing power consumption against desired features can be tricky, especially if adding extra sensors.
- **Signal Interference**: Urban environments or heavily wooded areas may disrupt GPS signals, leading to inaccurate readings.
- **Privacy Concerns**: Be mindful of privacy implications when sharing location data publicly or storing sensitive information locally.
### Conclusion
Creating a DIY dog tracking system centered around a smart collar for dogs empowers pet owners to safeguard their furry friends autonomously. By leveraging readily available technologies and applying creativity, anyone can craft a personalized solution that enhances both convenience and security. While initial setup demands effort and expertise, the resulting peace of mind makes it well worth the investment. Whether you're protecting your beloved companion from wandering off or simply gaining deeper insight into their daily routines, incorporating a smart collar for dogs into your life promises countless rewards.
Update Time:2025-05-15 19:30:53
Correction of product information
If you notice any omissions or errors in the product information on this page, please use the correction request form below.
Correction Request Form


